
Building a Multiplayer Mission in Eden Editor
Introduction:
This document will be used to help consolidate, organize, and orient people on the step by step process of how to create missions. We will be operating in Eden Editor 95% of the time, with some Zeus demonstrations here and there to show some similarities. If you know how to use Zeus, Eden will come naturally.
Essential Eden Mods and Compositions:
- Advanced Developer Tools
- Disable 3den Mission Preview Shortcut
- 3den Enhanced
- CLV Trigger Debugger
- 17th Starter Kit 2/25 Composition
The 17th Starter Kit Composition does not need to be manually mounted in the mod launcher because it is a composition.
External Tools (Server Upload and File Exporting):
- WinSCP: Used for connecting to the server and uploading files
- PBO Manager: Used for exporting your mission file as a pbo to upload to the server. If not comfortable to download, I teach a separate export technique in the Session 0 workshop video below.
- Mission Guts: Download mission-maker-template under the downloads section.
Section 0 - Mission Creation and Upload Process:
In this video, you will learn:
- How to create a reduced modlist for mission making
- How to create and save a mission file in Eden Editor
- What are some recommended settings to have
- How to use the 17th Starter Kit Composition
- How to insert and use the 17th Mission Guts
- How to package the mission file as a PBO using both PBO Manager and ARMA 3's inbuilt PBO export tool
- How to upload the mission file to the server using WinSCP
- How to switch to mission file on the server for multiplayer play
Section 1 - LAMBS Modules
In this video, you will learn:
- Additional Eden preference settings (e.g. tracking FPS and garrison positions)
- Considerations when choosing a faction and their loadouts
- What are the different AI Settings to be commonly aware of
- How waypoints work for the AI
- What the different LAMBS modules do
- Task Patrol, Task Garrison, Task Camp, Task Defend, Task Hunt, Task Creep, Task CQB, Task Rush
- How to incorporate triggers to activate the LAMBS modules
Supplementary Information
- List of Waypoint Types in ARMA 3: documentation on their purpose and usage
- Event Handlers: used to understand different exit triggers, such as Task Garrison's Hit, Fired Near, Suppressed, etc.
- Artillery LAMBS Tutorial: one of the developers shows back-end demonstration of its functionality and usage
Section 2 - Intro to Triggers, NR6, and HBQ:
In this video, you will learn:
- What are Triggers and how to use them
- How to use NR6 and the NR6 Site module
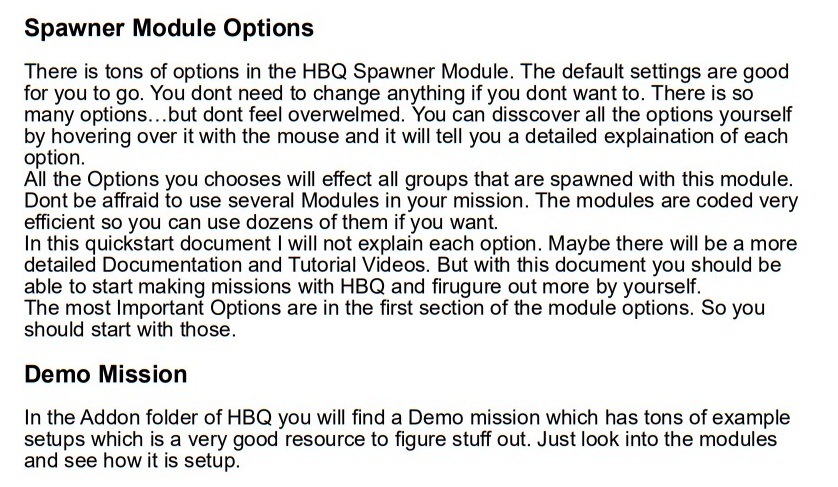
- What is HBQ with a brief showcase of the HBQ Demo File made by the HBQ developers
- What are some of the basic settings they offer in the HBQ spawner module and what they affect
NR6 is a powerful tool. However, it has a lot of mechanics that I am not comfortable to teach in a timely manner. Its mechanics are complex and deeply embedded, and they are not beginner friendly. For this manual, we will only focus on NR6 Sites and NR6 Caching.
Accessing the HBQ Demo File
If you want to access the HBQ Demo File for yourself, here are the steps:
- Verify you have HBQ downloaded from the Steam Workshop
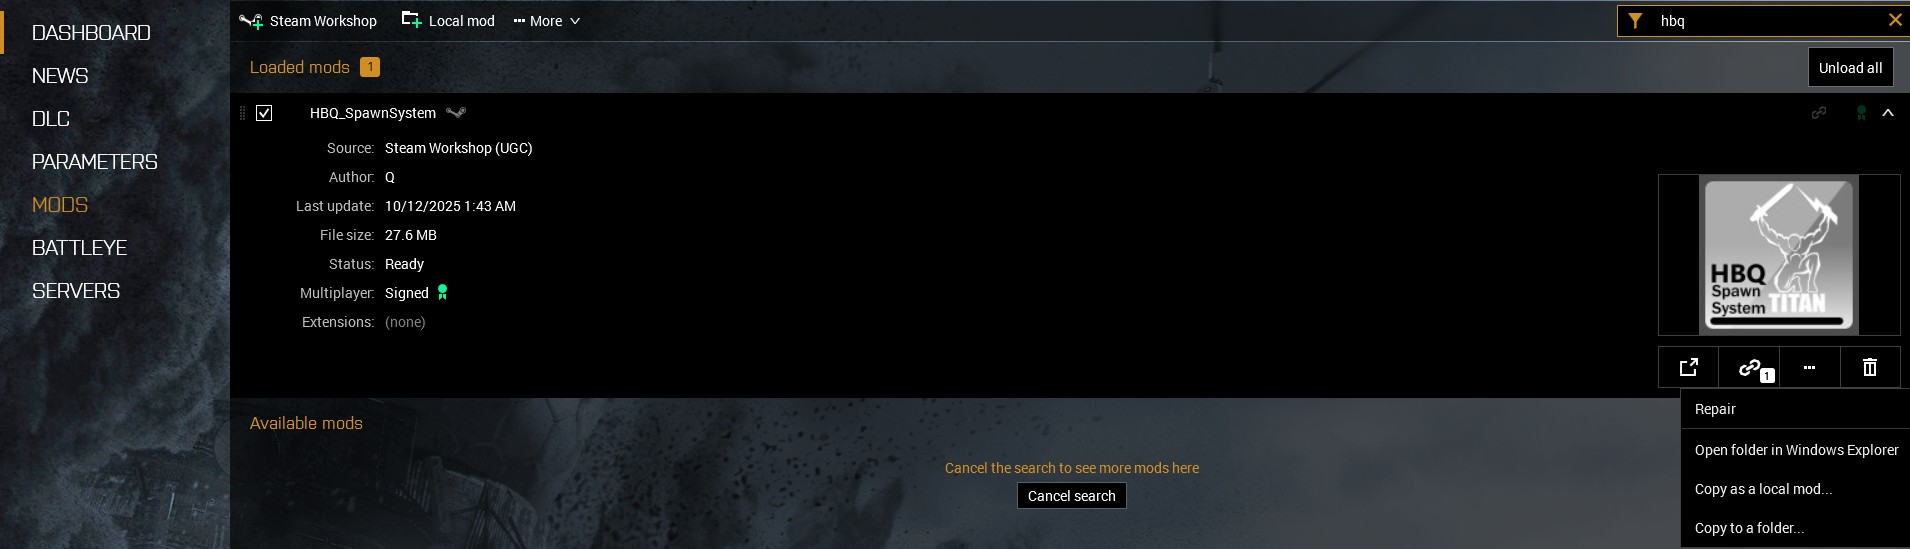
- Launch ARMA 3 and go to the Mods section
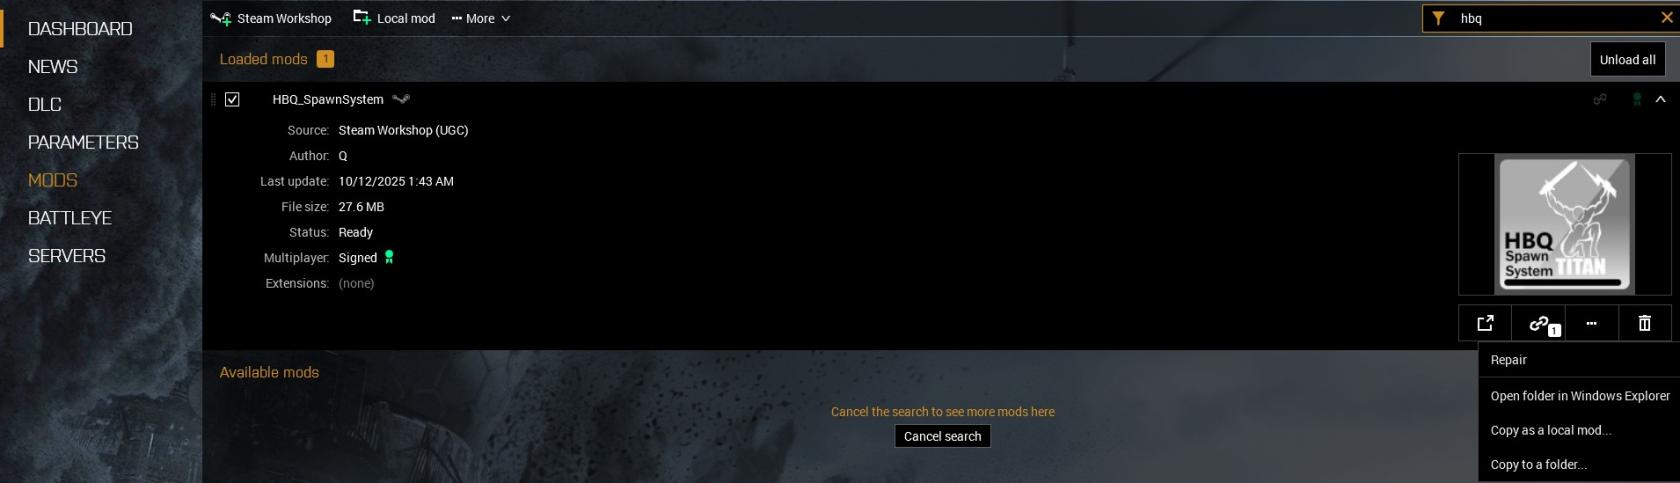
- Locate HBQ_SpawnSystem, select the "..." option, and then select "Open folder in Windows Explorer" (you may be prompted with a warning, click "I understand").
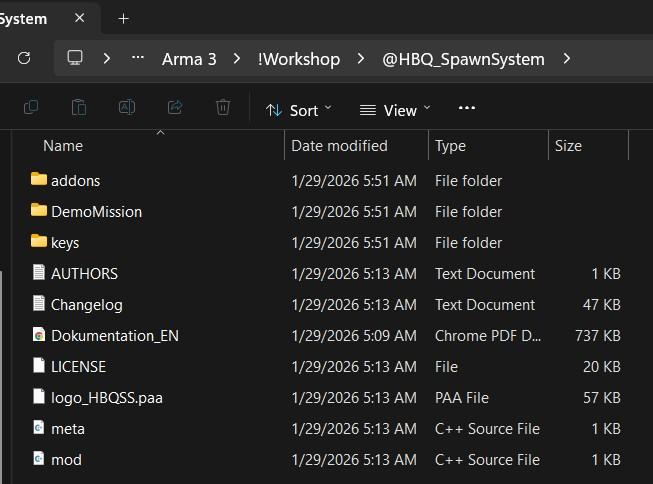
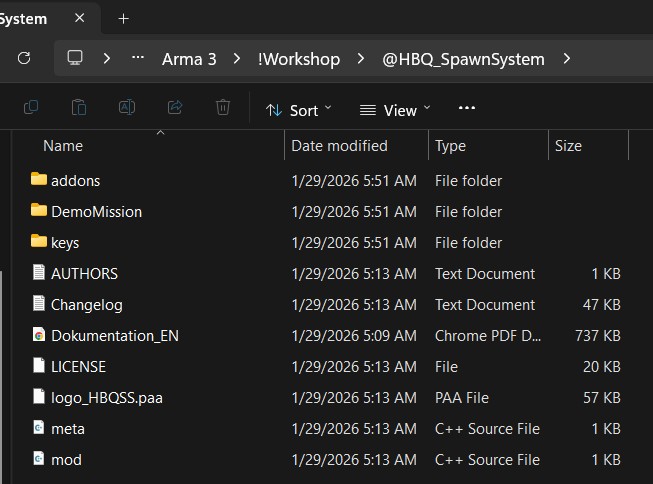
- Enter the folder @HBQ_SpawnSystem, then enter the folder DemoMission
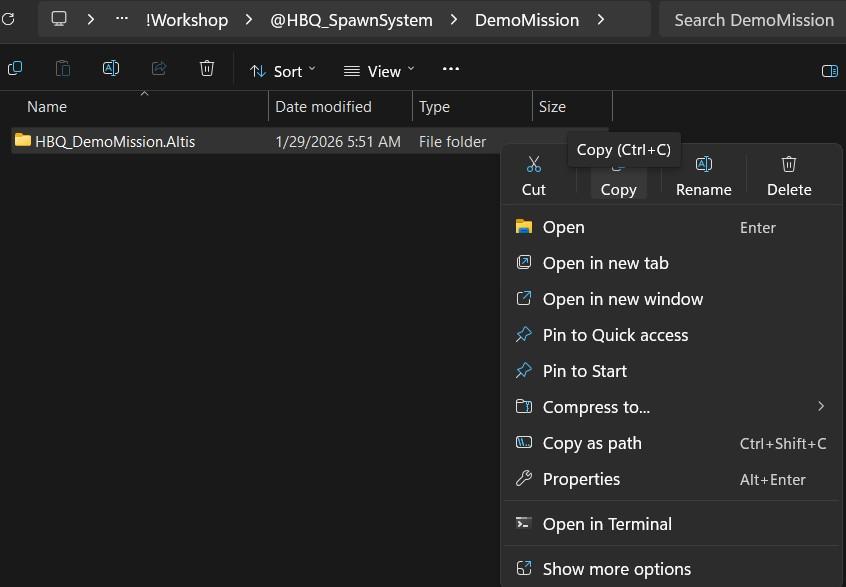
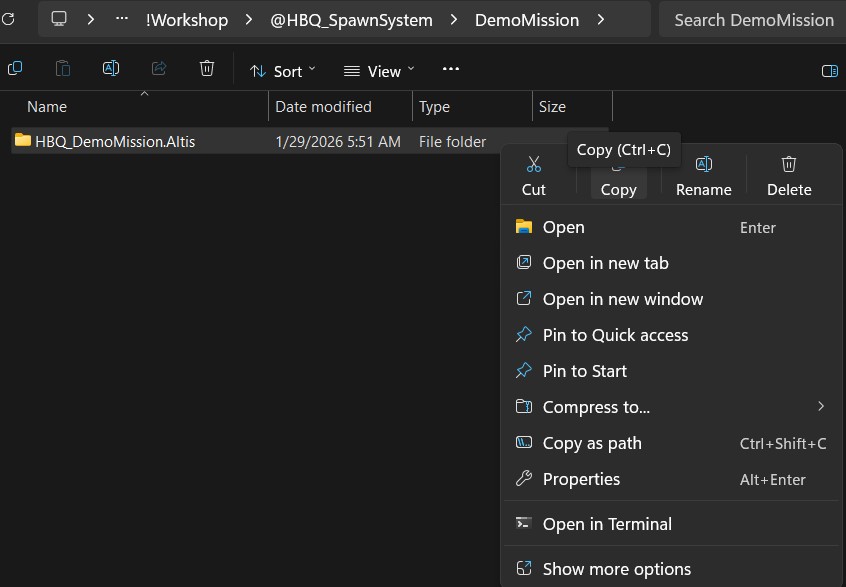
- Copy the HBQ_DemoMission.Altis folder
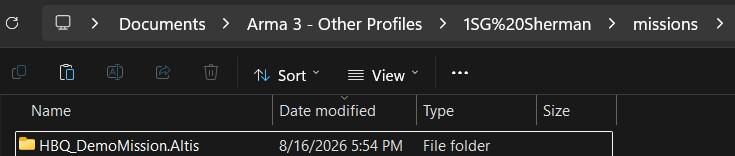
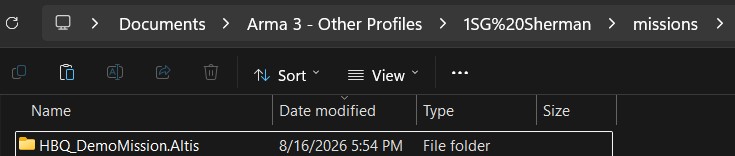
- Go to your Documents -> Arma 3 - Other Profiles -> "Your Arma 3 Profile" -> missions, then paste the folder into the missions folder
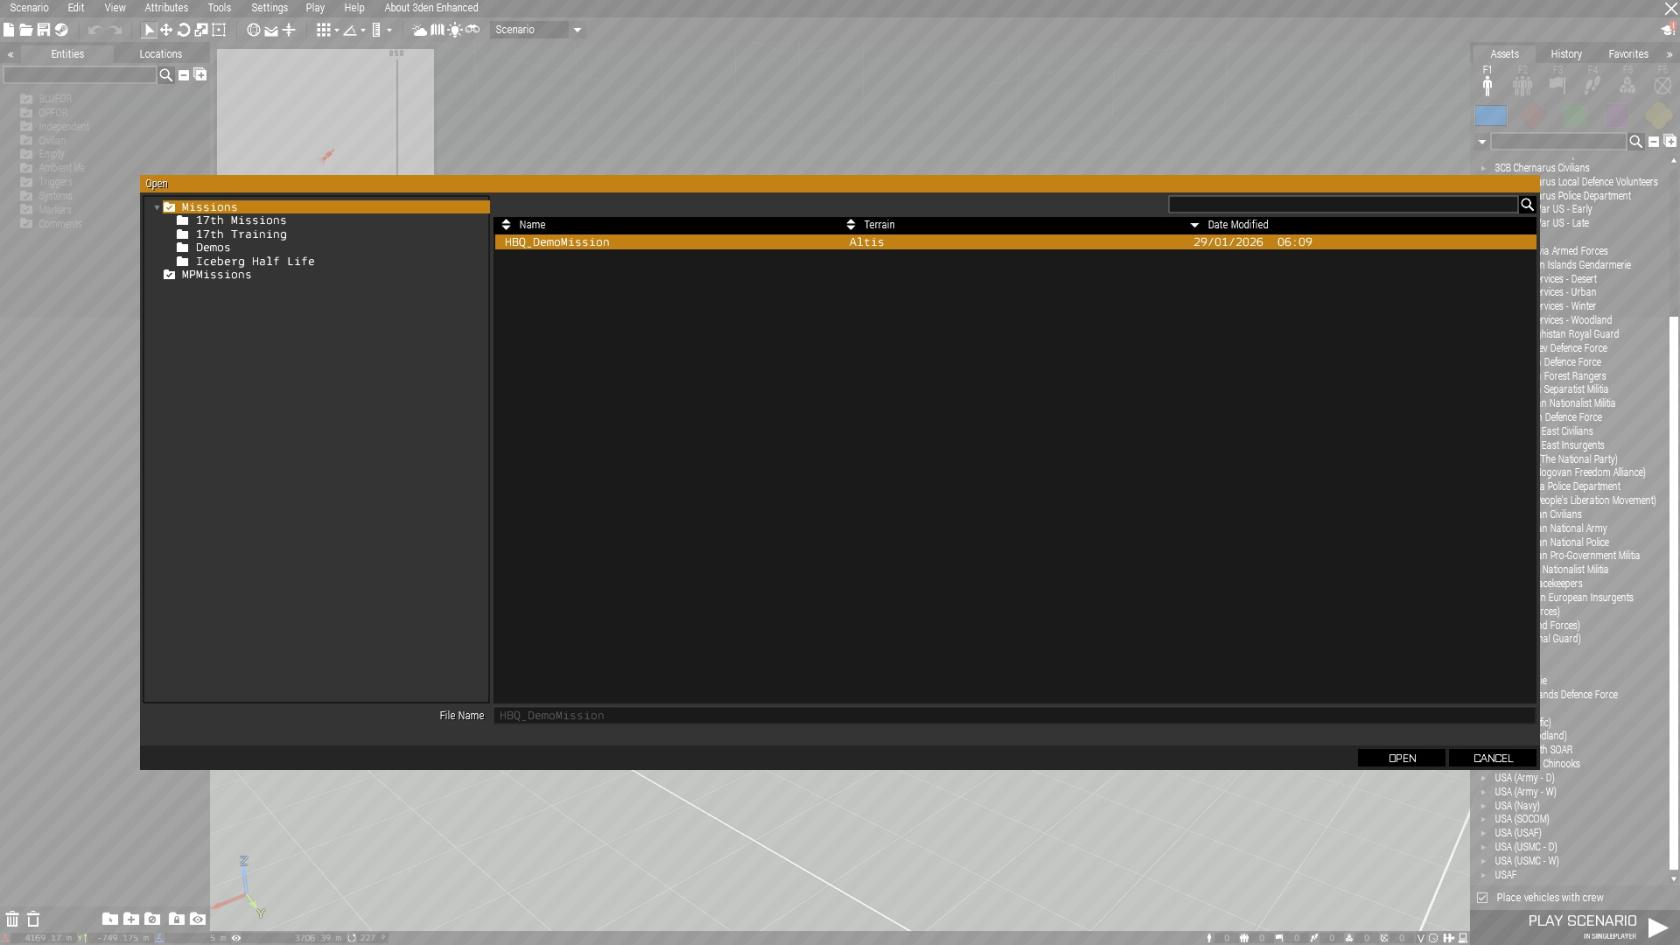
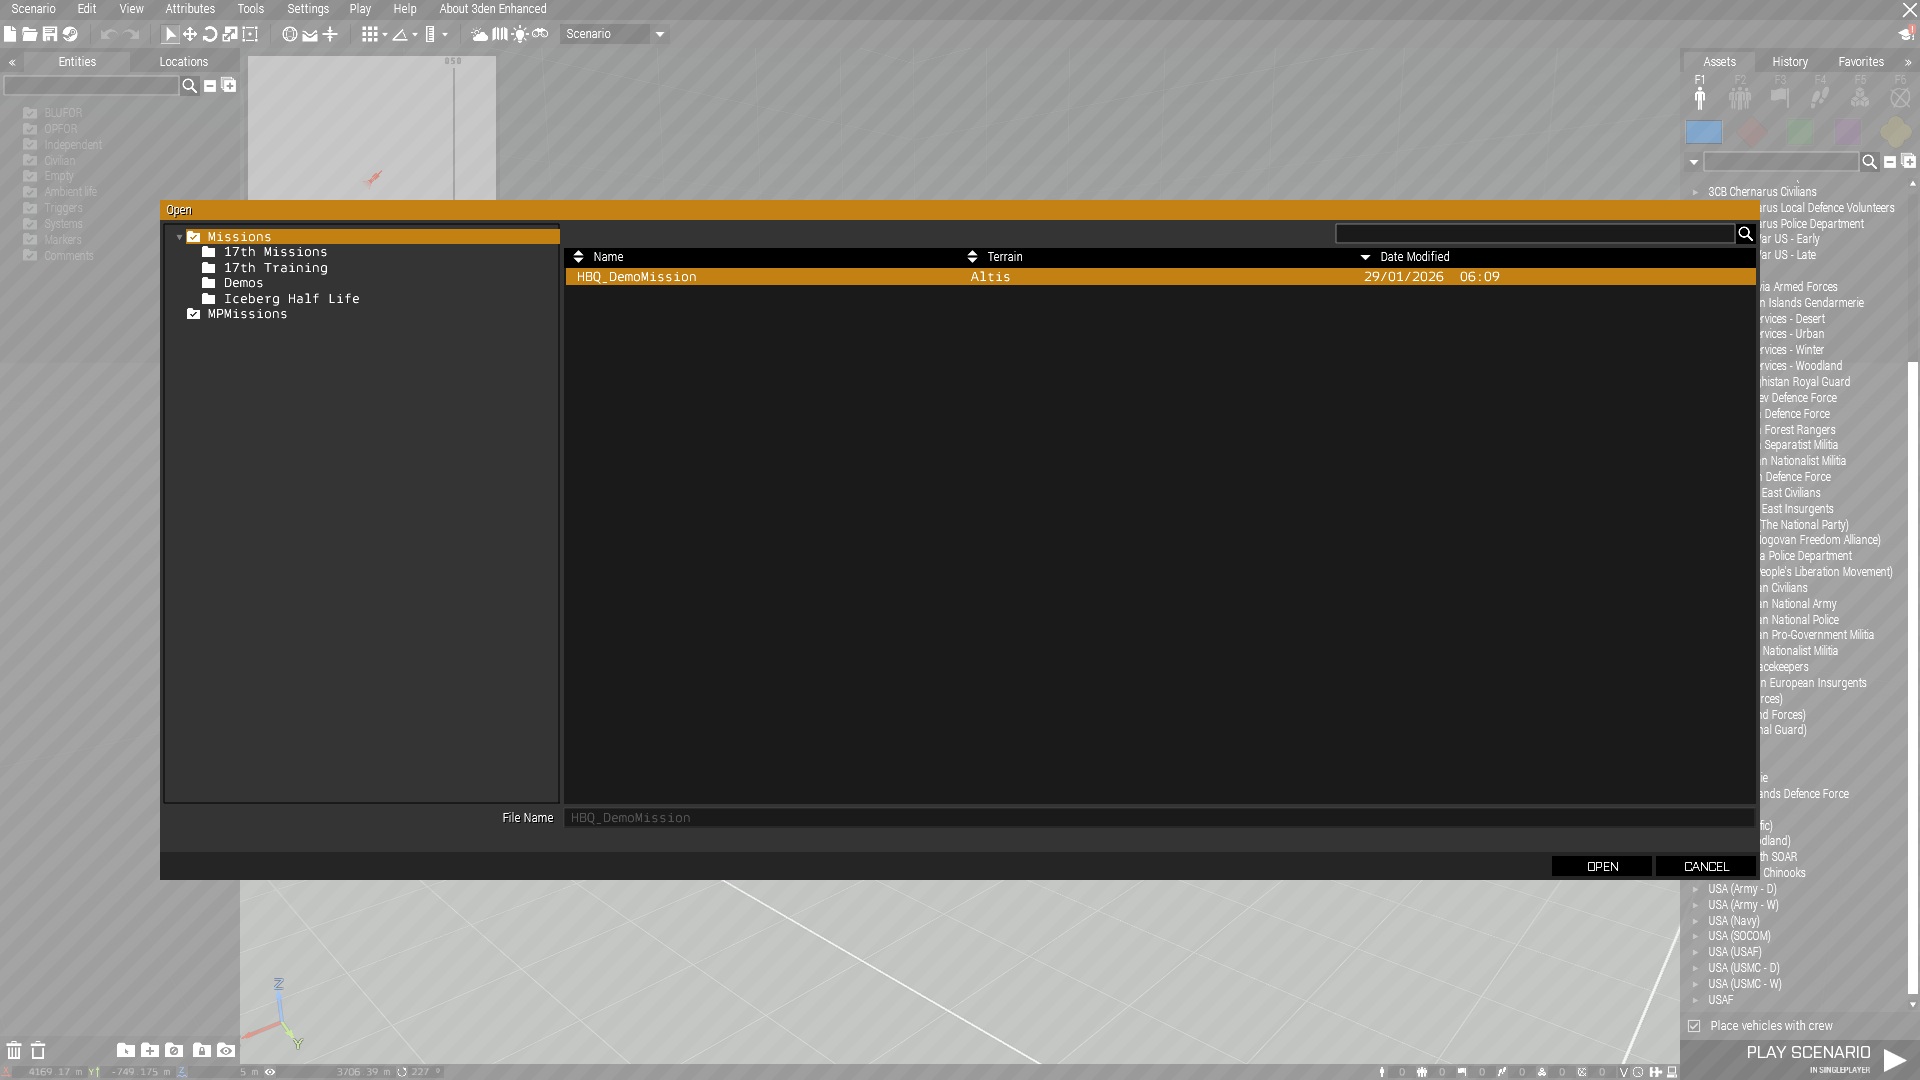
- Load the HBQ_SpawnSystem mod in your ARMA 3 launcher and go to Eden Editor. Click on Scenario on the top left, select Open, select the "missions" folder, and the Demo file should be present. You may play the file in singleplayer straight from Eden Editor.
Section 3 - HBQ Waypoints and Fire Support:
In this video, you will learn:
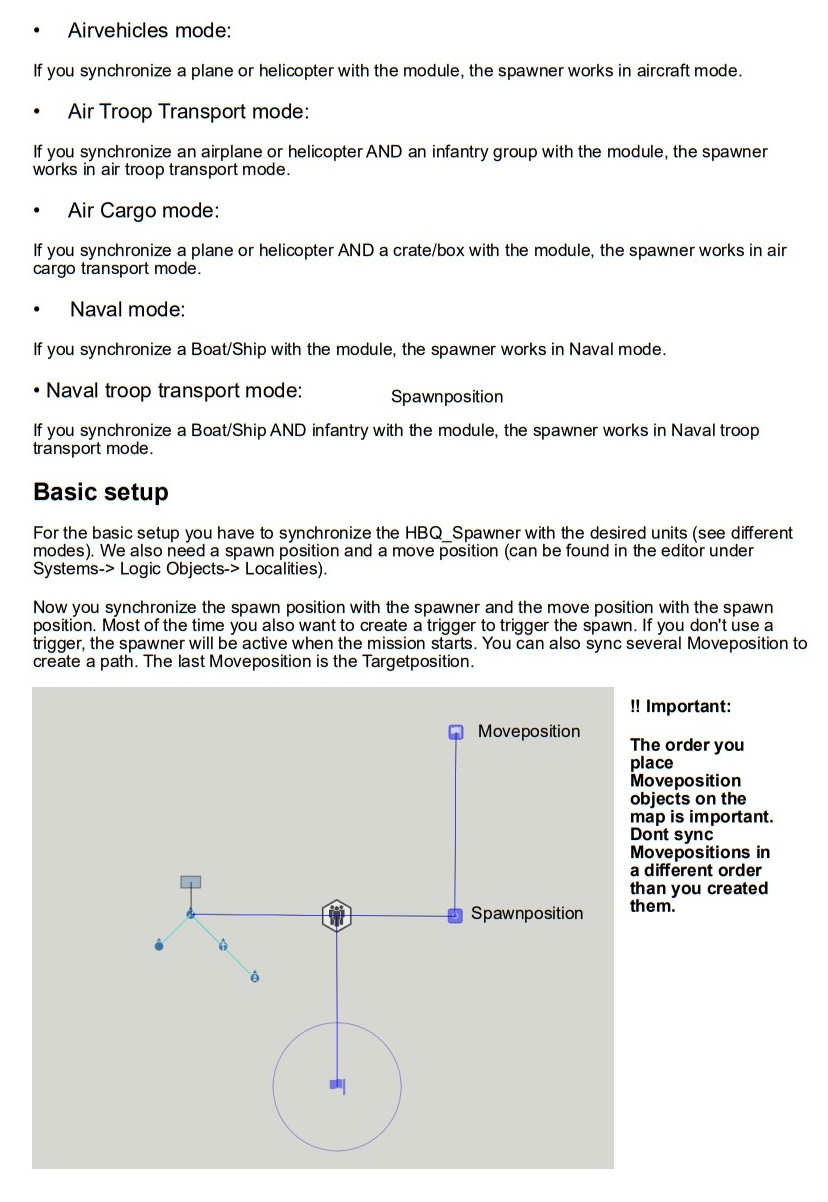
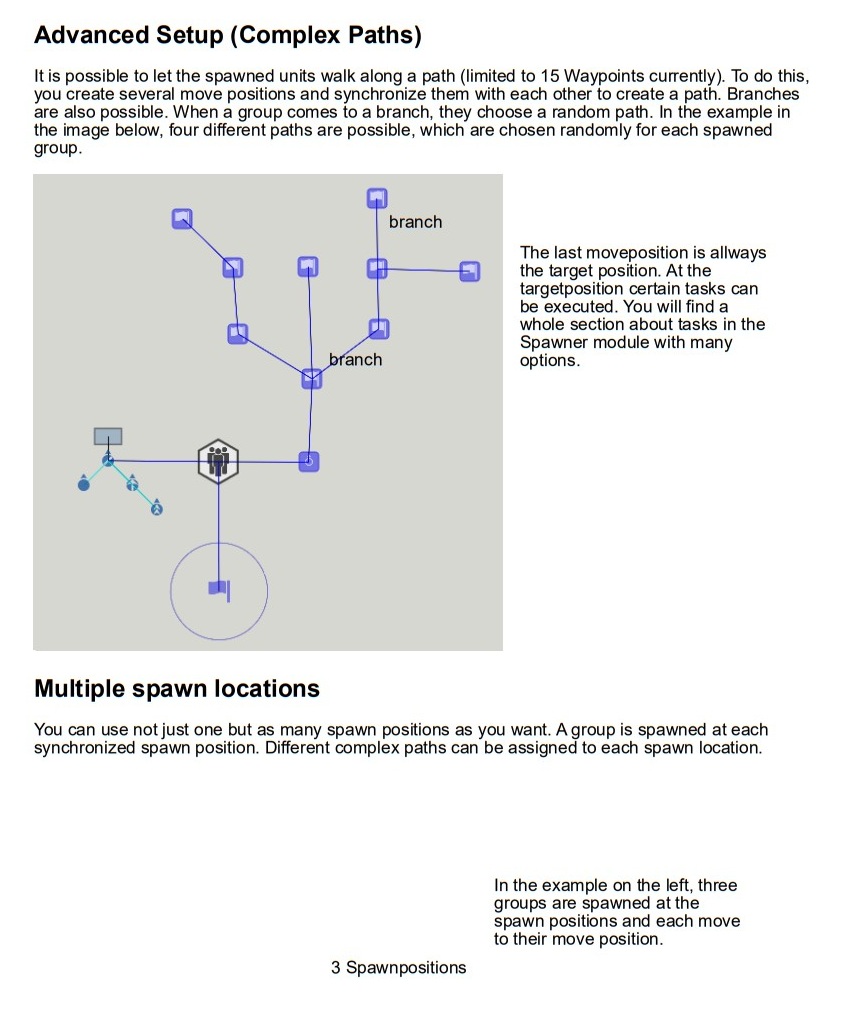
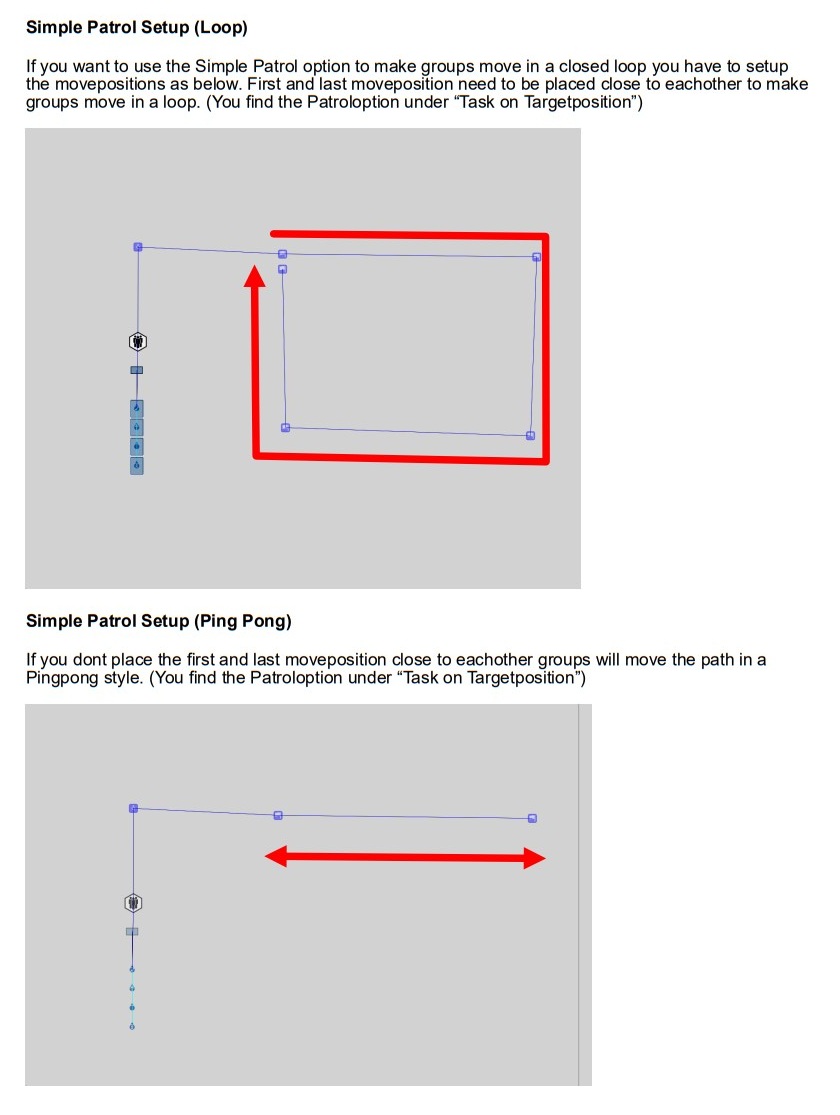
- How to sync waypoints and spawn positions using HBQ
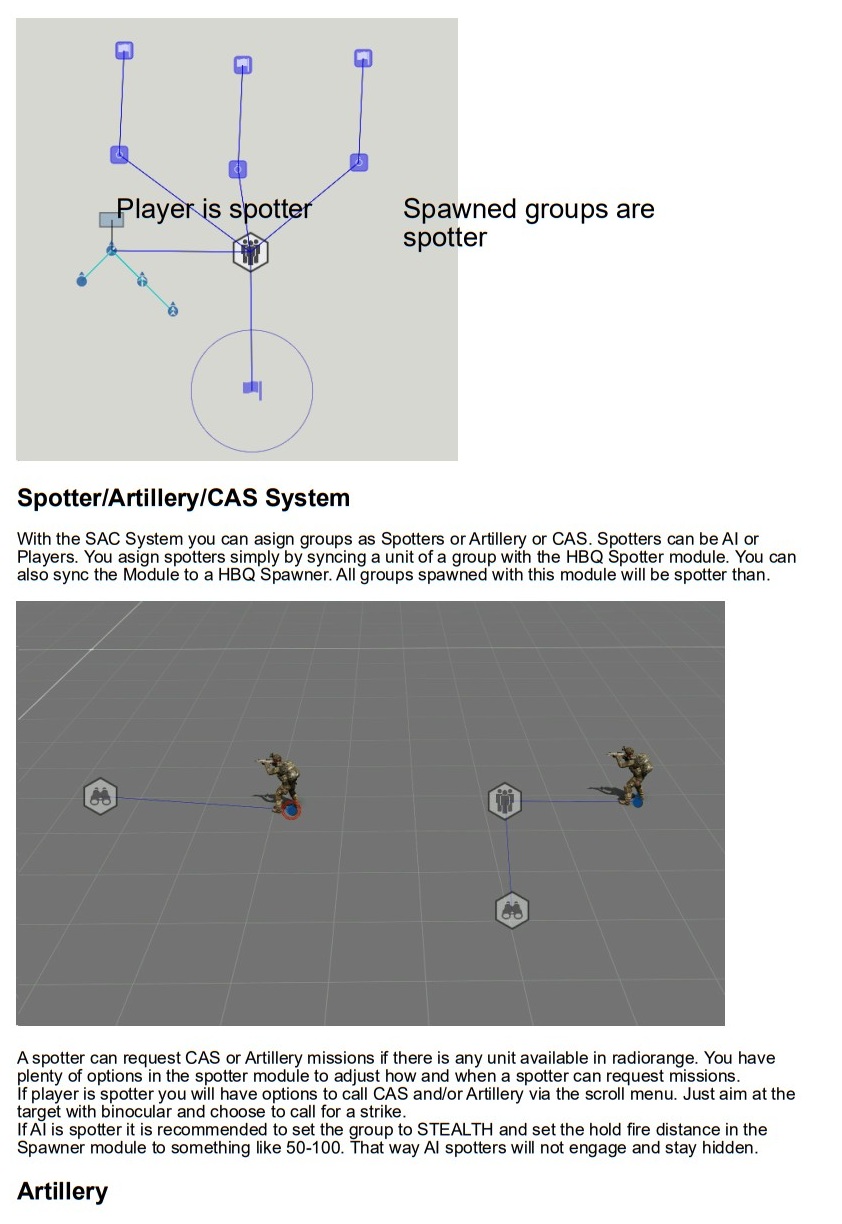
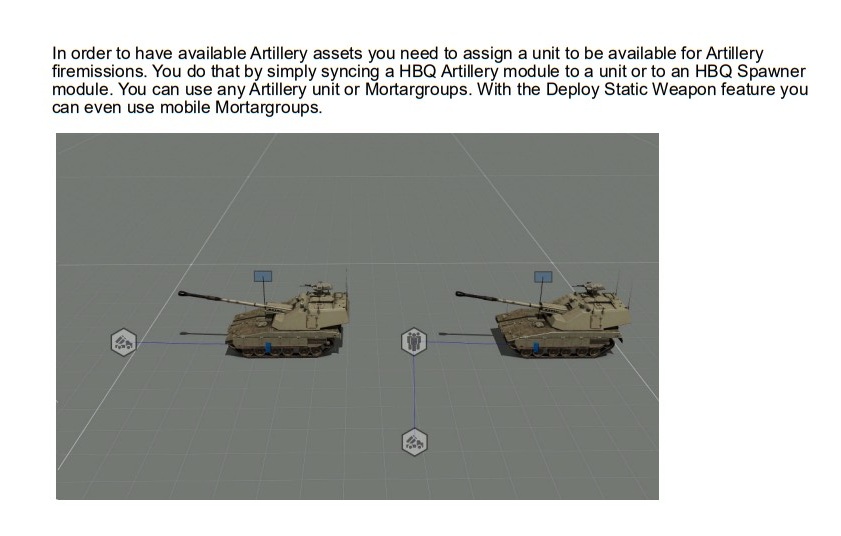
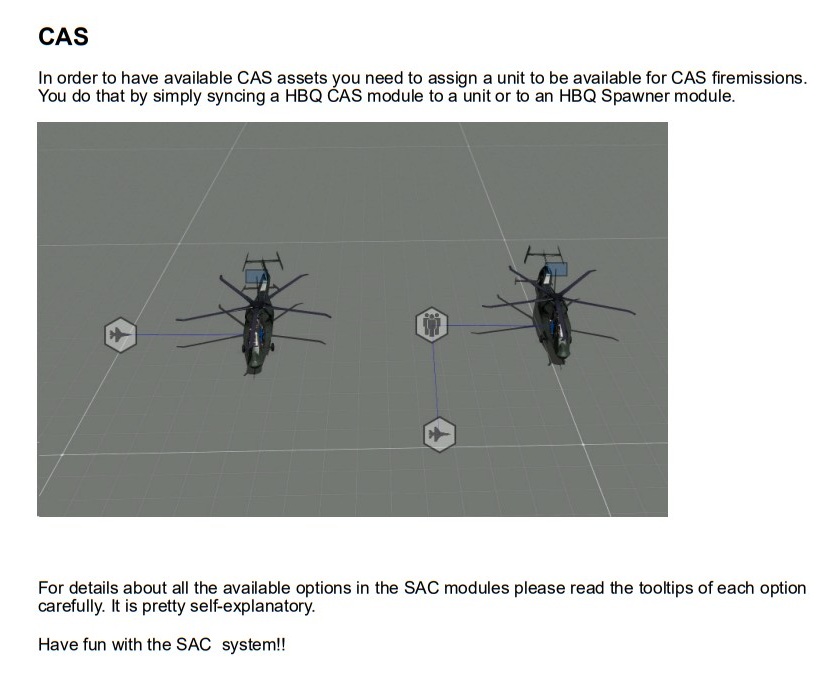
- How to use the different fire support modules from HBQ, including CAS and Artillery
- What are some of the differences on how HBQ and LAMBS do Artillery
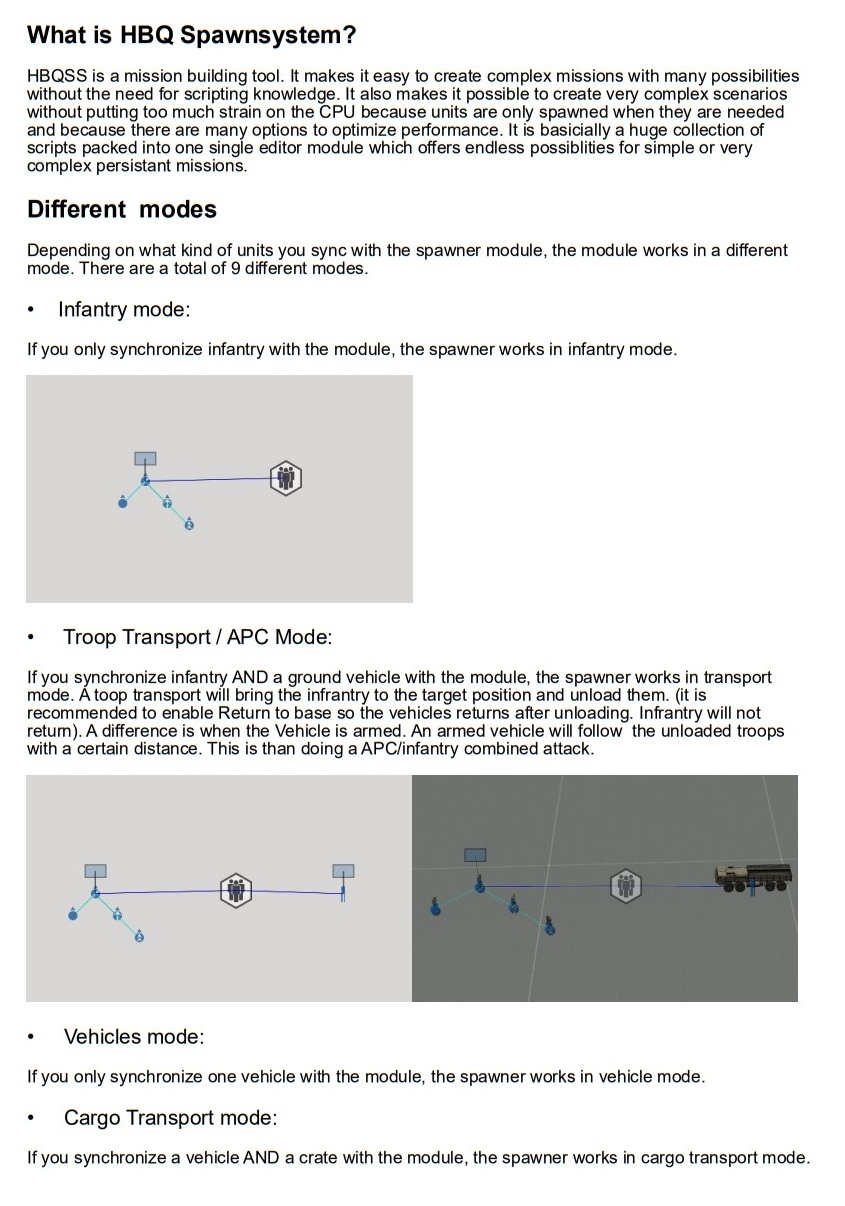
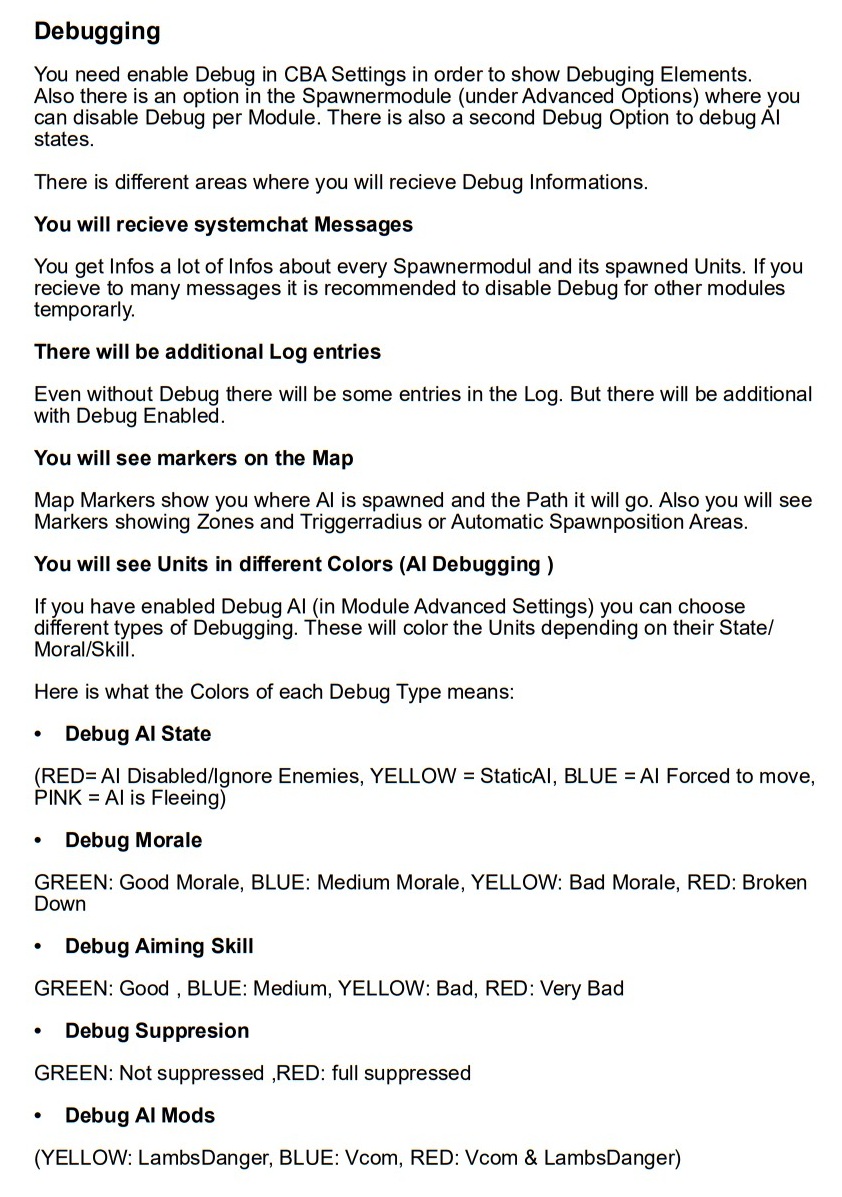
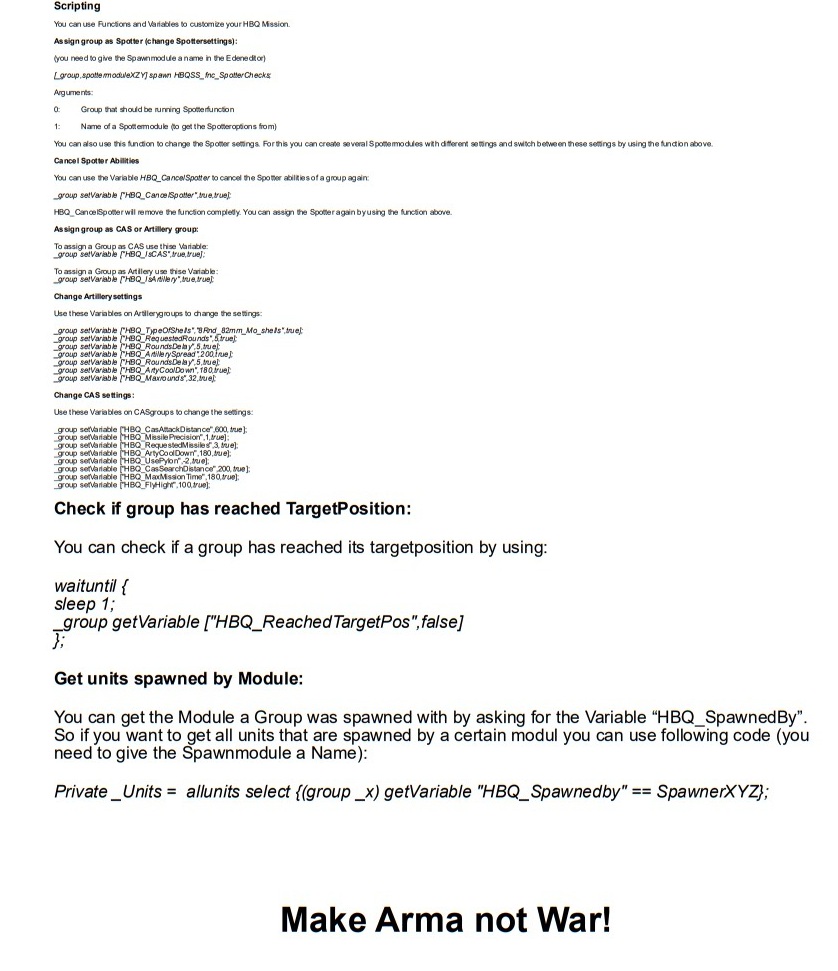
The HBQ Quickstart Manual (11 pages)
Section 4 - Caching and Performance:
Part 1 - Show/Hide, Dynamic Simulation, NR6 Caching, and Setpiece Design:
In this first video, you will learn:
- Why caching matters
- How to use the Show/Hide module effectively and how to activate it with Triggers
- Small groups at a time
- Best for smaller scale missions, supplement in larger scale missions
- What is Dynamic Simulation and what are some conflicts that come with it
- When and how to use the NR6 Caching System module
- Observe how the NR6 Caching System may conflict with Dynamic Simulation and Show/Hide
- Note that the NR6 Caching System's effect on vehicles/turrets is not shown while in Eden Editor, but visualized during Multiplayer runtime on a live server.
- Best for larger scale missions. Challenges may occur with heavy scripting involved.
- What are the basics of setpiece design and relevant settings for server performance
How to Disable Caching on a Group
Method 1: Disable Caching (place inside the group leader's init field):
(group this) setVariable ["zbe_cacheDisabled", true];Method 2: Disable Caching (remote call with unitName referencing the group variable name that you write in):
(group unitName) setVariable ["zbe_cacheDisabled", true];The video uses Method 1 of disabling caching, with no remote call. It is rare you will ever need to use Method 2.
I accidentally cut the video into two parts, which is why there is an abrupt ending in Part 1.
Part 2 - Setpiece Optimization and Compositions
In this second video, you will learn:
- How to optimize your setpieces when adding props/objects/vehicles to your mission.
- How to create custom compositions for a faster workflow
Section 5 - Mission Flow, Intel, Sequencing:
In this video, you will learn:
- Concepts of how to guide players through your mission
- How to use the Task system to indicate objective pass/fail conditions
- How to use Intel and Diary Records
- Bohemia Interactive's Intel Object: If you want to be able to pick up intel and create a diary record with an image attached to it.
- How to use Triggers to sequence intel and/or tasks together
- How to update/delete map markers using Triggers
Section 6 - Example Mission Build
This was a challenge to complete a mission in 3 hours, and I failed. In total, it took around 7 hours to deploy the mission file. Do not forget to pace yourself and take breaks in between.
The video has been broken up (accidentally) into parts for digestible viewing.
Part 1 - Initial Planning and Setup:
Part 2 - AA Site 1 Scripting and Task Testing:
Part 3 - Placing Bases, Enemies, and Reinforcements:
Part 4 - Assets, Environment, Guts, and Upload:
In the mission guts, you can overwrite the mission.jpg file directly as I initially intended. However, I was having an issue with my image not being applied and it just needed a full restart of ARMA 3 to fix. Review the README in the mission guts for further details on the mission.jpg.