
Opord
Situation
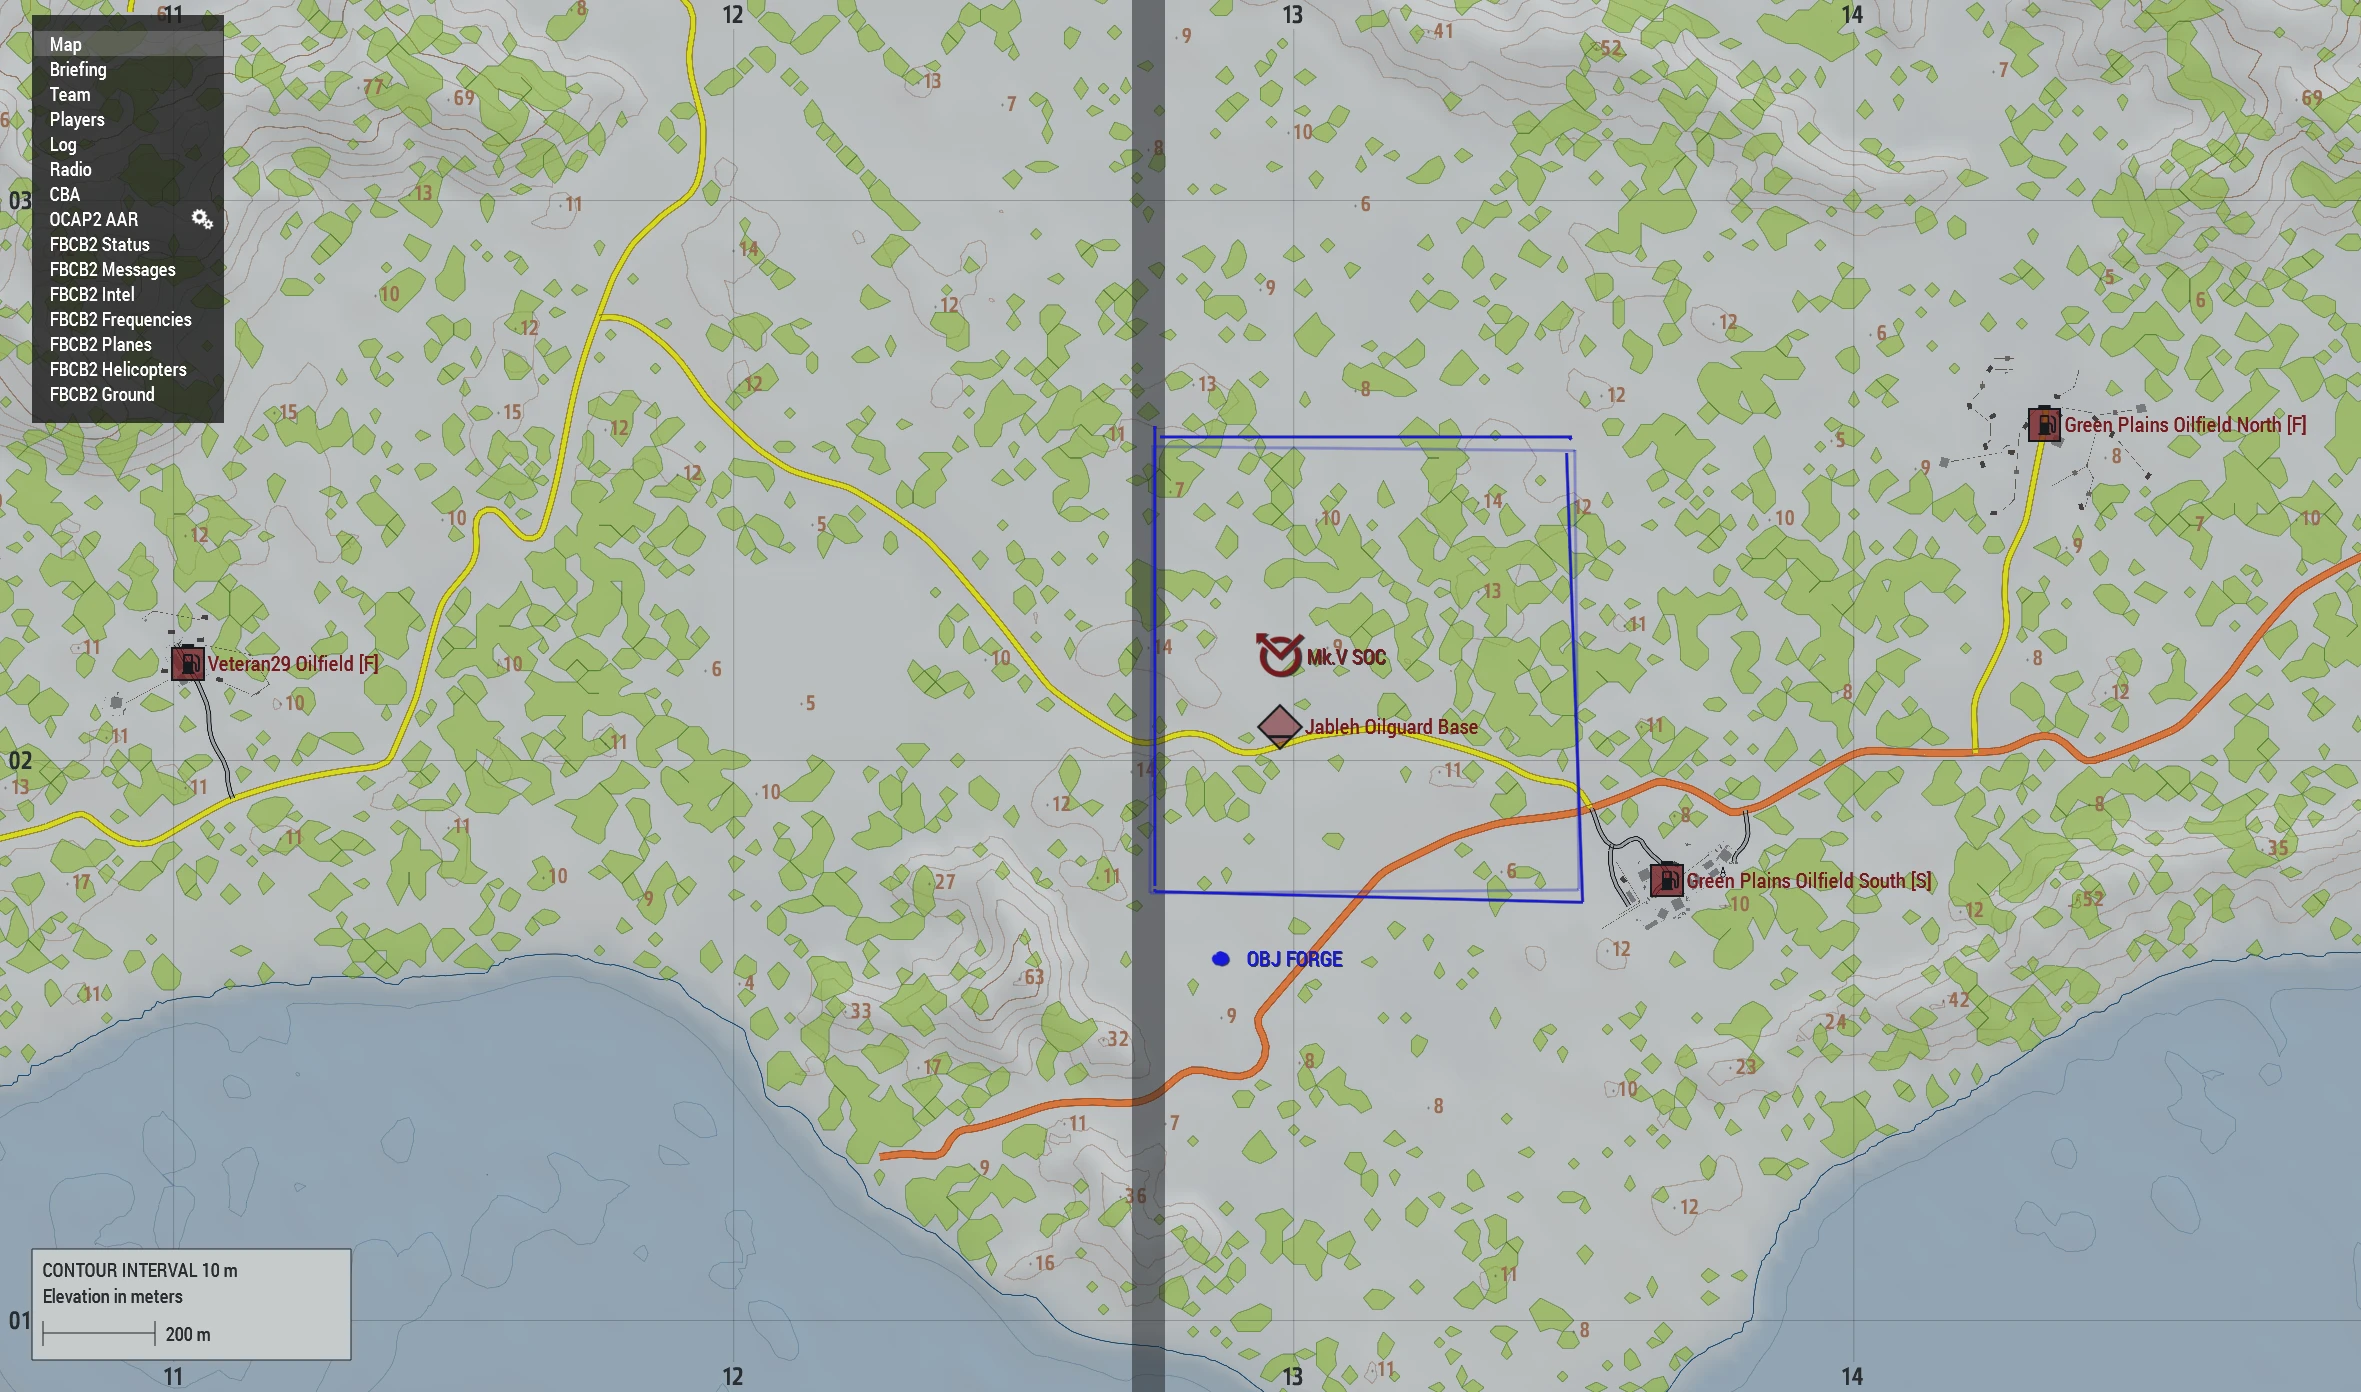
{Placeholder}In the last episode of our campaign, we launched a high-stakes offensive to establish a beachhead and spread the ideals of managed democracy throughout the region. The operation unfolded swiftly, with our forces advancing rapidly and securing key territories up until the regional capital of Jableh. This initial success, achieved under the cover of night, was crucial in cementing our foothold in Al Rayak and proving our resolve to push back the forces of CSAT.
Despite these victories, we were unable to reach OBJ Ironclad Dawn or establish FOB Horizon’s Edge as initially planned by the close of the operation. Both objectives, essential for our longer-term strategy, remained out of reach, and the area was still vulnerable to enemy retaliation.
However, the valor and determination of a small group of rangers ensured that we would not be deterred. In the hours following the last episode, this team pressed on, liberating additional towns and completing the capture of Ironclad Dawn. Their actions were instrumental in the eventual establishment of FOB Horizon's Edge, providing us with a vital logistical and defensive stronghold.
As we move forward into the next phase, the focus must shift to fortifying our position further. We need to establish additional bases to support artillery and anti-air operations, ensuring our defenses remain impenetrable. The river delta must be secured to protect our flanks, and a nearby airfield must be captured to bolster air support, which will be critical for both offensive and defensive actions.
The last episode may have been only the beginning, but with our newly secured positions and the unwavering resolve of our forces, we are now poised to expand our influence and strengthen our presence across Al Rayak. The next steps are clear: fortify, expand, and secure—our mission is far from over.
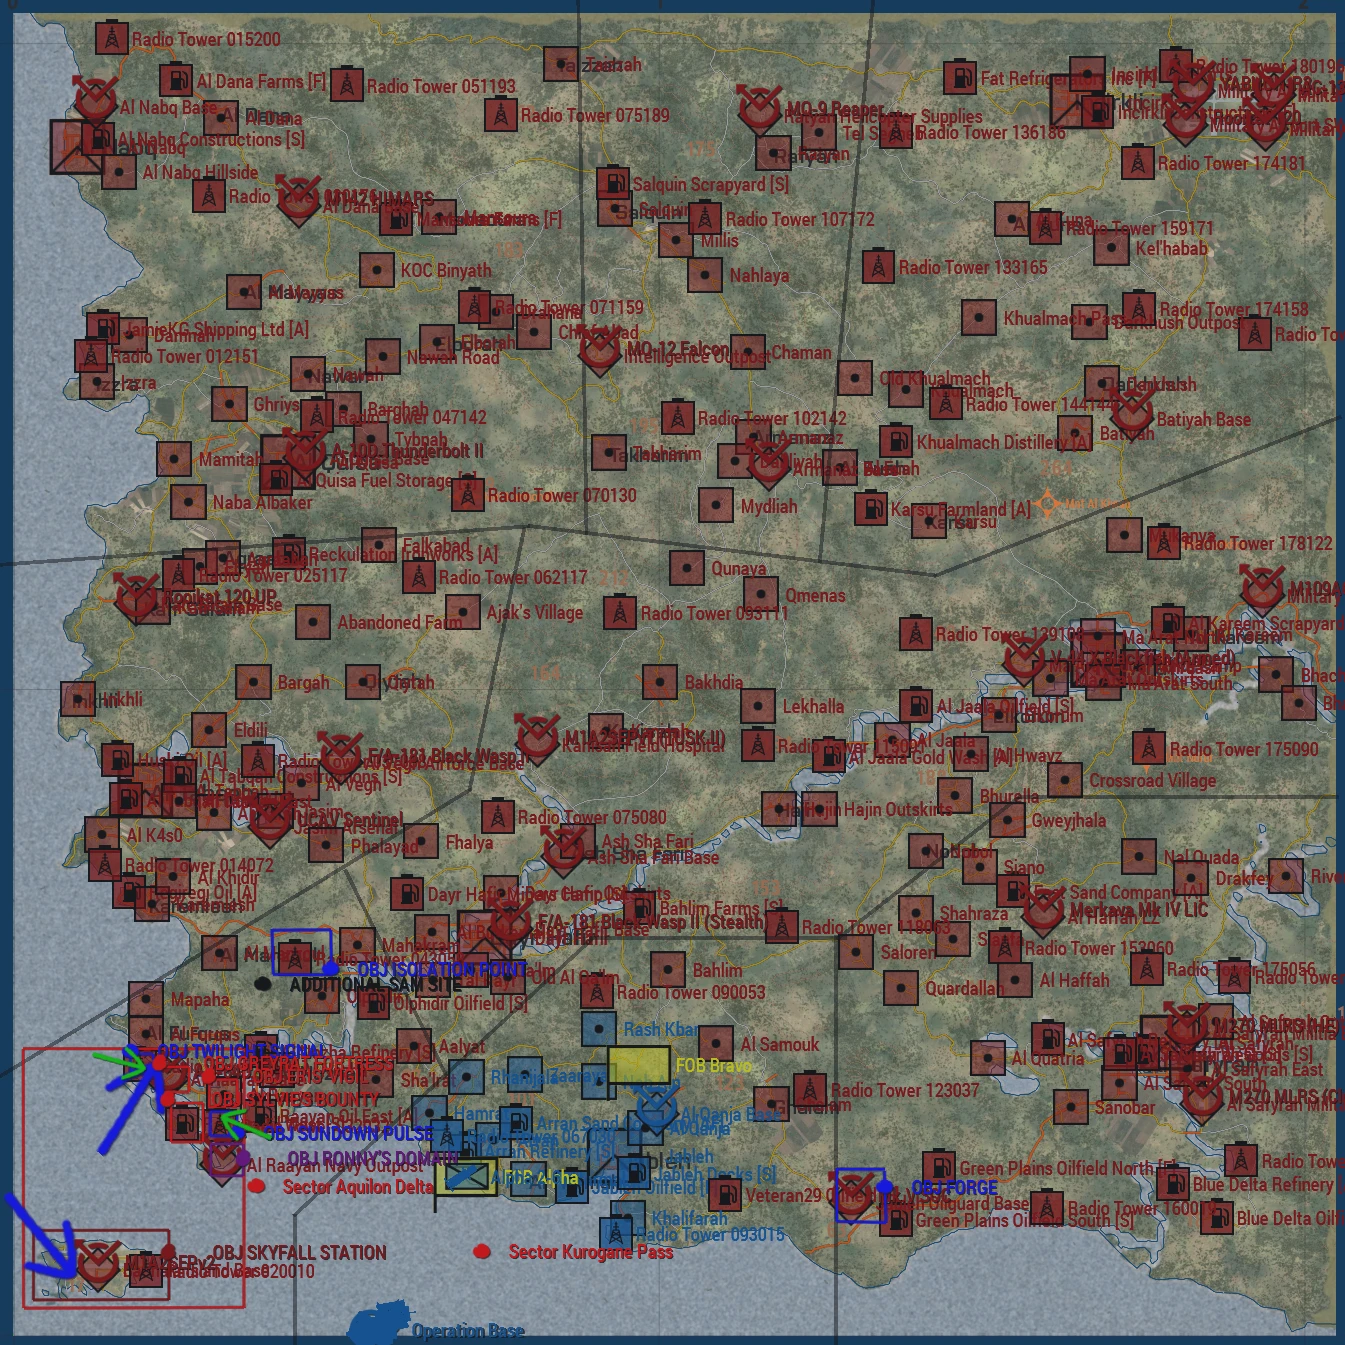
Area of Operation (AO):
{Placeholder}
Forces in Play:
Opfor:
{Placeholder}CSAT - Europe
Most Likely Course of Action:
Defense of held positions and repulsion of BLUFOR
Most Deadly Course of Action:
Counterattack in force to crush the beachhead and prevent establishment of FOBs
Civilian Considerations:
Present throughout the AO. Any injured civilians are to be medically treated using BASIC BANDAGES. All civilian vehicles and dwellings are to be spared when at all possible. Killing civilians, destroying their property, or not treating them will give rise to potential IEDs and rebel forces arrayed against us.
POW's:
Any and all POWs are to be sought when a location has been captured. A killed POW has the same effect as a killed civilian. First use a ZIPTIE on surrendered forces, then use ACE interact to move the prisoner and transport them to a FOB main building.
Blufor:
{Placeholder}Task Force Helldivers- 17th Ranger Battalion "Otherworlders"
Greenfor:
{Placeholder}n/a
Engagement Criteria:
{Most
{MostCSAT Deadly Course of Action}
Mission:
Execution:Upcoming Operation: Weekly Execution Plan
Objectives:Responsibilities:
{Placeholder}Alpha
CONOP:
-
Phase 0: PreOp 1730 CST
- COs/XOs finalize remaining details if any
- Reevaluate Sector and Weekly progress
Phase I: Brief 1900 CST
-
Phase II: Prep 1905 CST
- Alpha kits up for night ops
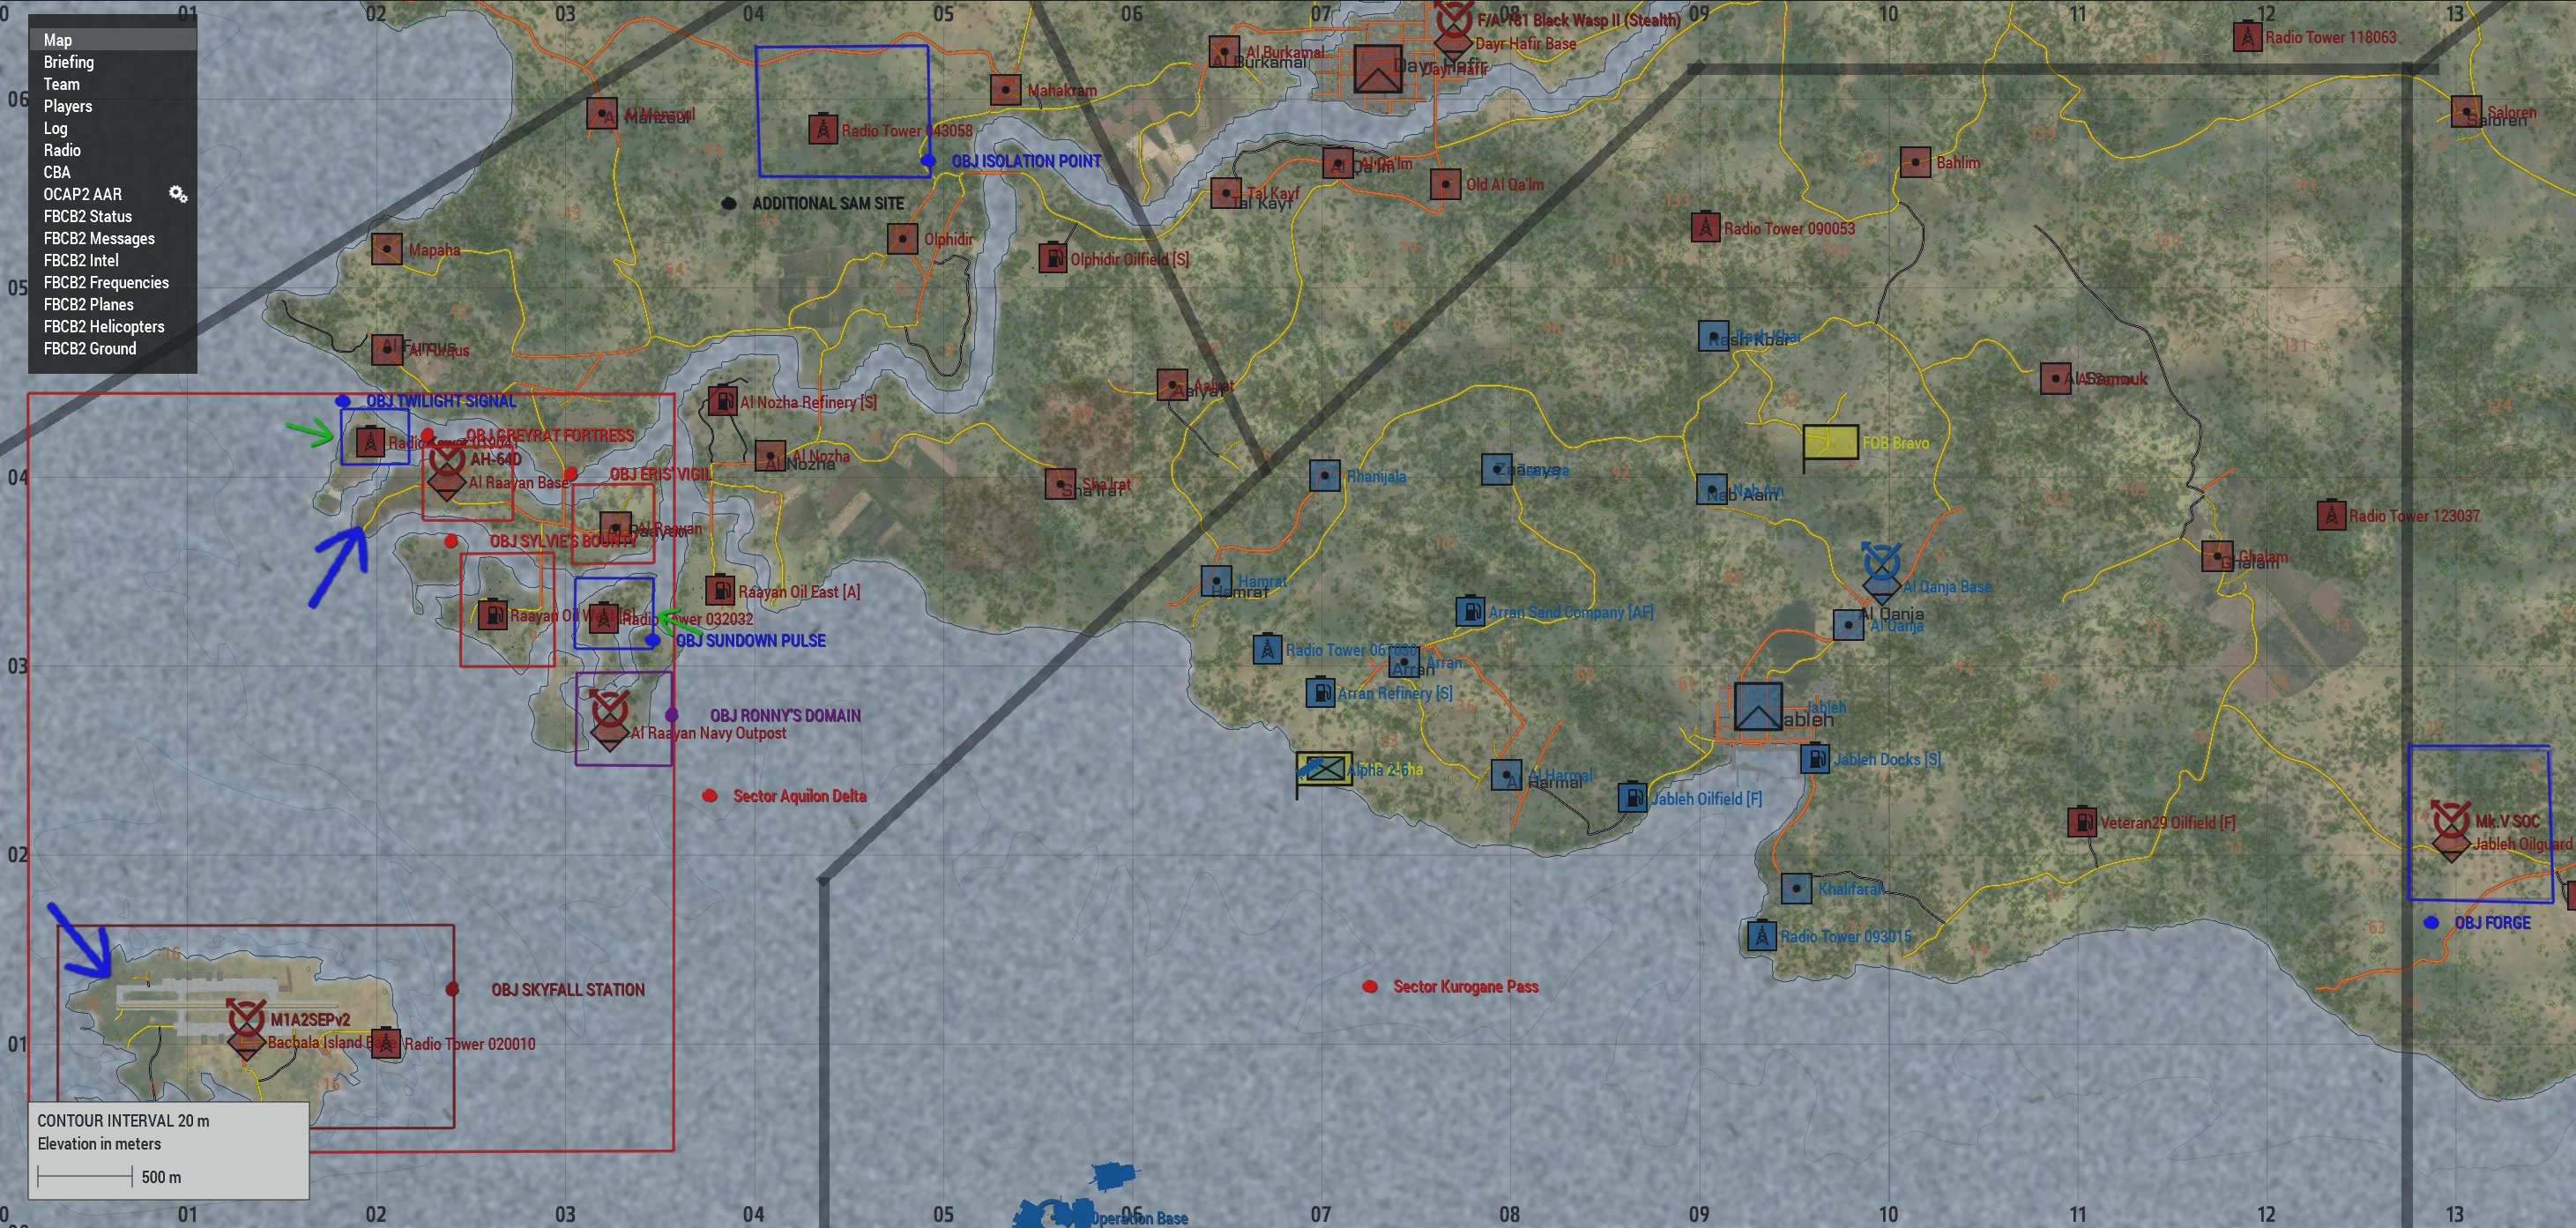
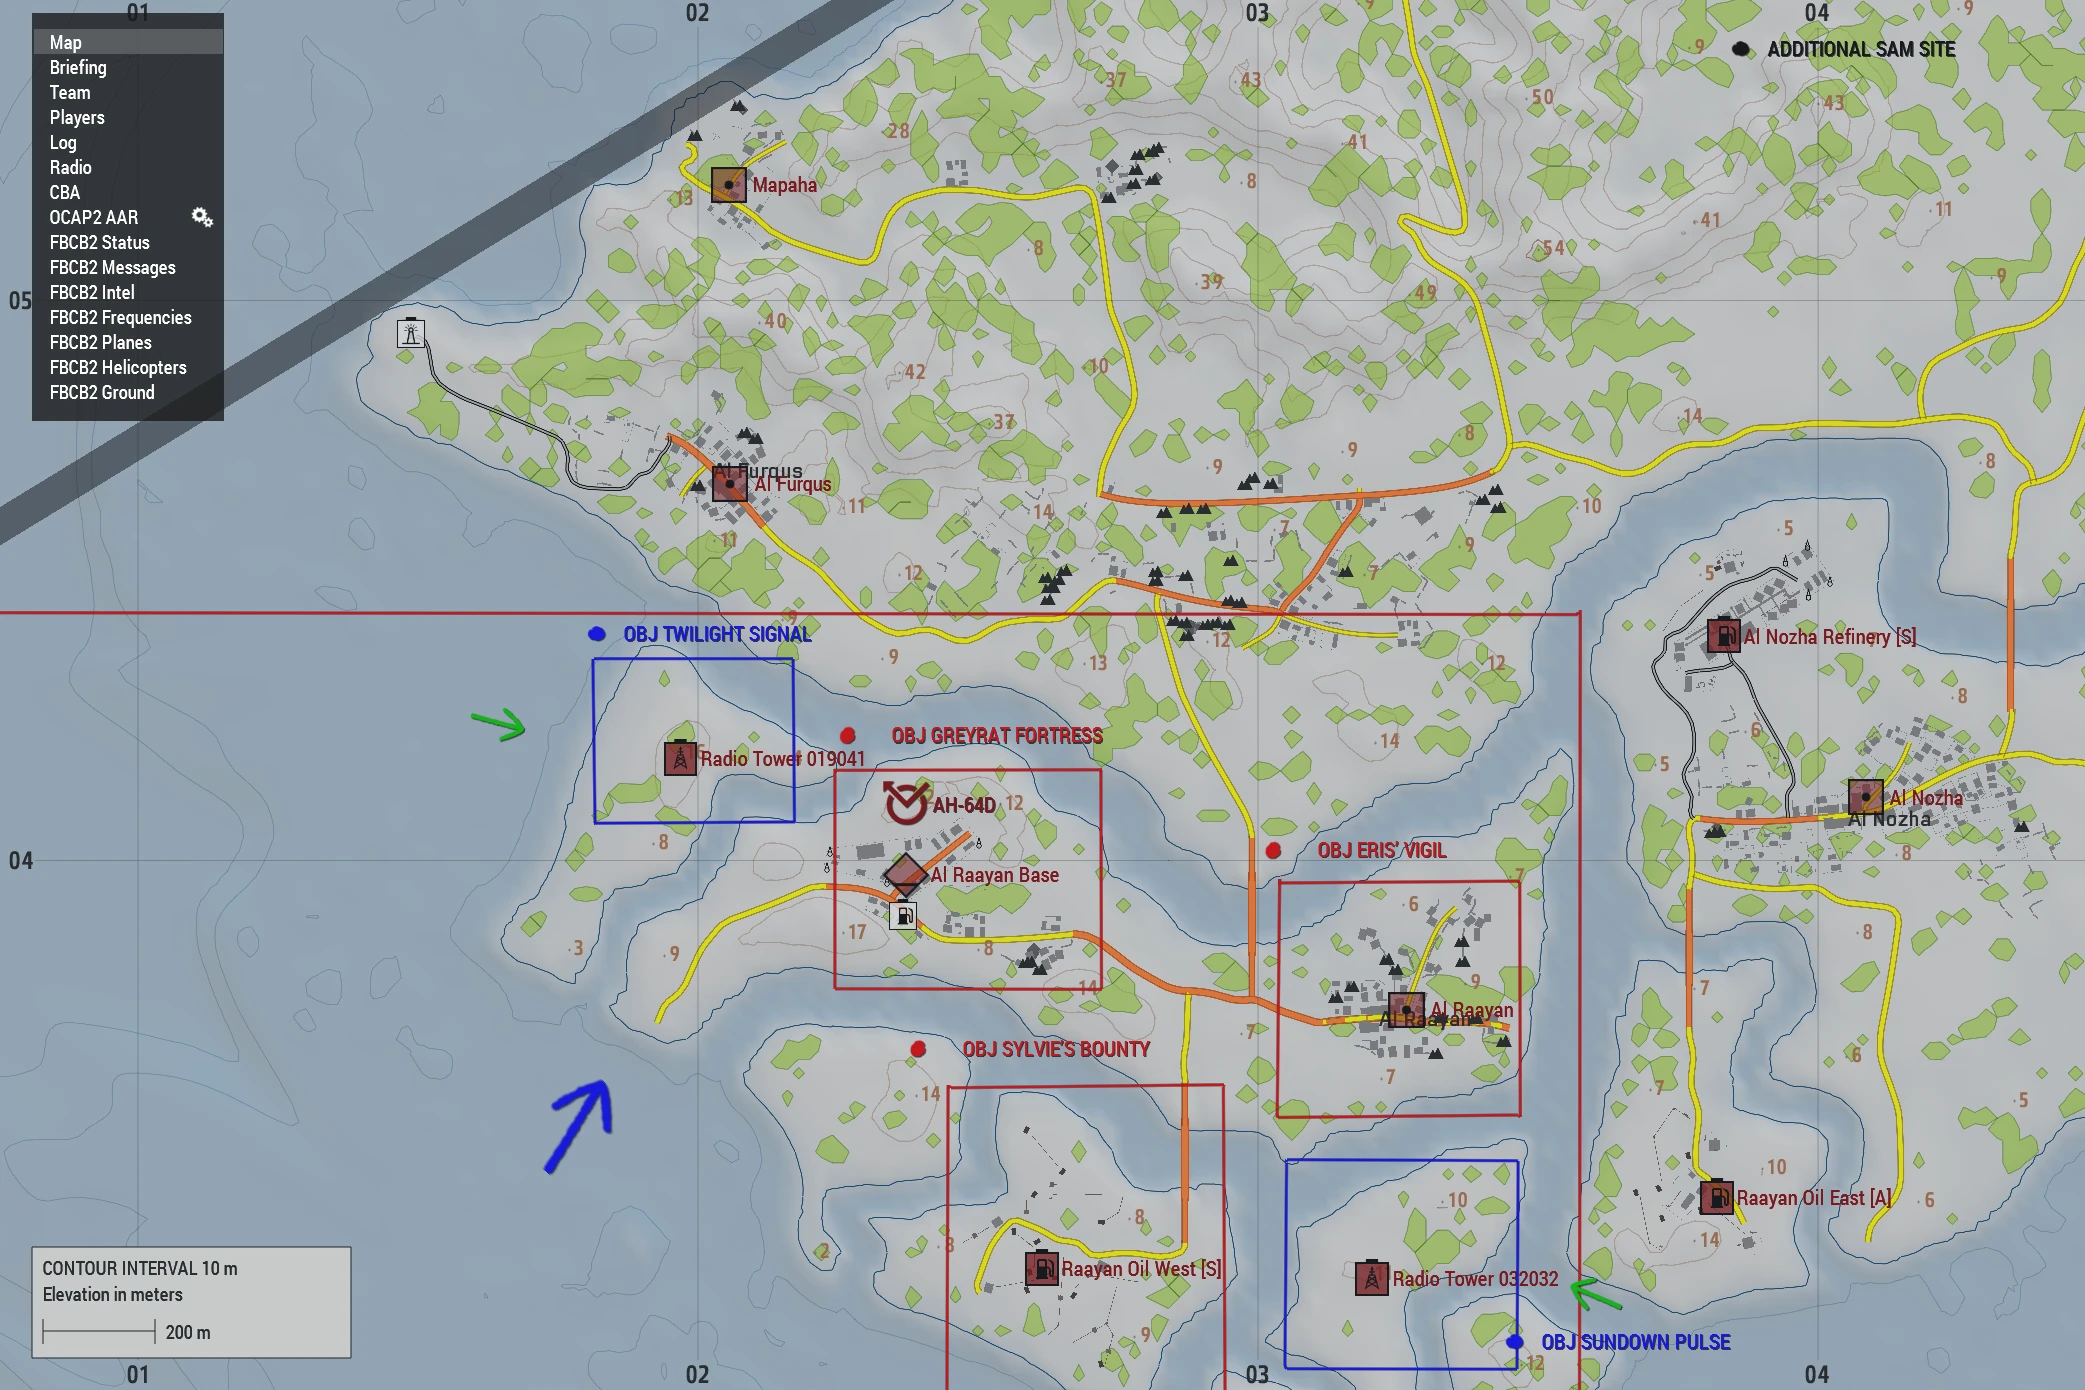
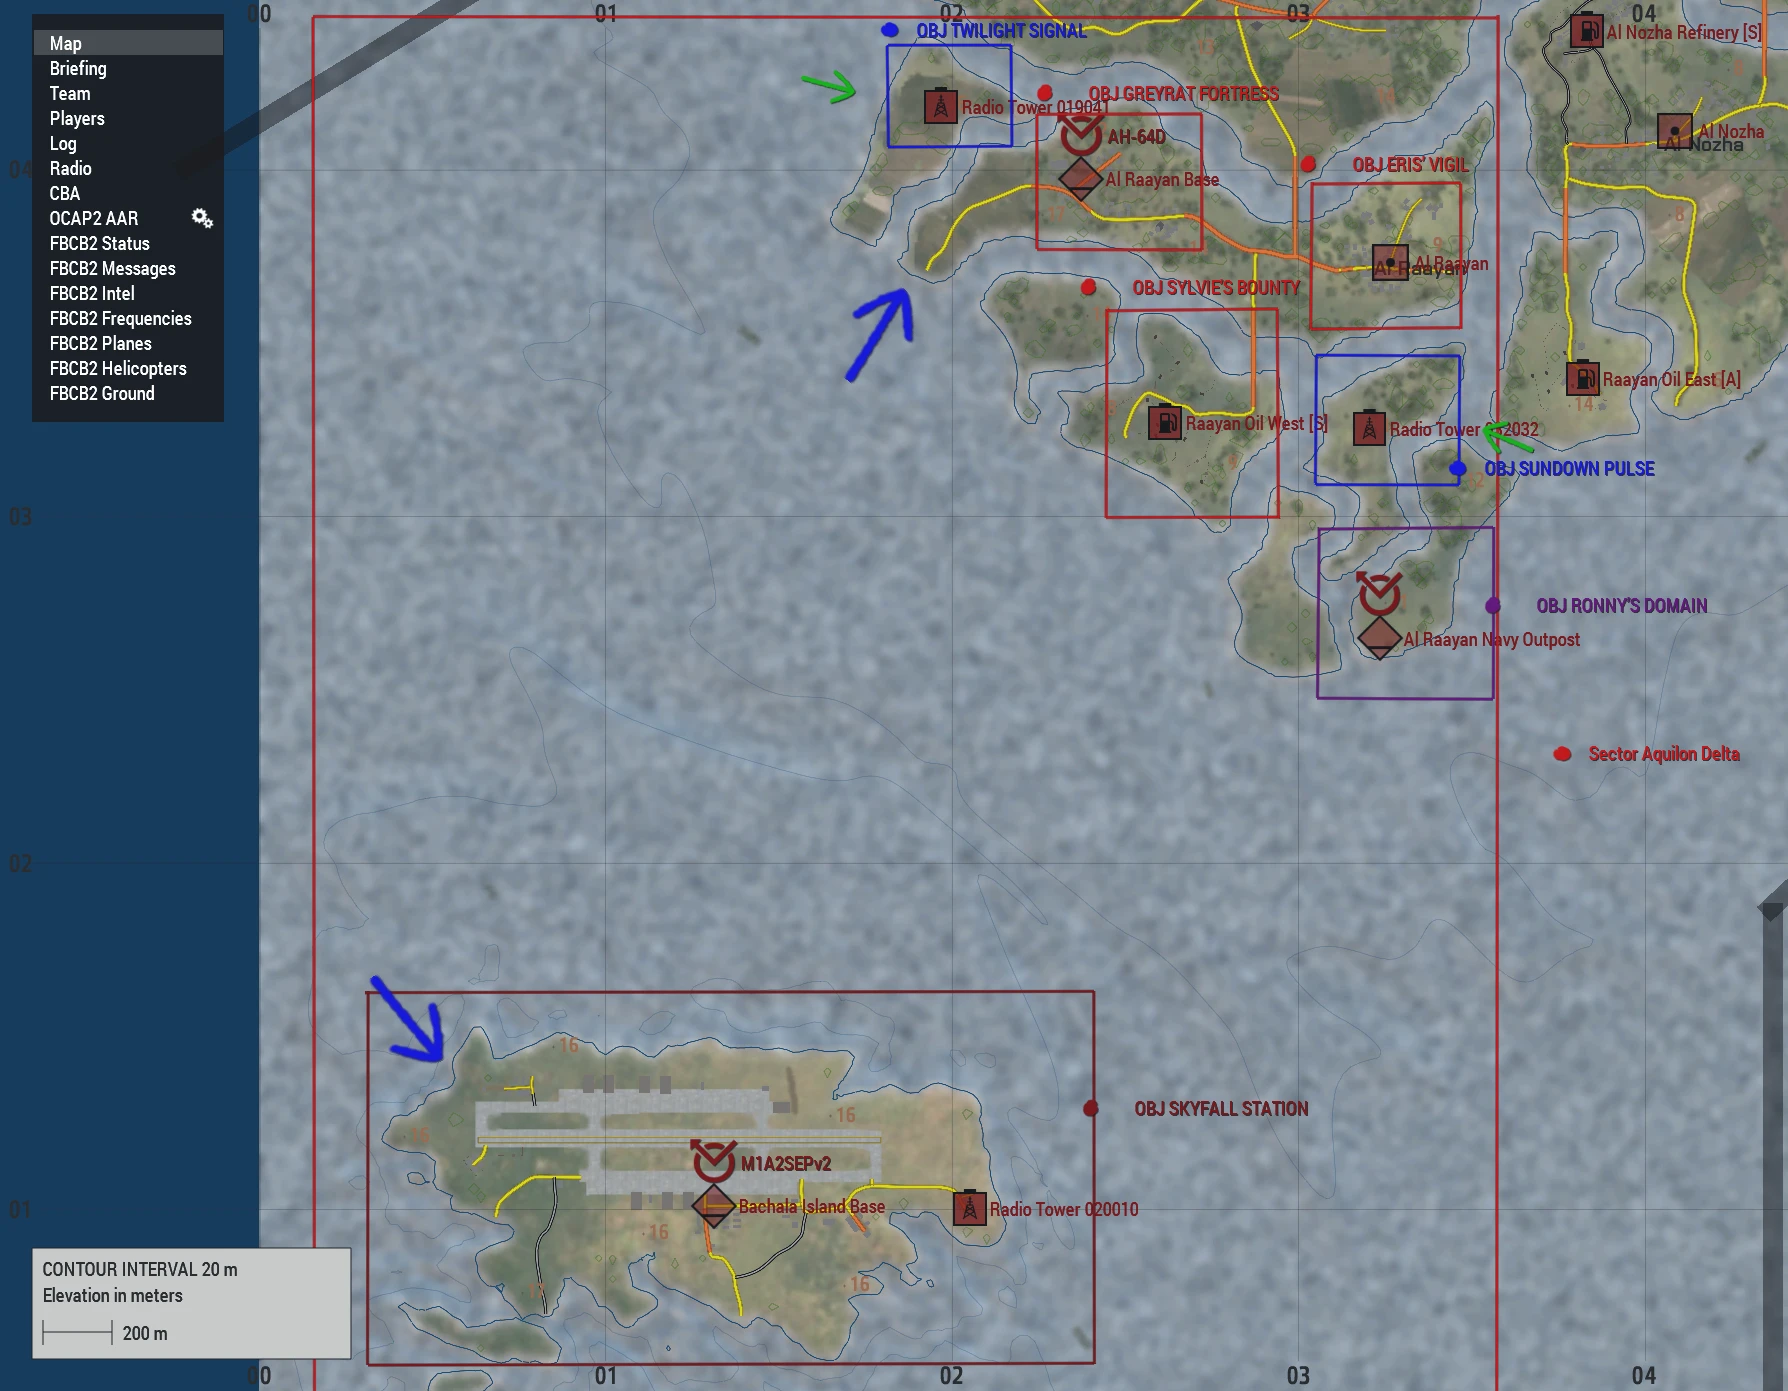
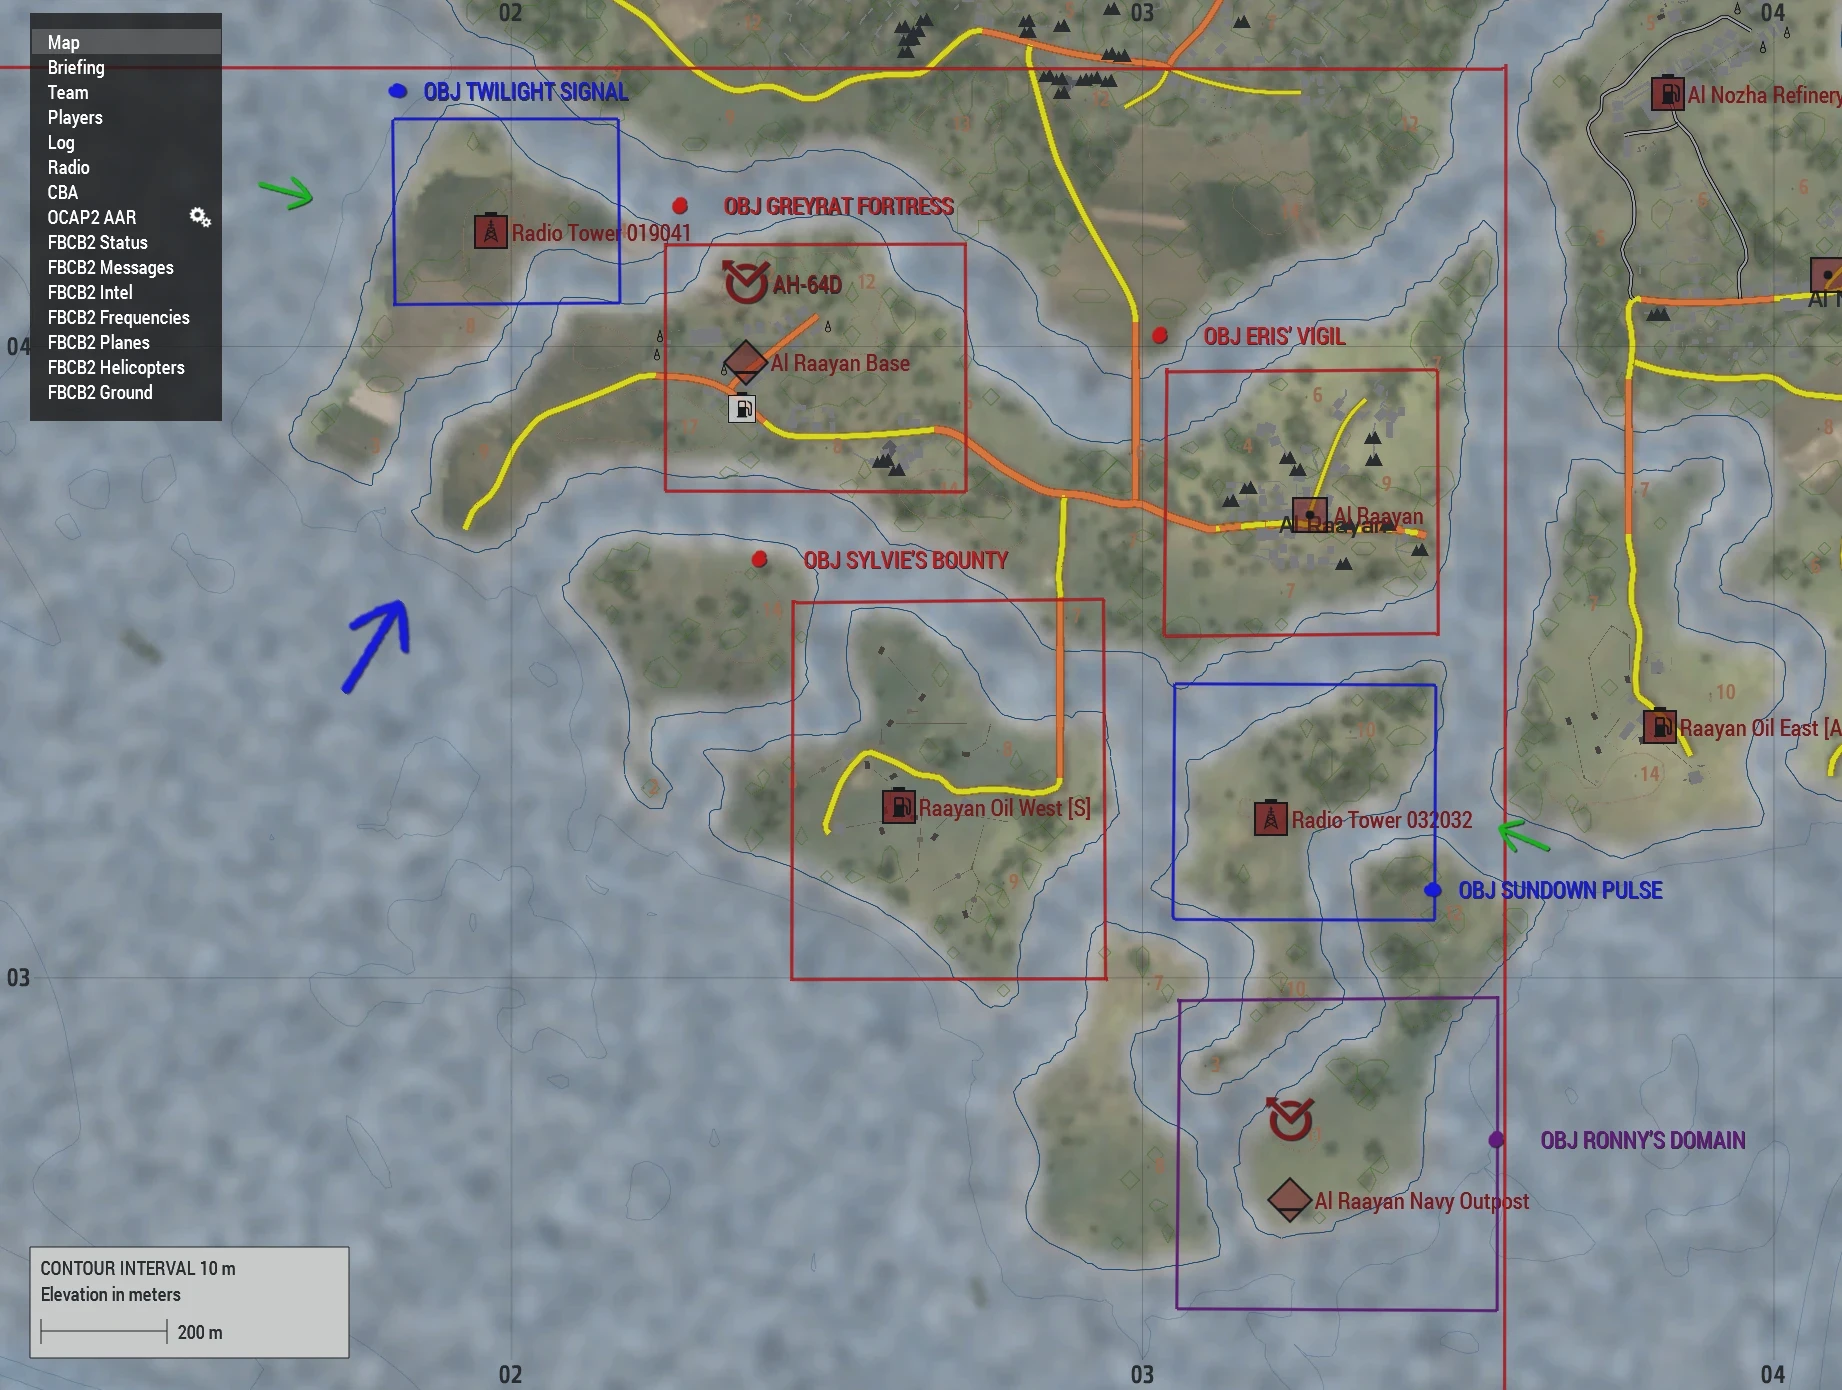
Phase III: Stepoff and OBJ TWILIGHT SIGNAL AND SUNDOWN PULSE 1915 CST
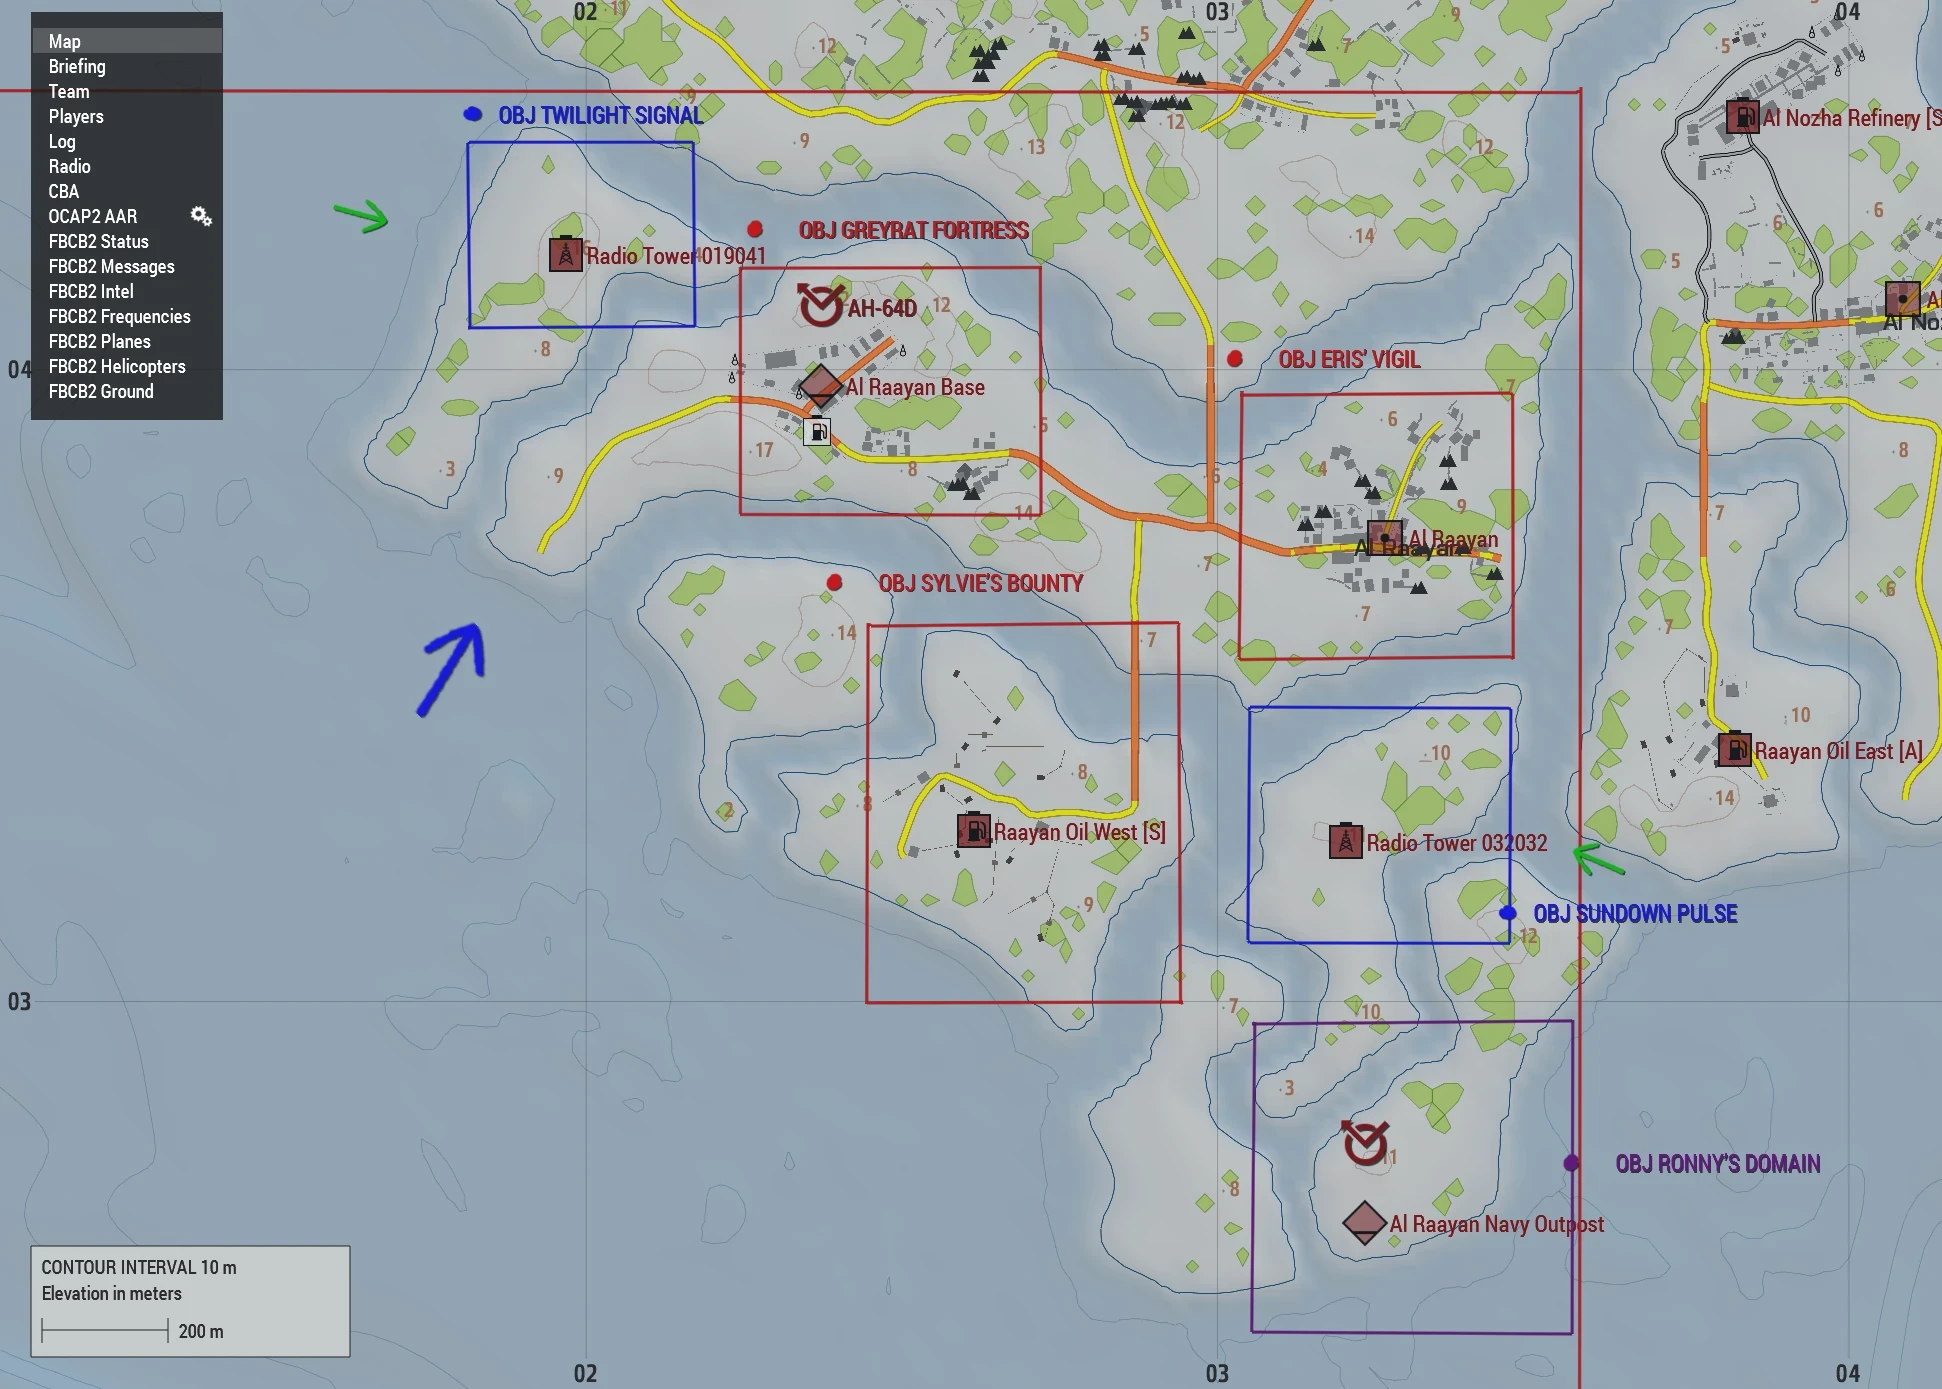
Approaches in green are recommended to maintain surprise and speed
-
Phase IV: OBJ GREYRAT FORTRESS
- Alpha with Echo fire support will eliminate the base and it's ability to reinforce
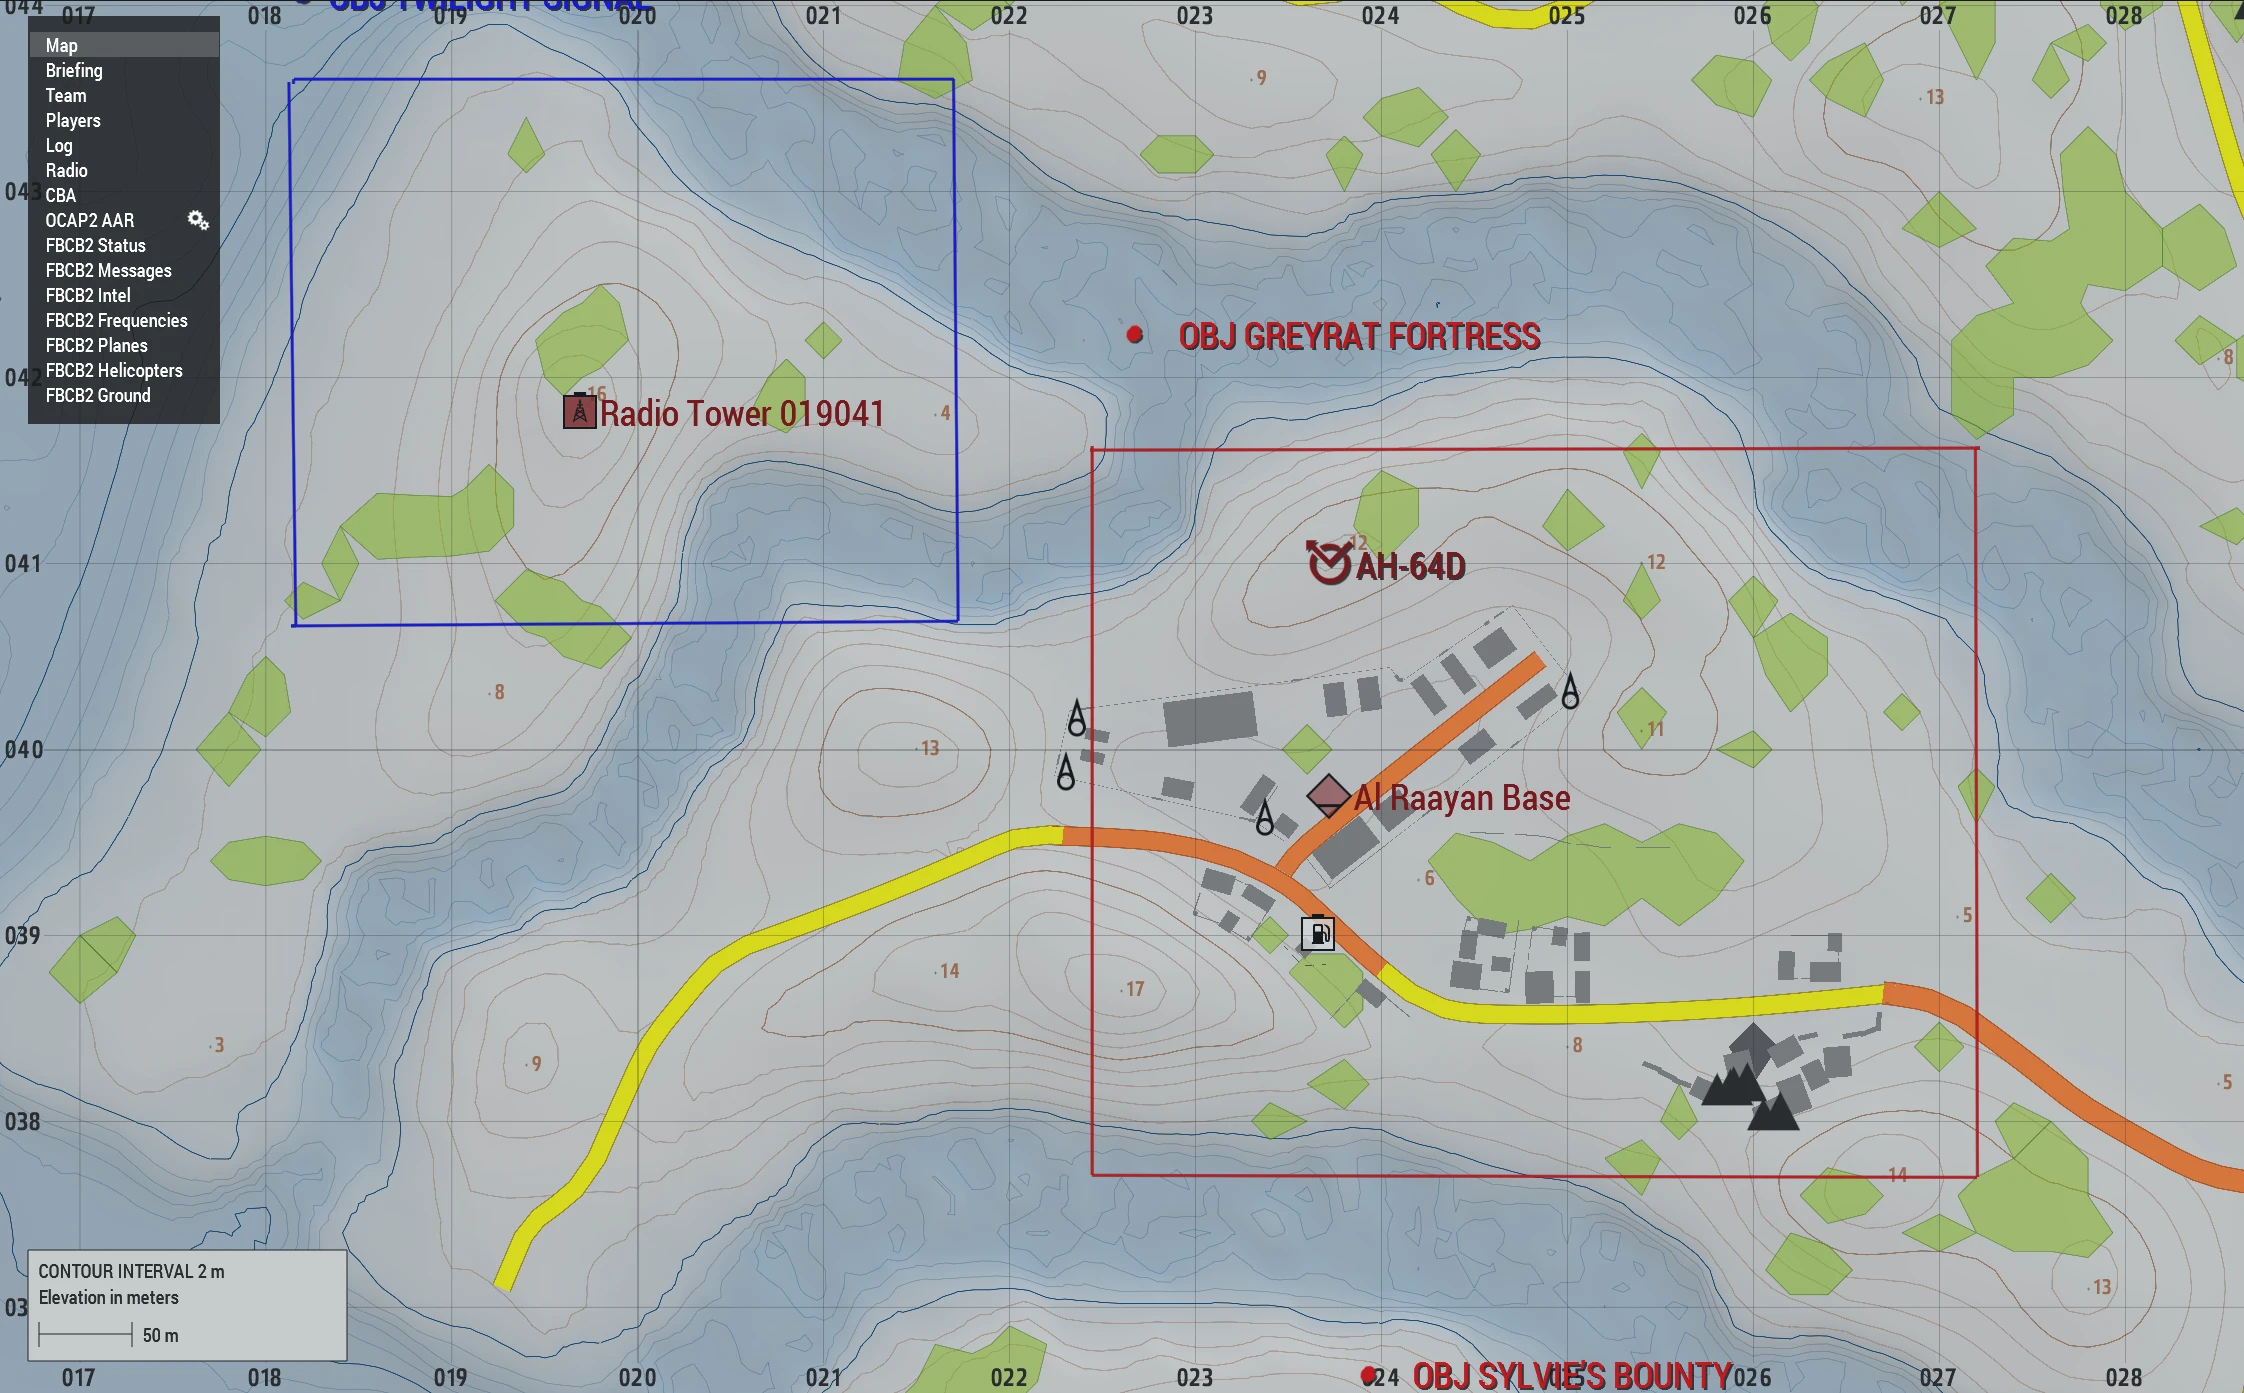
-
Phase V: OBJ ERIS' VIGIL and OBJ SYLVIE'S BOUNTY
- Liberate the village and secure the oilfield
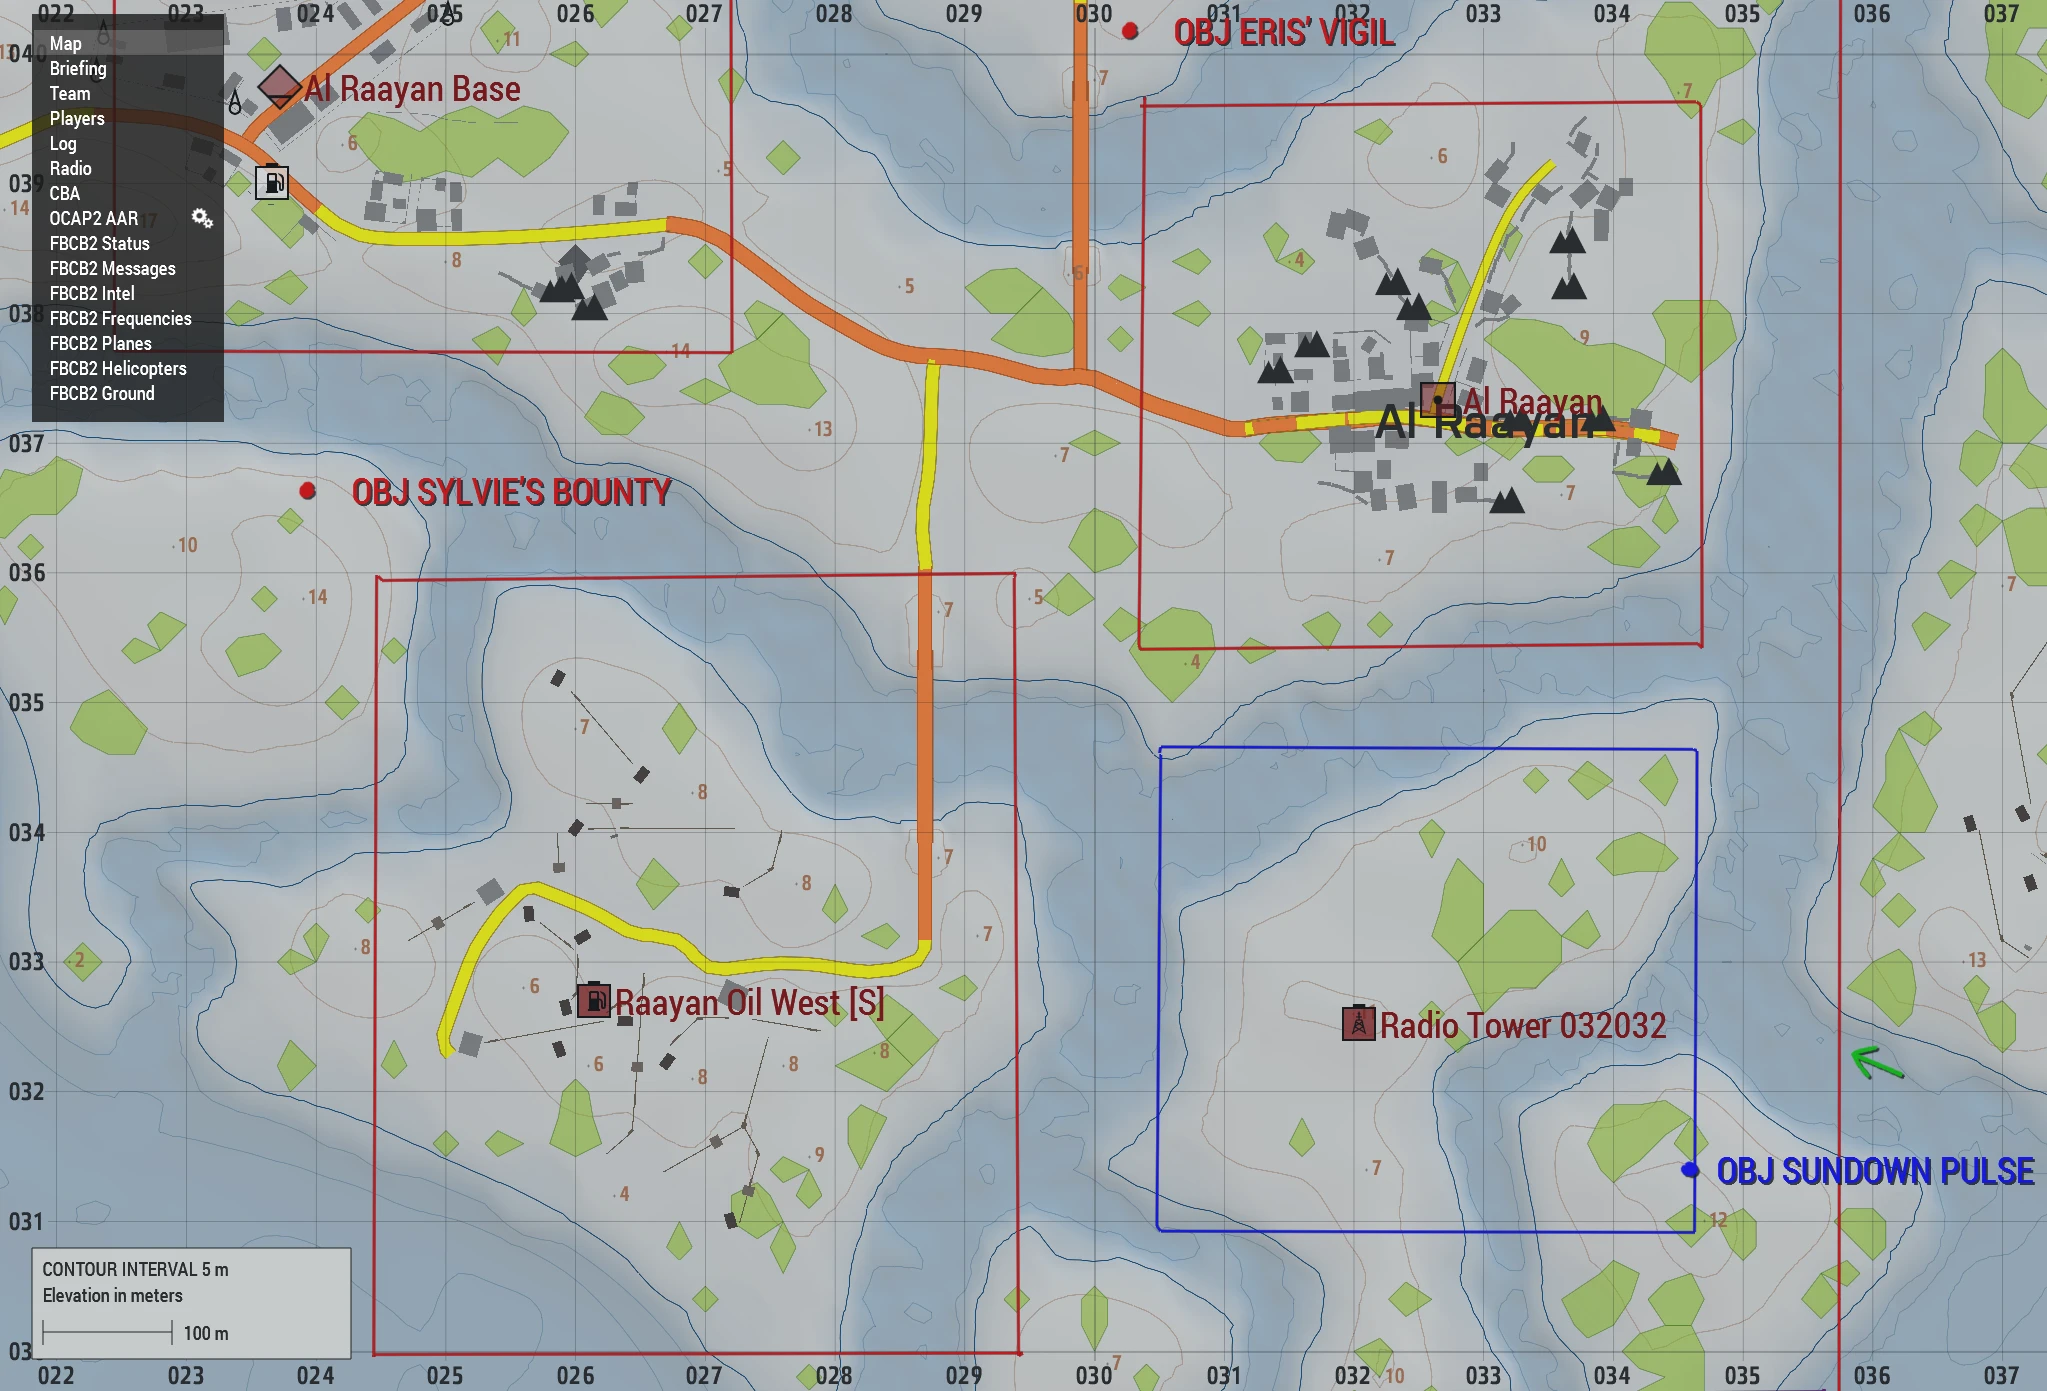
-
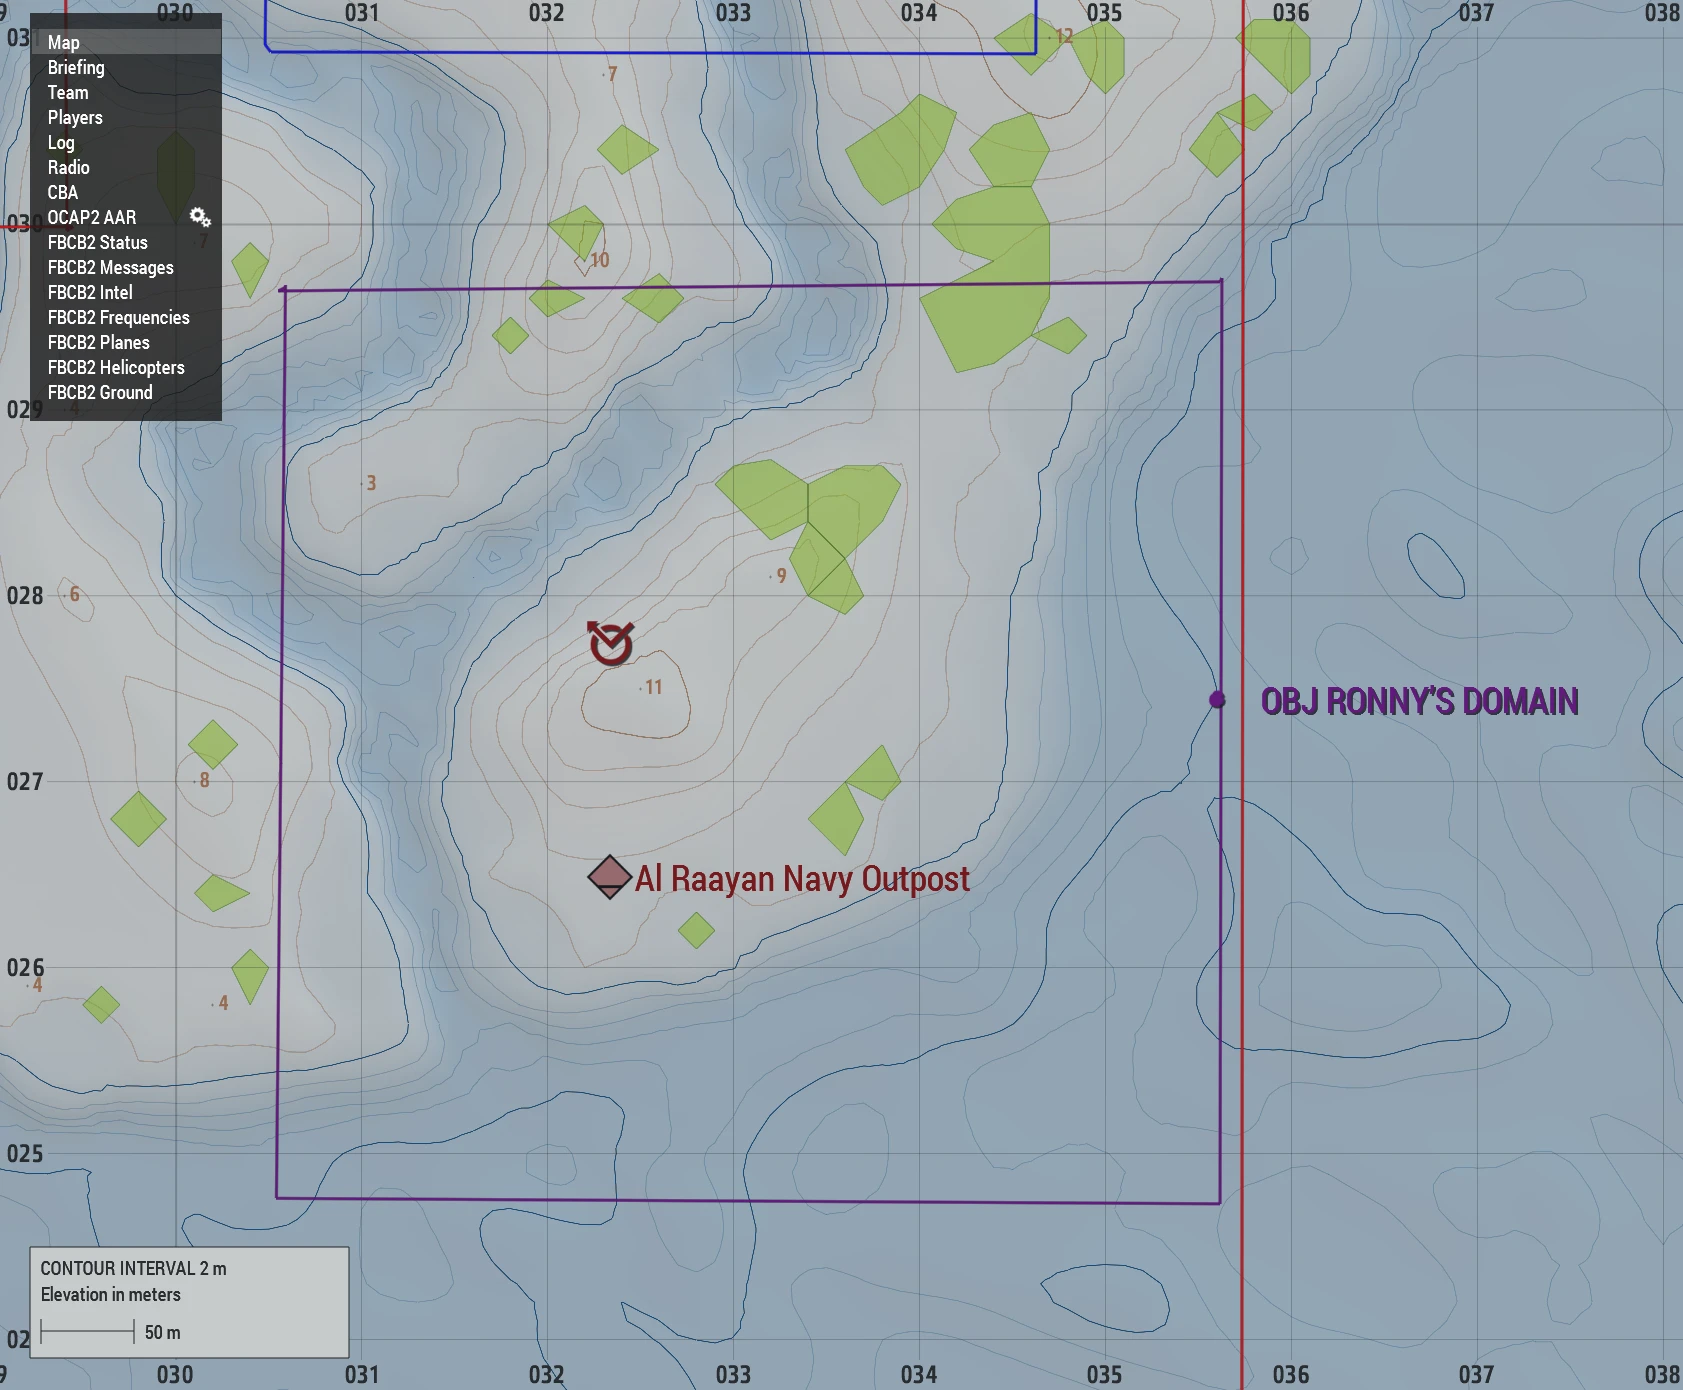
Phase VI: OBJ RONNY'S DOMAIN
- Secure the naval outpost to complete our control of the Delta and stage for the attack on the next OBJ
Phase VII: OBJ SKYFALL STATION
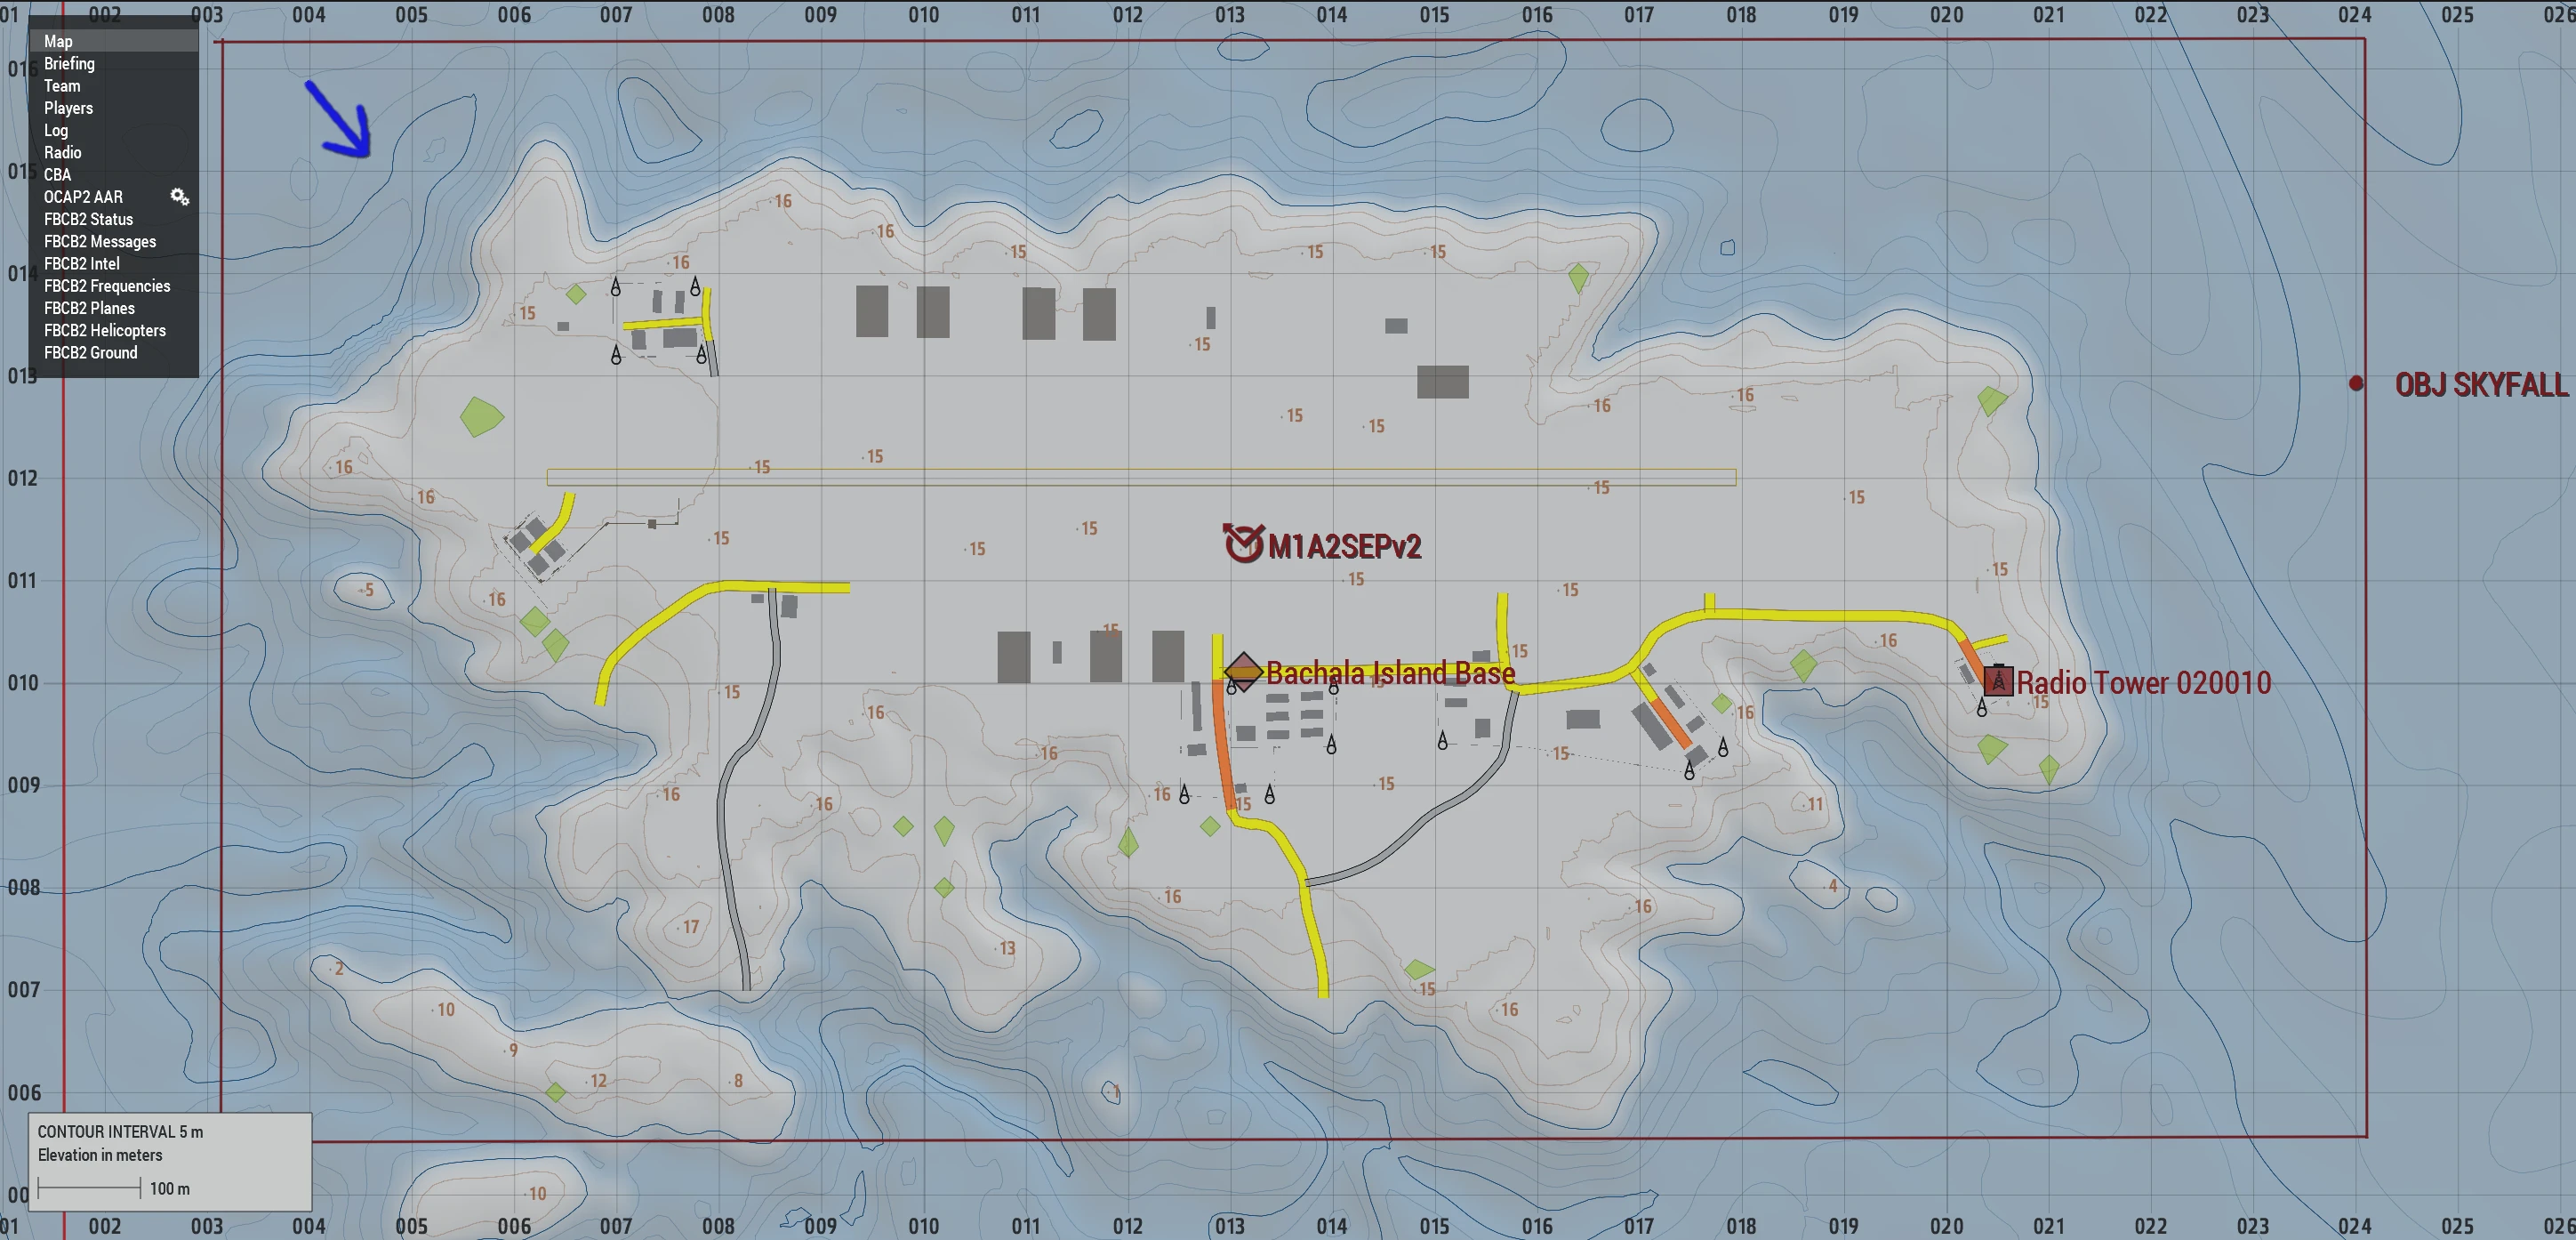
Phase VIII: RP/AAR
-
All units prepare for debrief.
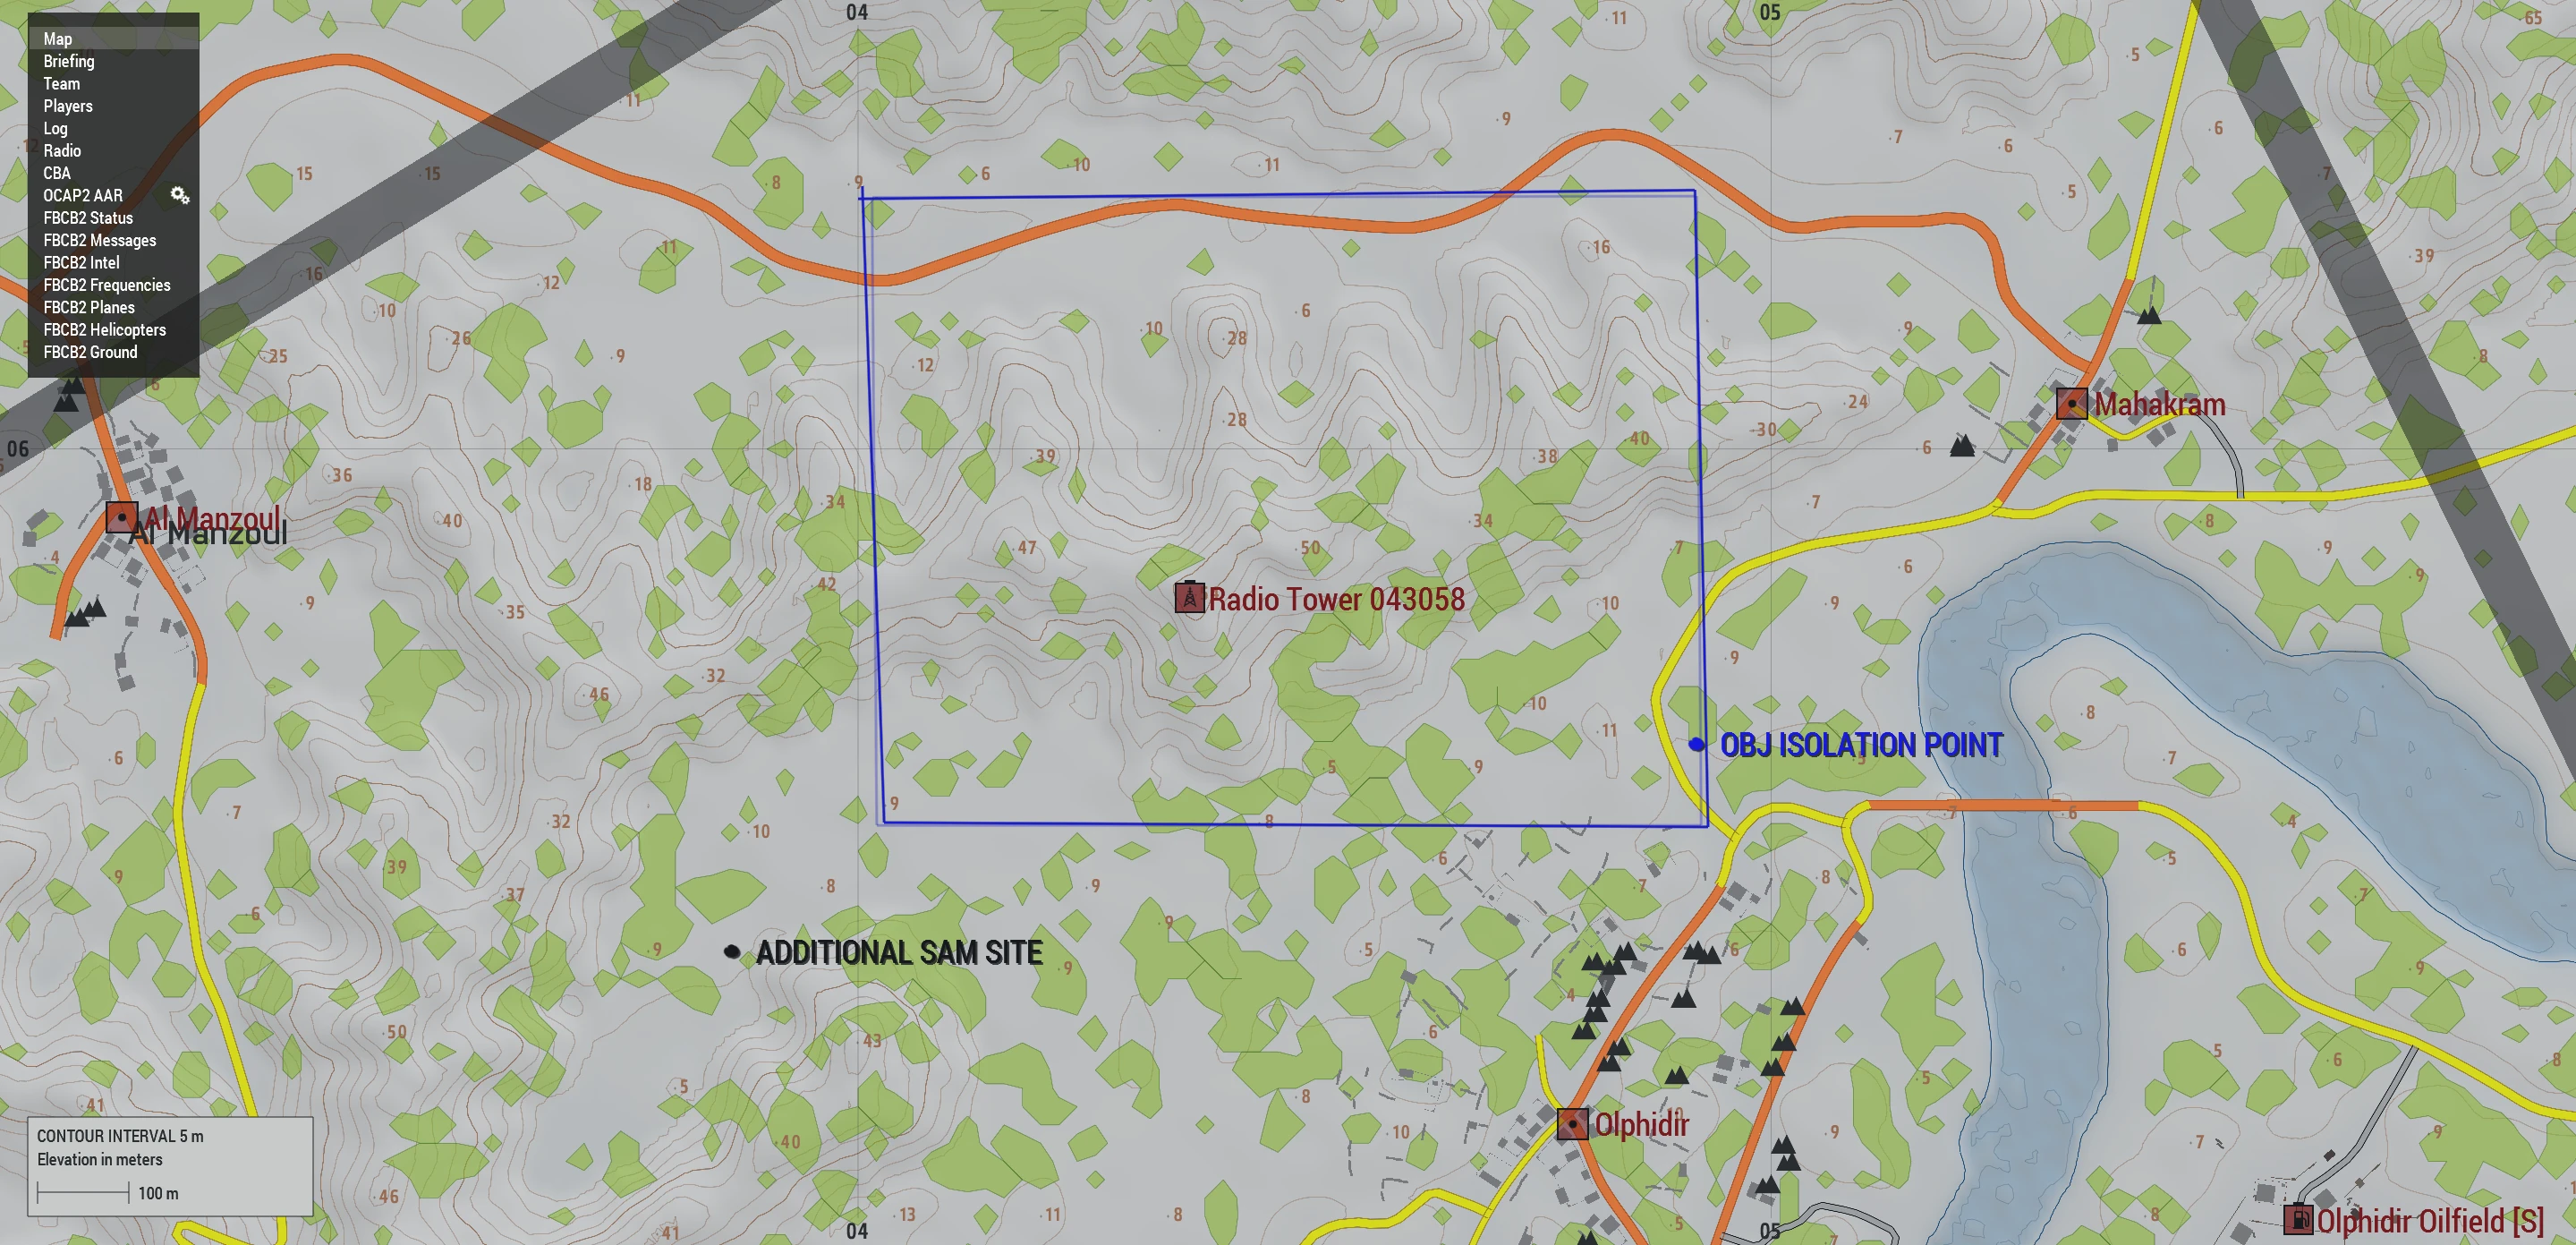
Imagery:
Timeline (in CST)
Command and Signal
Long Range Frequencies:
- Command 45
- RTO 45, 35
- Alpha Lead 40
- Flight Lead 45, 30
- Pilots 30, 35
- Echo Lead 45,80
- RRC 69
- Convoy 50
Nonverbal Coordination:
- Green: This is used to mark friendly positions on the field.
- Blue: Marking suitable locations for Landing Zones.
- Red: This is used for marking enemy positions for all units to reference.
- Yellow: This is used to inform friendly forces that Immediate medical support is needed.
- Purple: This color represents a friendly position with enemy units danger close, Anyone outside of 100 meters away from the smoke should be assumed hostile.
- Orange: This tells anyone in the air that a friendly unit is in desperate need of resupply.
Call signs for Supports:
{Placeholder}MH-6M Transport = "Apollo"
Ground
{Placeholder}M1165A1 Humvee = "Dagger"
M1132 Stryker = "Katana"
Badger IFV = "Rapier"
M2A3 Bradley = "Sabre"
M1A2 Abrams = "Claymore"
Rooikat 120 = "Gladius"
M142 HIMARS = "Halberd"
M109 Paladin = "Glaive"
Mk6 Mortar Team = "Hammer"
105mm Howitzer = “Mailman”
{Placeholder}MK.V SOC = "Poseidon"
RHIB = "Trident"
Available Assets:
{Placeholder}60mm Mortars