
Opord
Situation
With the GAF's air defenses and major fortifications taken out, the enemy is starting to get desperate. We have reports that a GAF and LSF officer will be holding a secret meeting with a Russian VDV officer at a nearby base. They are presumably making deals with the Devil in an attempt to maintain any control over the region. However, this has given us a golden opportunity swoop in and cut the head off of this snake.
Area of Operation (AO):
Forces in Play:
Opfor:
- Gorzovia Armed Forces (GAF)
- Livonia Separatist Militia (LSM)
Notes:
Enemy Air has been all but decimated
GAF and LSM are at their highest defensive postures, expect enemy reinforcements
Enemy special forces teams have been sighted operating in the AO
Blufor:
- 17th Ranger Battalion
- Livonia Defense Force (LDF)
- NATO
Greenfor:
- n/a
Engagement Criteria:
All civilians have evacuated the region, but damage to civilian infrastructure should be avoided where possible.
Mission:
The 17th has been tasked with taking out 3 key officers, extracting their bodies, and razing the base upon exfil.
Execution:
- Alpha and a RRC Sniper team will attack the enemy base via an Air Assault with echo support, including an armed Blackfish. (Note: A convoy may instead be conducted if we lack the pilots needed to perform an Air Assault)
- Alpha and the RRC team will locate, identify, and KILL all 3 HVTs
- After the base has been secured, Alpha will secure and bag the HVTs' bodies. Additionally, Alpha will wire as many demo blocks as they can throughout the base
- Once the body bags are secured, Alpha will exfil from the AO. During extract, all demo blocks will be detonated. Any structures that remain standing will be demolished by the armed Blackfish. Leave nothing standing.
Objectives:
- Raid enemy base via Air Assault
- Kill 3 HVTs (GAF, LSM, and VDV officers)
- Extract HVTs' bodies from AO (BRING BODY BAGS), and destroy base
CONOP:
-
Phase 0:
-
Phase I: Brief
-
Phase II: Prep
-
Phase III:
-
Phase IV:
-
Phase V:
-
Phase VI: RP/AAR
-
All units prepare for debrief.
-
Imagery:
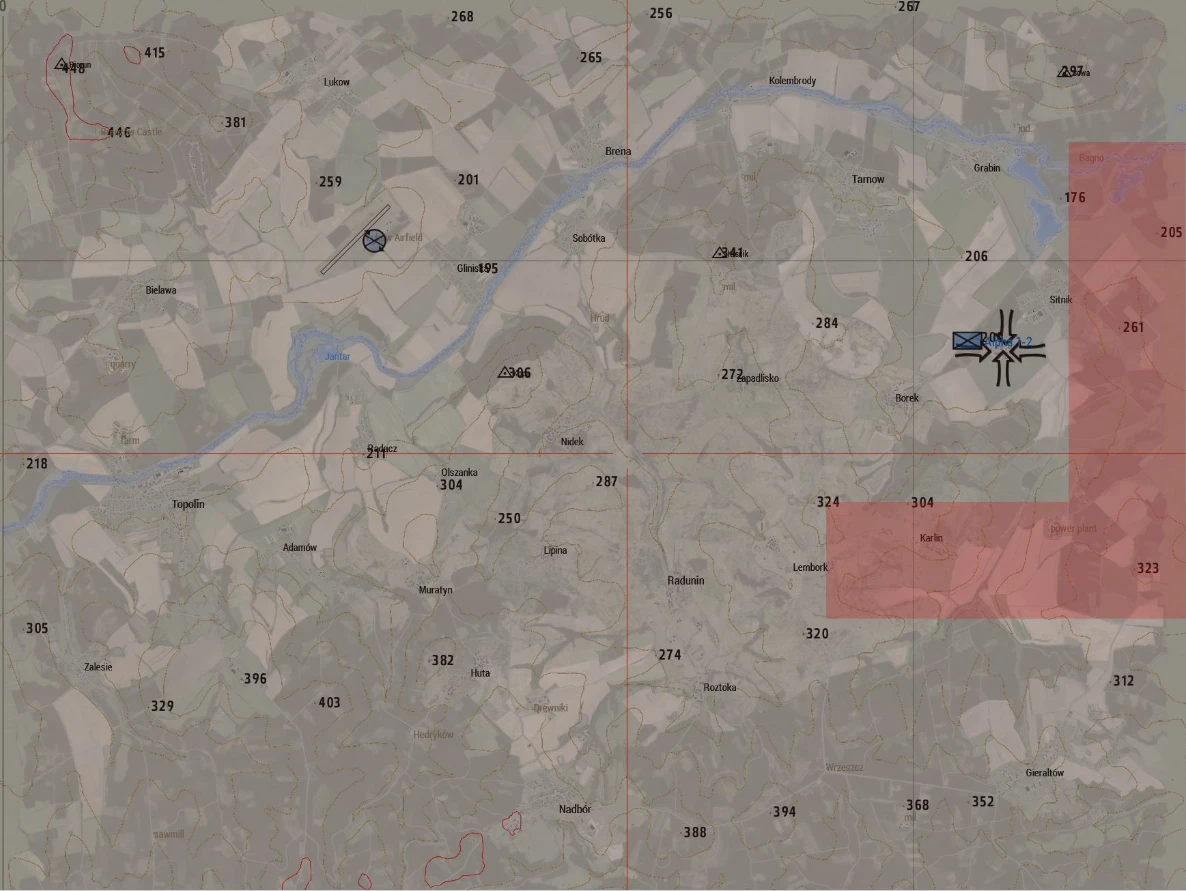
Map of relevant AO (red indicates No-Fly zone).

Aerial view of enemy base. Circled buildings indicate likely location of HVTs.
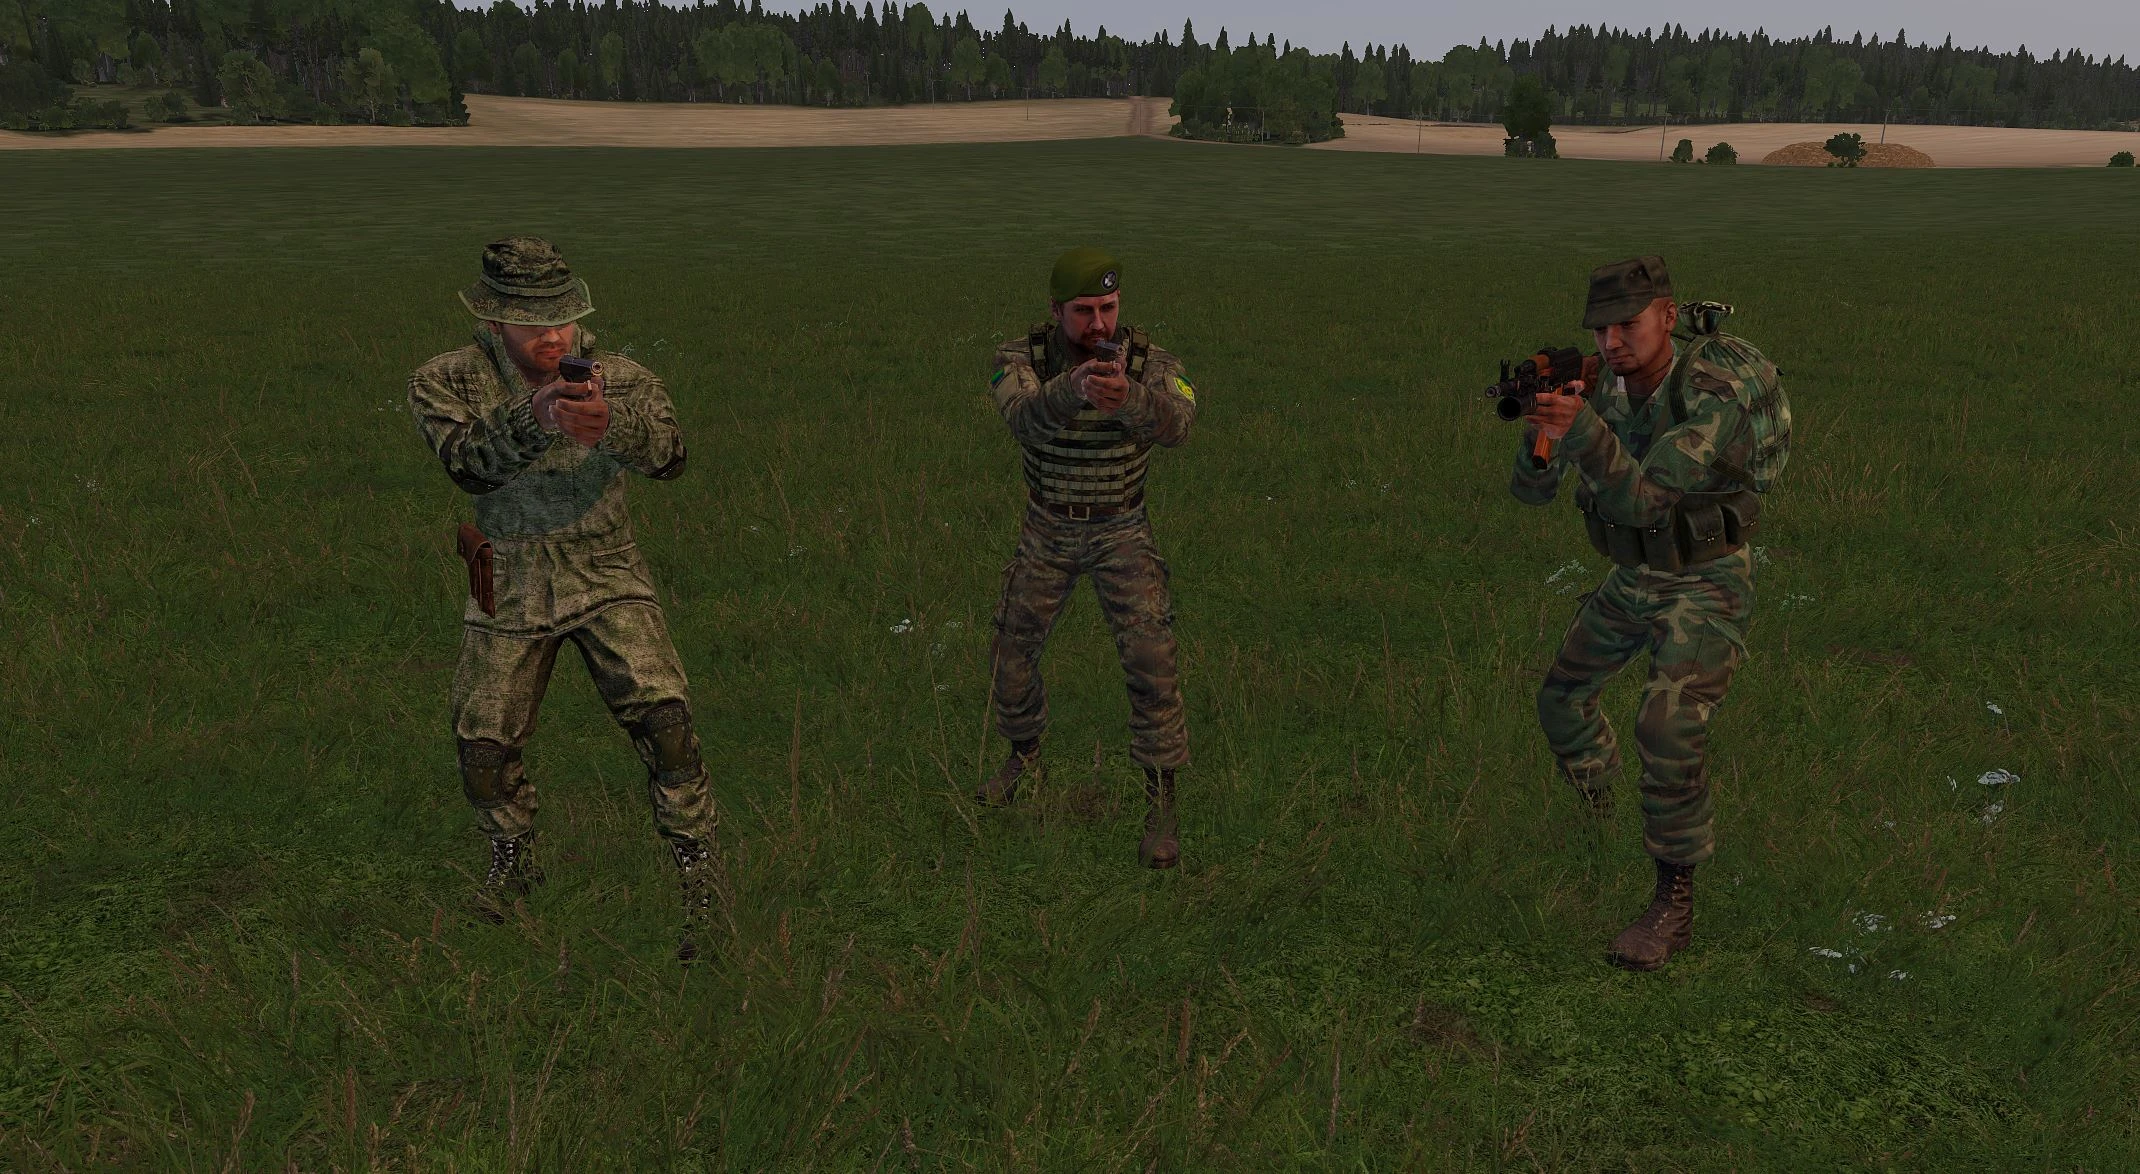
Image of HVTs.
Timeline (in CST)
Command and Signal
Long Range Frequencies:
- Command 45
- RTO 45, 35
- Alpha Lead 40
- Flight Lead 45, 30
- Pilots 30, 35
- Echo Lead 45,80
- RRC 69
- Convoy 50
Nonverbal Coordination:
- Green: This is used to mark friendly positions on the field.
- Blue: Marking suitable locations for Landing Zones.
- Red: This is used for marking enemy positions for all units to reference.
- Yellow: This is used to inform friendly forces that Immediate medical support is needed.
- Purple: This color represents a friendly position with enemy units danger close, Anyone outside of 100 meters away from the smoke should be assumed hostile.
- Orange: This tells anyone in the air that a friendly unit is in desperate need of resupply.
Call signs for Supports:
- MH-6M Transport = "Apollo"
- AH-6M Attack = "Artemis"
- OH-6M Scout = "Icarus"
- CH-47F Chinook = "Achilles"
- MH-60M (DAP) = "Hades"
- UH-60M Transport = "Griffin"
- UH-60M Medical = “Dustoff"
- Blackfish (support) = "Pegasus"
- Blackfish (attack) = "Chimera"
- AH-64D Apache = "Orion"
- A-10 Warthog = "Ares"
- A-29 Super Tucano = “Odyssey"
- C-17 Globemaster III = "Titan"
- C-130J Super Hercules = "Hercules"
- F/A - 181 = “Xerxes”
- AH-1Z Viper = "Athena"
- UH-1Y Venom = “Homer"
- CH-53E Super Stallion = "Atlas"
- M1165A1 Humvee = "Dagger"
- M1117 ASV = "Tanto"
- M1132 Stryker = "Katana"
- Badger IFV = "Rapier"
- M2A3 Bradley = "Sabre"
- M1A2 Abrams = "Claymore"
- Rooikat 120 = "Gladius"
- M142 HIMARS = "Halberd"
- M109 Paladin = "Glaive"
- Mk6 Mortar Team = "Hammer"
- 105mm Howitzer = “Mailman”
- MK.V SOC = "Poseidon"
- Speedboat Minigun = "Neptune"
- RHIB = "Trident"
Available Assets: