
Opord
Situation:
Following the defeat of the Norwegian forces on the island of Unije, the enemy launched a chemically loaded SCUD in a last ditch attempt to destroy friendly forces and sow terror among neighboring countries. The only remaining territory controlled by the enemy are the bases in the North West region. Friendly forces are to clear the bases and then hold against any potential counter attack.
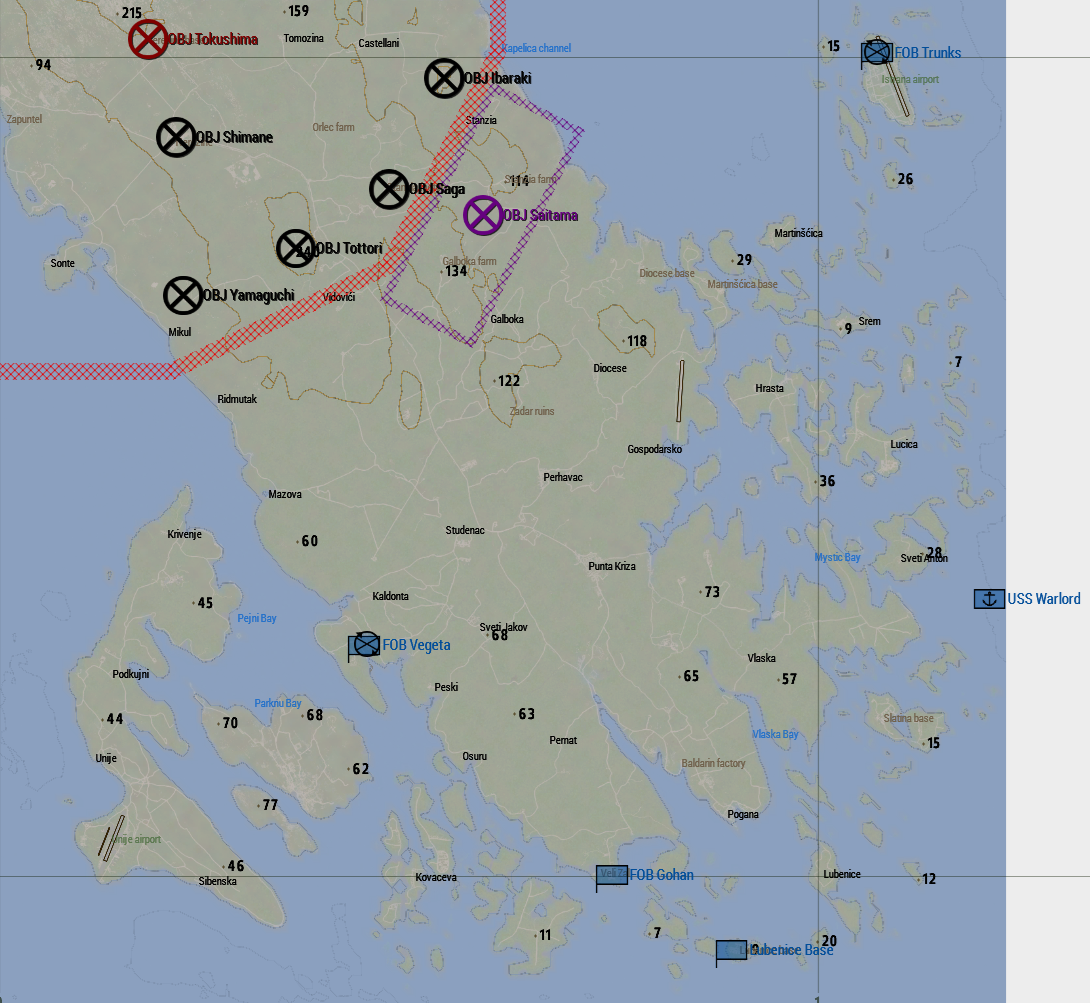
Area of Operation (AO):
Forces in Play:
OPFOR:
- Norwegian Army
- Norwegian Special Forces
Most likely Cause of Action:
- Friendly forces are able to clear out the enemy defensive front and hold back any reinforcements.
Most Deadly Course of Action:
- Norwegian forces hold strong, reinforce from the North and reclaim territory across Drakovac.
BLUFOR:
- 17th Ranger Battalion
- Division Schnelle Kräfte
- 9th Air Commando Group
Engagement Criteria:
- Open fire on any armed individuals. Stay aware of potential civilians in Nerezine.
Mission:
Execution:
RRC will insert via boats 1 hour before the main operation to clear any AA threats from OBJ Saitama. Alpha will perform a static line jump from FOB Trunks into this region once it has been cleared. Echo ground forces will drive vehicles from FOB Vegeta to provide support to individual squads.
Objectives:
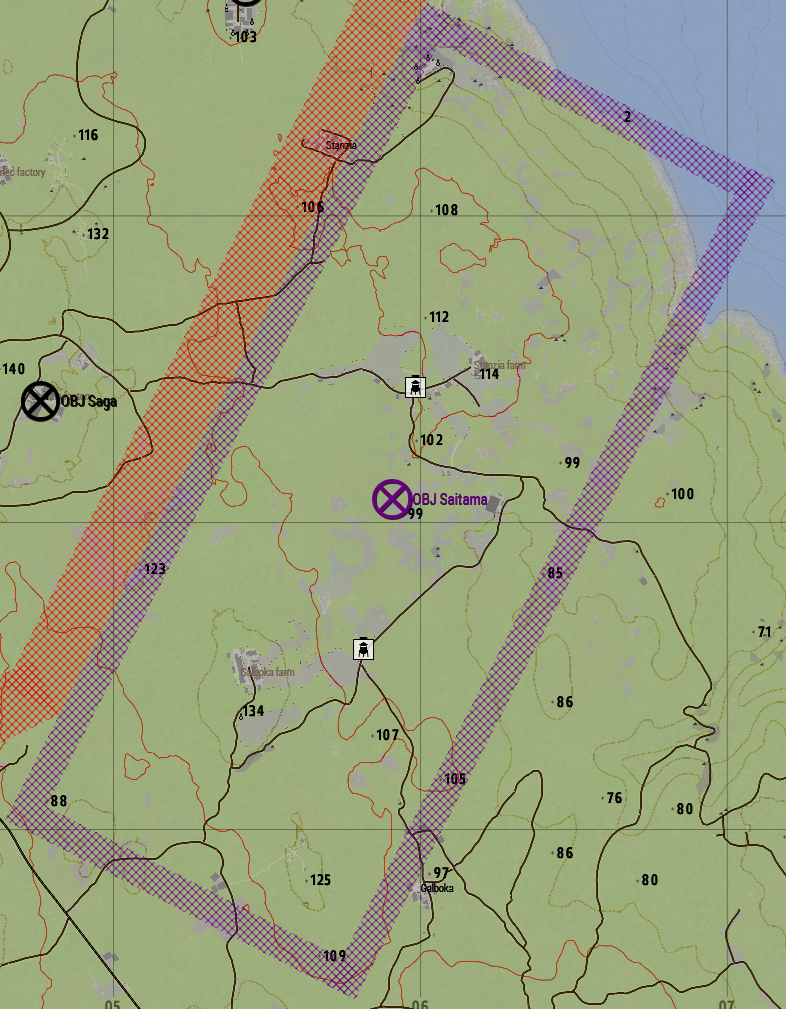
- OBJ Saitama (sigh-tah-mah)
- RRC team to insert via boat to search and destroy enemy AA.
- Likely located in or around the farms.
- RRC team to insert via boat to search and destroy enemy AA.
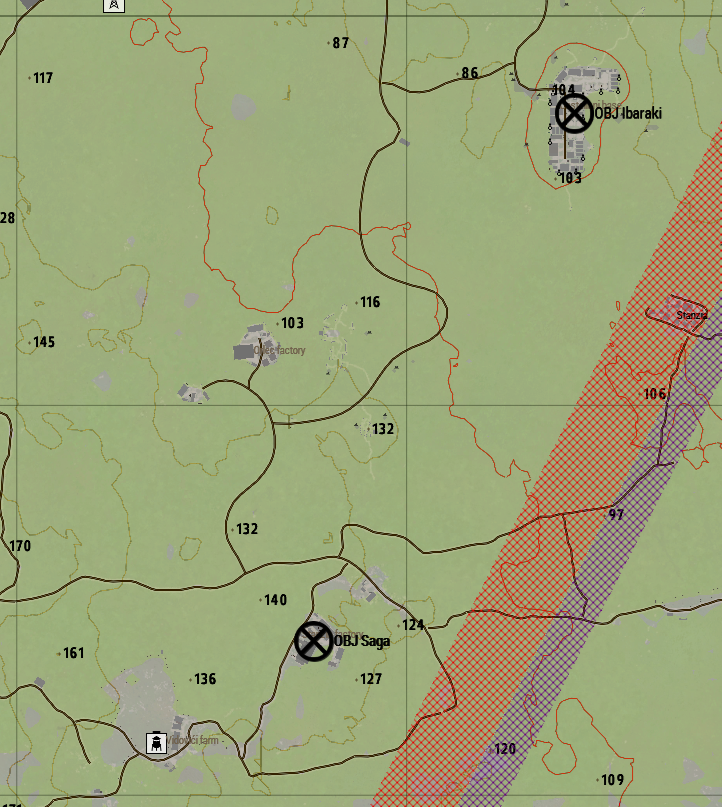
- OBJ Ibaraki (ee-bah-rah-kee)
- Clear all enemy forces.
- OBJ Saga (sah-gah)
- Clear all enemy forces.
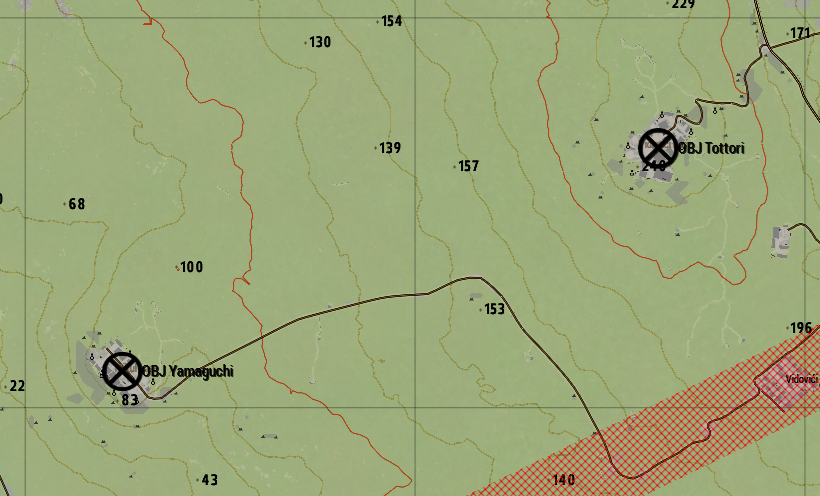
- OBJ Tottori (toh-toh-ree)
- Clear all enemy forces.
- OBJ Yamaguchi (yah-mah-goo-chee)
- Clear all enemy forces.
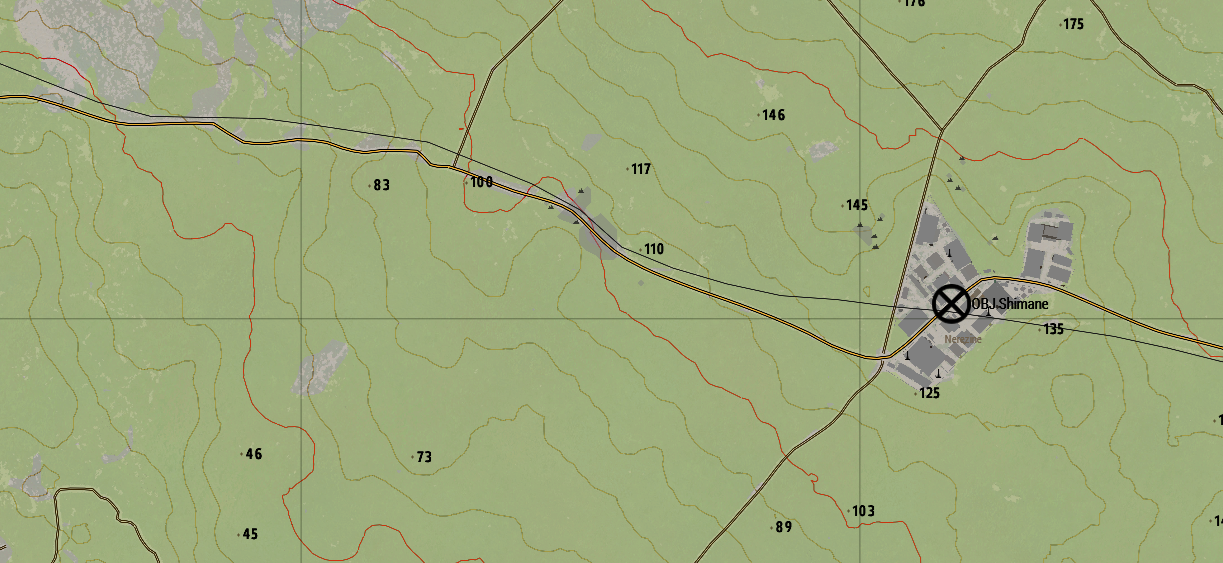
- OBJ Shimane (shih-mah-nay)
- Clear all enemy forces, aid any civilians and defend against any enemy reinforcements.
- Reinforcements are likely to approach along the MSR from the North West.
- Clear all enemy forces, aid any civilians and defend against any enemy reinforcements.
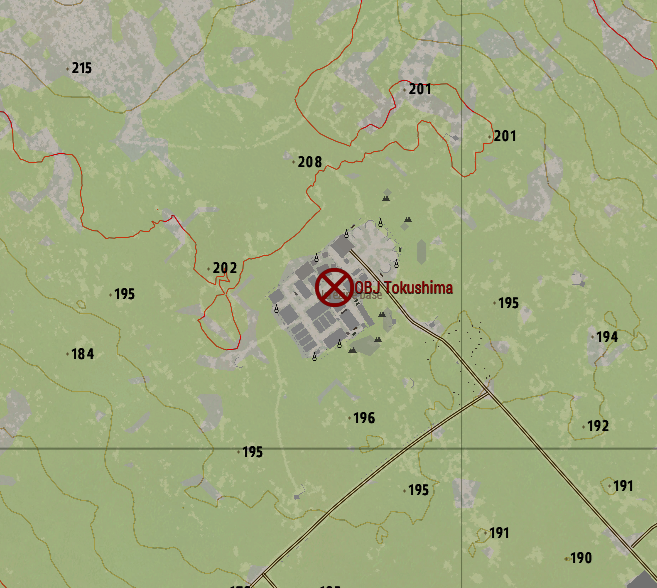
- OBJ Tokushima (toh-koo-shih-mah)
- Warlord and Oni, with the support of the USS Warlord, will use cruise missiles to destroy the majority of the base and then clear on foot.
CONOP:
-
Phase 0: OBJ Saitama
-
RRC deploy and report in once OBJ Saitama is cleared of enemy AA.
-
-
Phase I: Brief
-
Final loadout checks.
-
-
Phase II: Prep
-
Cover static line jumping, jump master assign numbers. Stress steerable parachutes.
-
-
Phase III: OBJ Ibaraki -> OBJ Saga
-
Both bases to be cleared of enemy forces. Transport between objectives at the discretion of Alpha CO and Echo CO.
-
Resupply following OBJ Saga. Bring axes, it's all forest.
-
-
-
Phase IV: OBJ Tottori -> OBJ Yamaguchi
-
Both bases to be cleared of enemy forces. Transport between objectives at the discretion of Alpha CO and Echo CO.
-
Resupply following OBJ Yamaguchi. Bring axes, it's all forest.
-
-
-
Phase V: OBJ Shimane & OBJ Tokushima
-
OBJ Shimane: Majority of battalion.
-
Clear the industrial town of Nerezine, check for civilians in need and hold back enemy reinforcements.
-
-
OBJ Tokushima: Warlord & Oni.
-
Perform cruise missile strikes on Nerezine Base. Final clear on foot.
-
-
-
Phase VI: RP/AAR
-
All units prepare for debrief.
-
Imagery:
OBJ Saitama
OBJ Ibaraki & OBJ Saga
OBJ Tottori & OBJ Yamaguchi
OBJ Shimane
OBJ Tokushima
Timeline (in CST):
5:45pm: RRC join an kit up.
6:00pm: RRC Start.
6:45pm: Organize units, and kit up.
7:00pm: Operation Brief.
7:15pm: Operation Start.
10:30pm: All OBJ cleared, prepare for AAR.
Command and Signal:
Long Range Frequencies:
- Refer to the Commo Card.
Nonverbal Coordination:
- Green: This is used to mark friendly positions on the field.
- Blue: Marking suitable locations for Landing Zones.
- Red: This is used for marking enemy positions for all units to reference.
- Yellow: This is used to inform friendly forces that Immediate medical support is needed.
- Orange: This tells anyone in the air that a friendly unit is in desperate need of resupply.
- Purple: This color represents a friendly position with enemy units danger close.
- Anyone outside of 100 meters away from the smoke should be assumed hostile.
Available Assets:
Ground:
- 6 x M1283 (M2/Javelin)
- 6 x M2A3 (BUSK III)
- 2 x Wiesel 2 (ATGM)
- 4 x M1097A2 (2D/Half)
- 3 x M1078A1R SOV (M2)
- 2 x M1239 AUV Deploy (CROWS/M2)
Naval:
- 4 x RHIB (Unarmed)
- 1 x USS Warlord (Mk41 VLS)
Air:
- 1 x C-130J
- 2 x AH-1Z
- 6 x AH-6M Little Bird Vsqz
- 4 x MH-6M Little Bird
- 8 x MH-60M (Insertion)
- 1 x MQ-9 Reaper