
Opord
Situation
Intelligence reports indicate that Fallujah is currently held by enemy insurgents and the Iraqi MIlitary. They are well-entrenched and heavily fortified in key positions throughout the city. There are likely a mix of IEDs, RPG teams, sniper nests, APCs, IFVs, older Soviet era tanks and heavy machine gun emplacements around major intersections and government buildings. Expect heavy resistance in the city center and the surrounding industrial zones. The enemy forces are entrenched in defensive positions, but they lack the coordination and logistics to effectively conduct a prolonged defense.
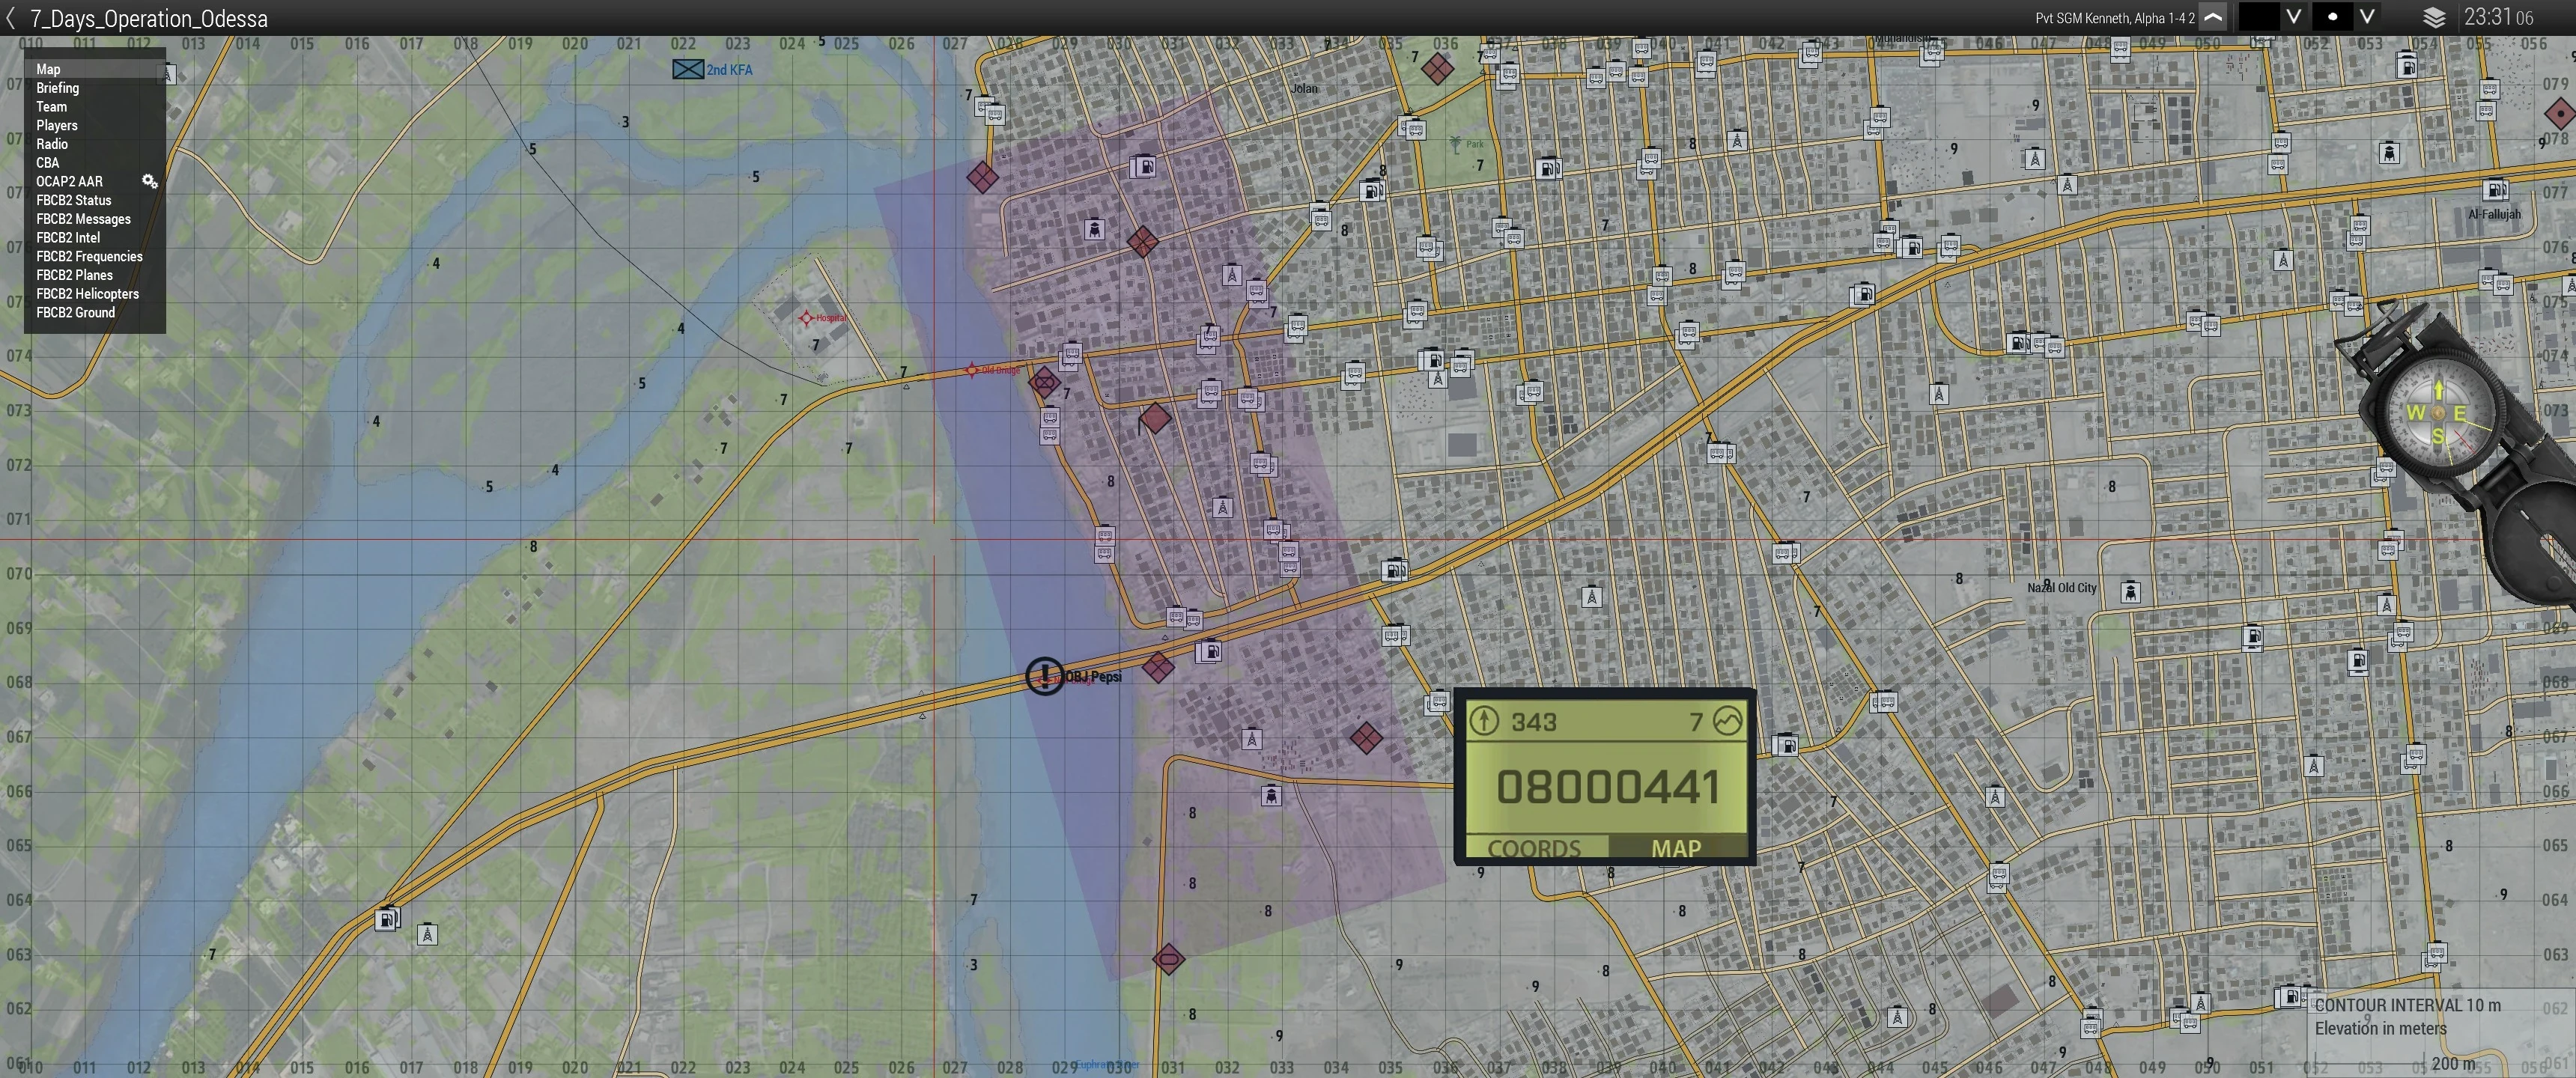
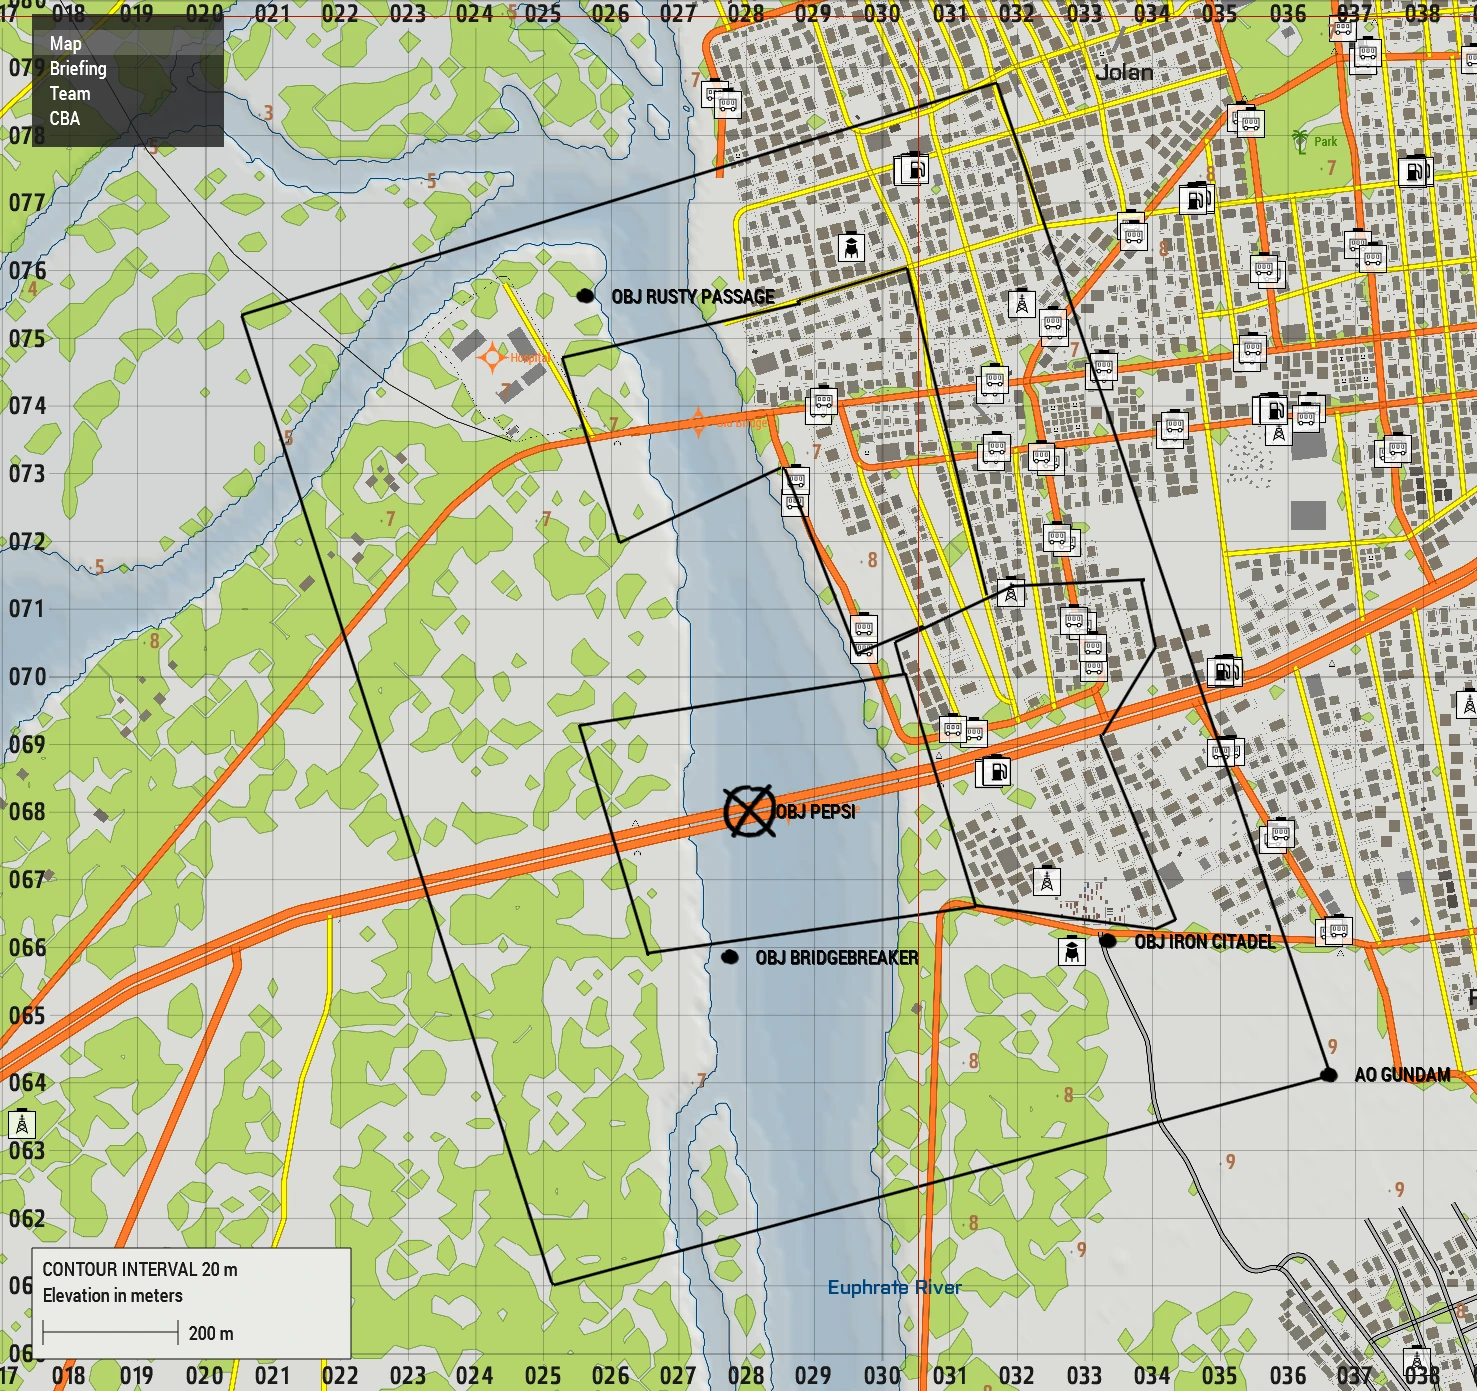
Area of Operation (AO):
Forces in Play:
Opfor:
- Various Insurgent Groups (3CB MIddle eastern insurgents/MIlitia)
- Iraqi MIlitary (3CB Takistan Army)
Most Likely Course of Action:
Defense in place and ensure no BLUFOR crosses the Euphrates.
Most Deadly Course of Action:
Counterattack the BLUFOR staging areas and push them away from the city.
Civilian Considerations:
Leaflets have been dropped, 90% of civilians have evacuated. They are present so check fire.
Blufor:
- Taskforce Tekashi
- RCT 6 (RHS USMC)
- RCT 9 (RHS USMC)
- 1st Recon BN (RHS SOCOM)
- Kurdish Freedom Alliance (3CB Kargizstan Royal Gaurd)
- Taskforce Gundam
- 17th Ranger Battalion
- 3ID (RHS US ARMY D)
- ZEON(PSI)
Greenfor:
- n/a
Engagement Criteria:
Engage any armed individual.
Mission:
Execution:
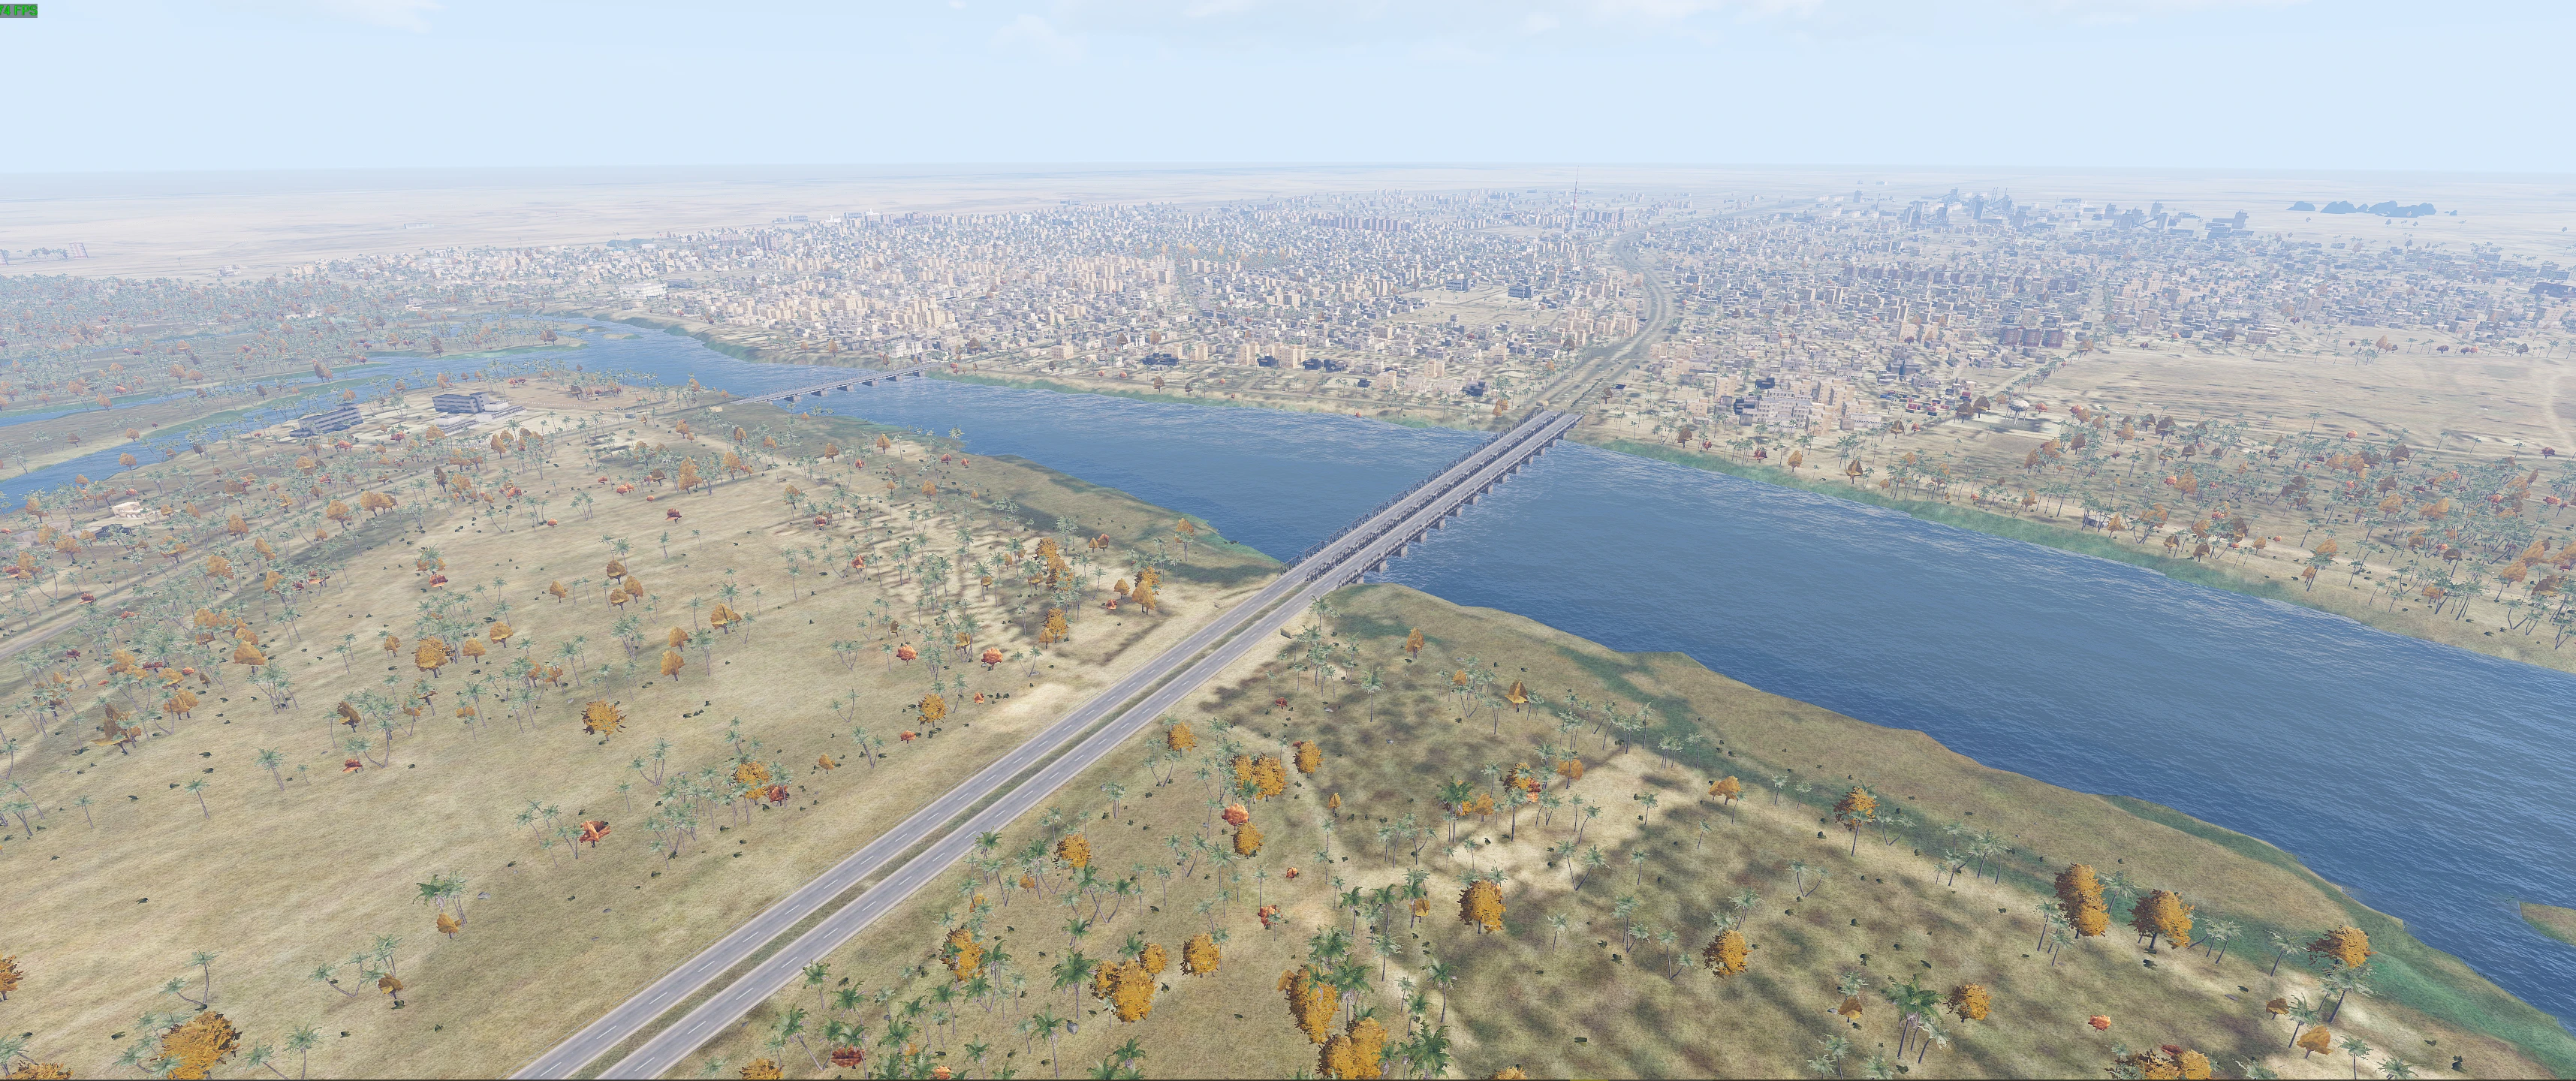
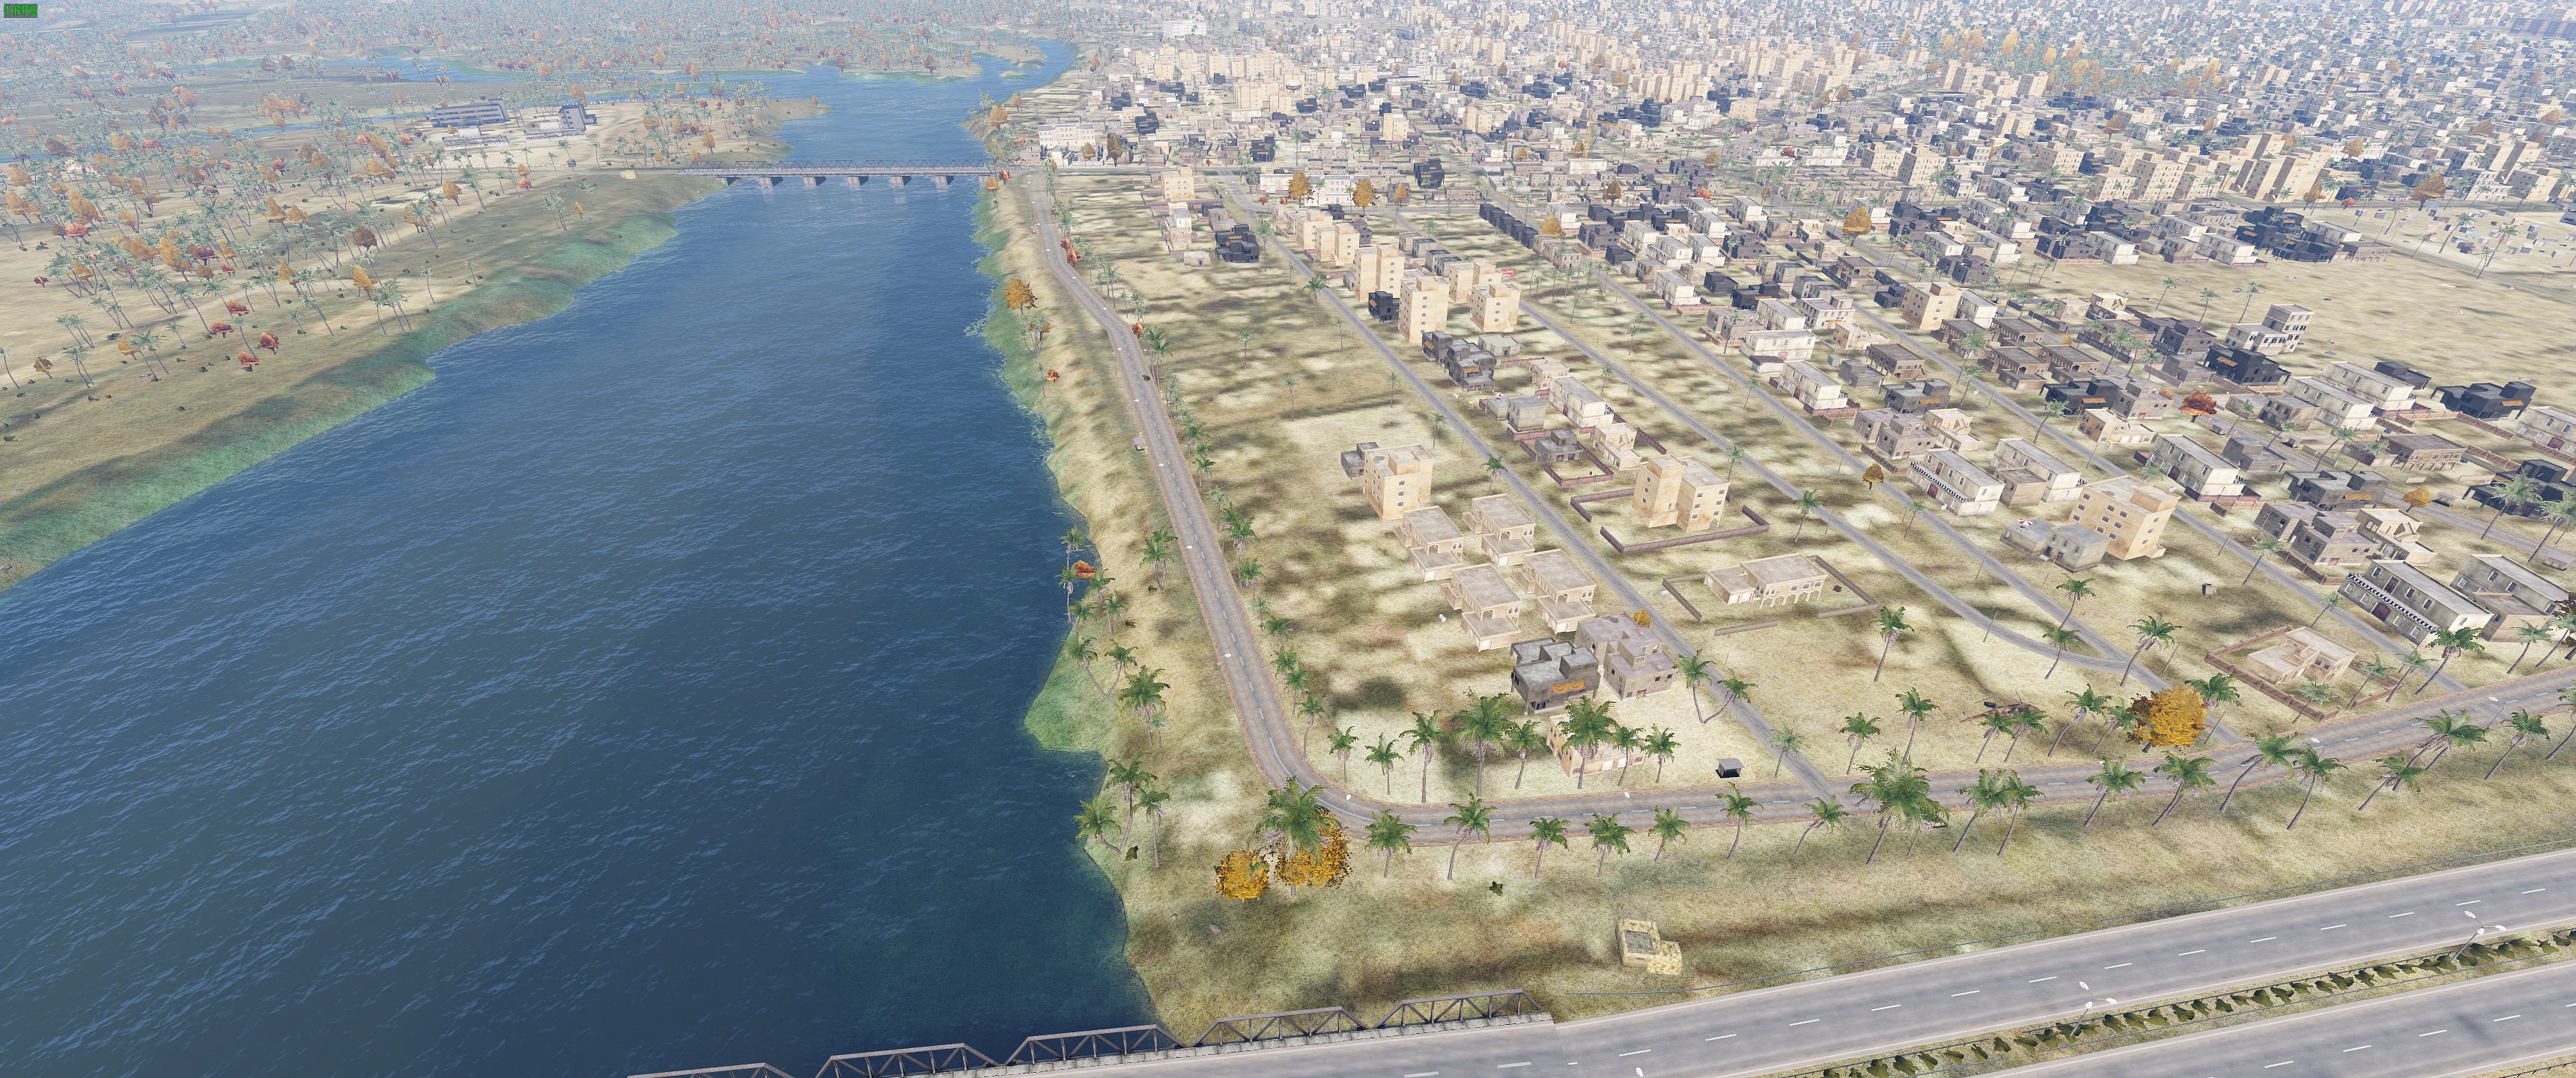
This operation will involve a coordinated mechanized assault across the Euphrates River into the city of Fallujah. The primary goal is to seize key crossing points, neutralize enemy resistance, and secure terrain for subsequent urban operations. Mechanized forces will be used to ensure rapid mobility, firepower, and battlefield dominance. The operation will be conducted in multiple phases, with the first phase focusing on river crossing, followed by securing the city’s outskirts and preparing for urban warfare inside Fallujah. This is the opening move in a prolonged rooting out of Iraqi forces and insurgents.
Objectives:
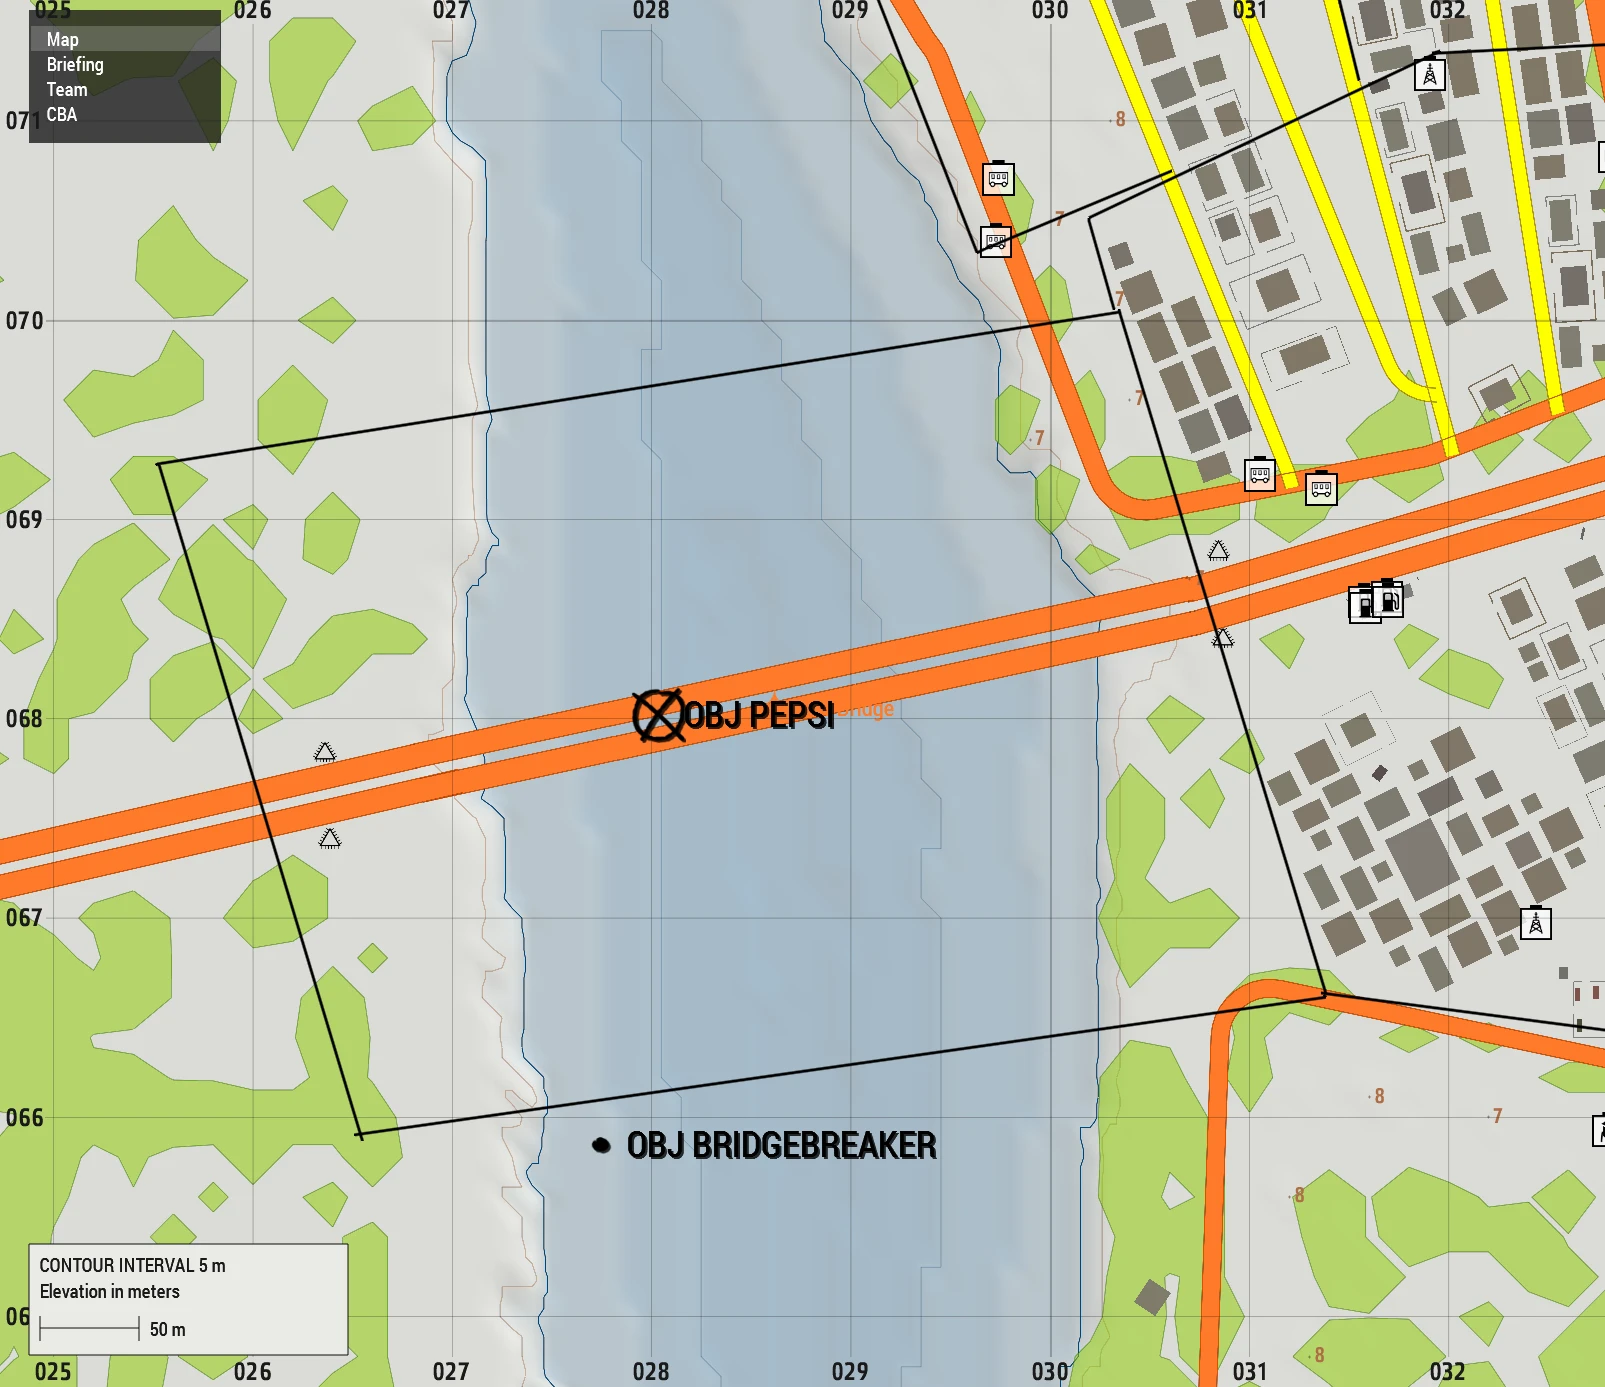
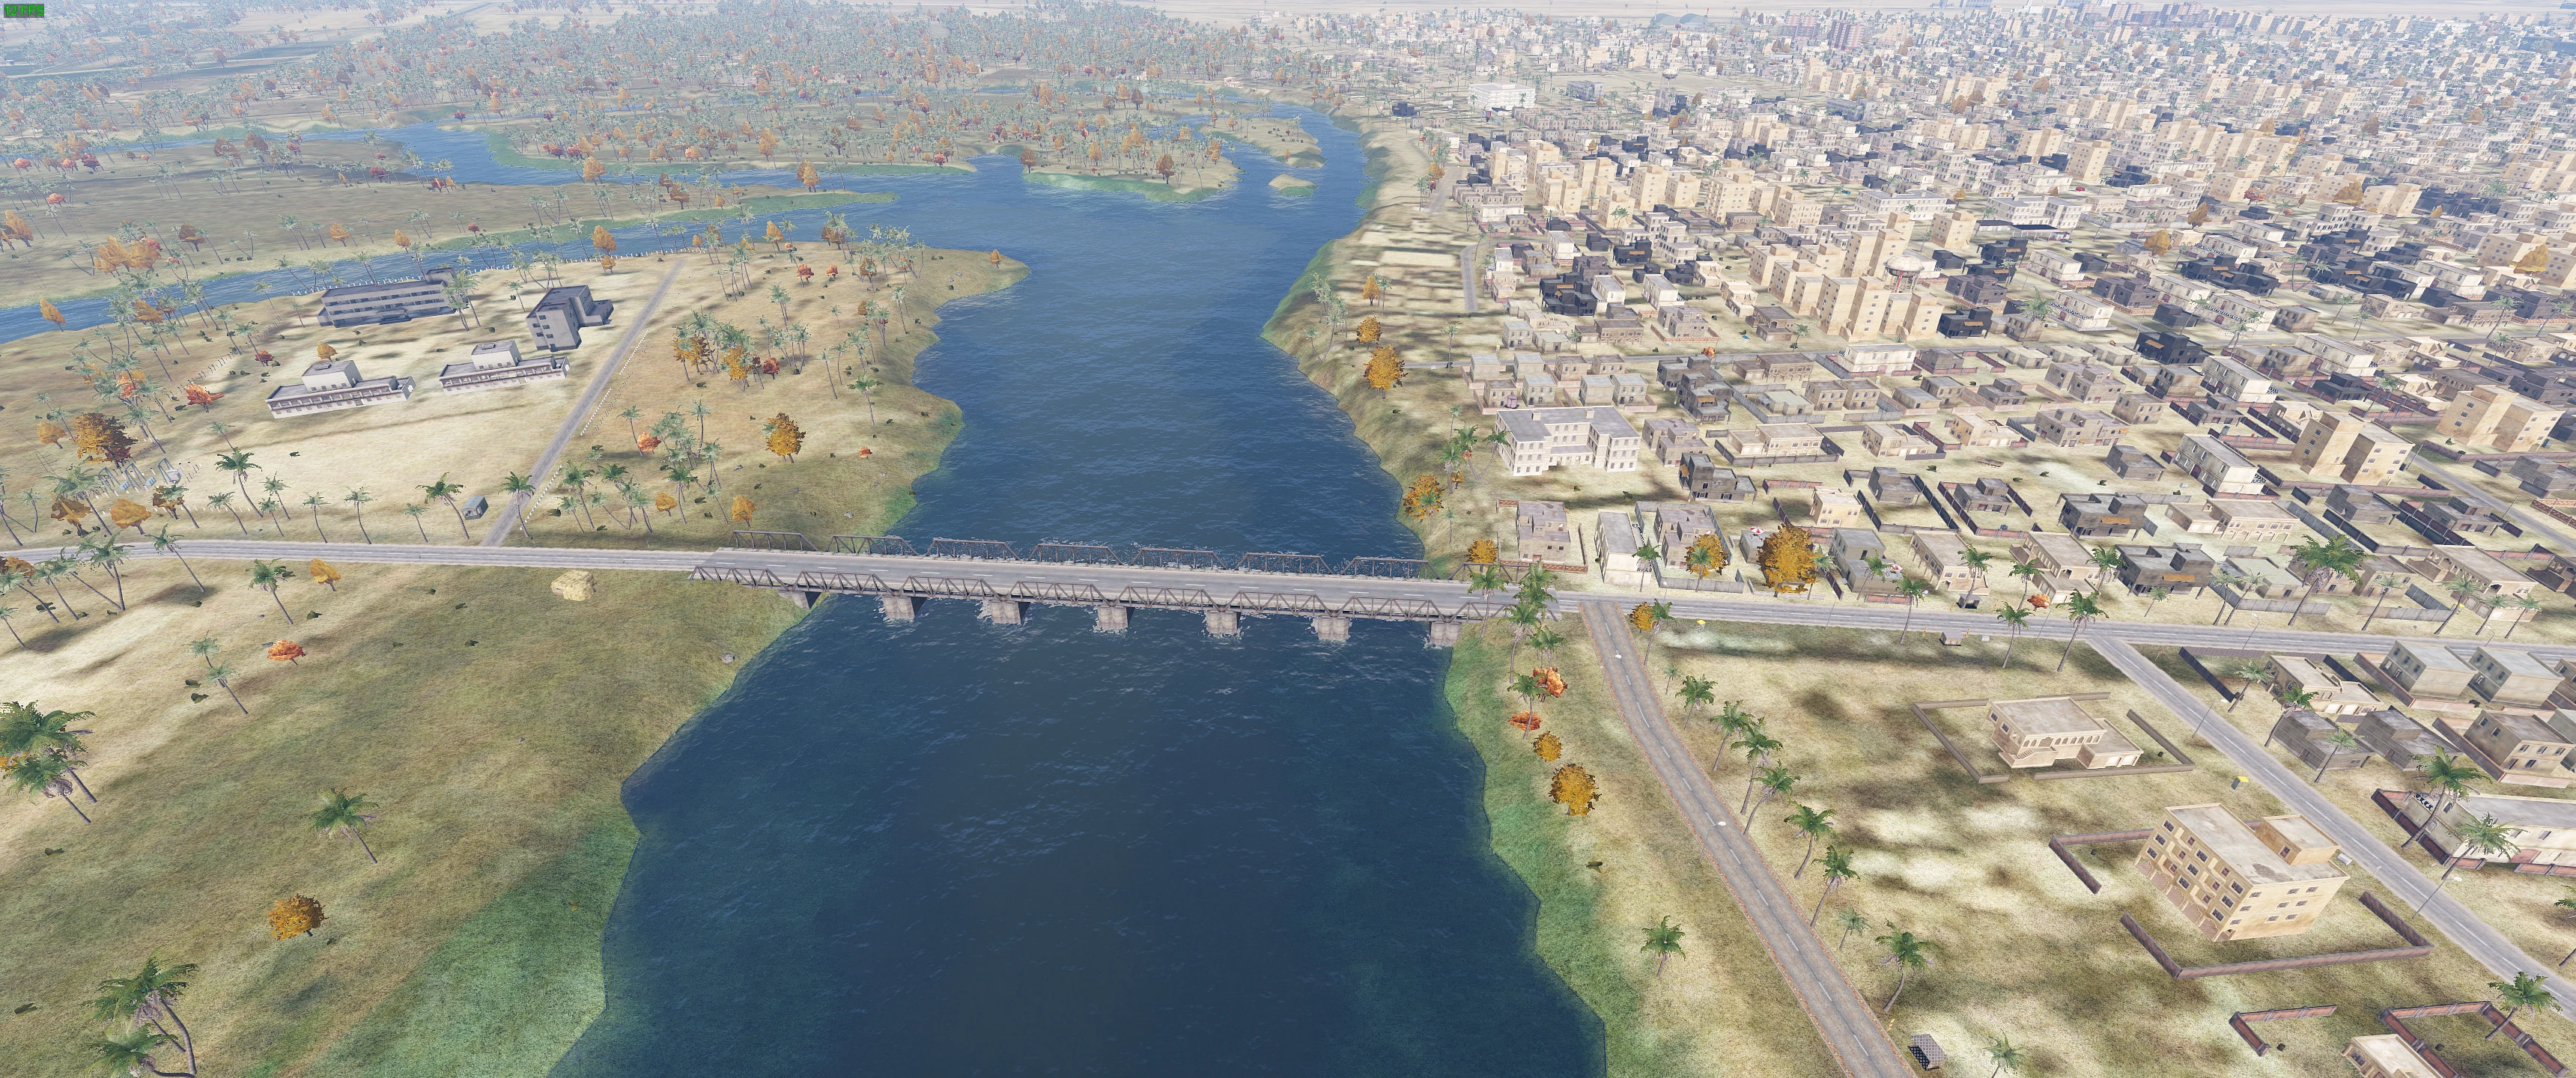
- OBJ BRIDGEBREAKER/PEPSI

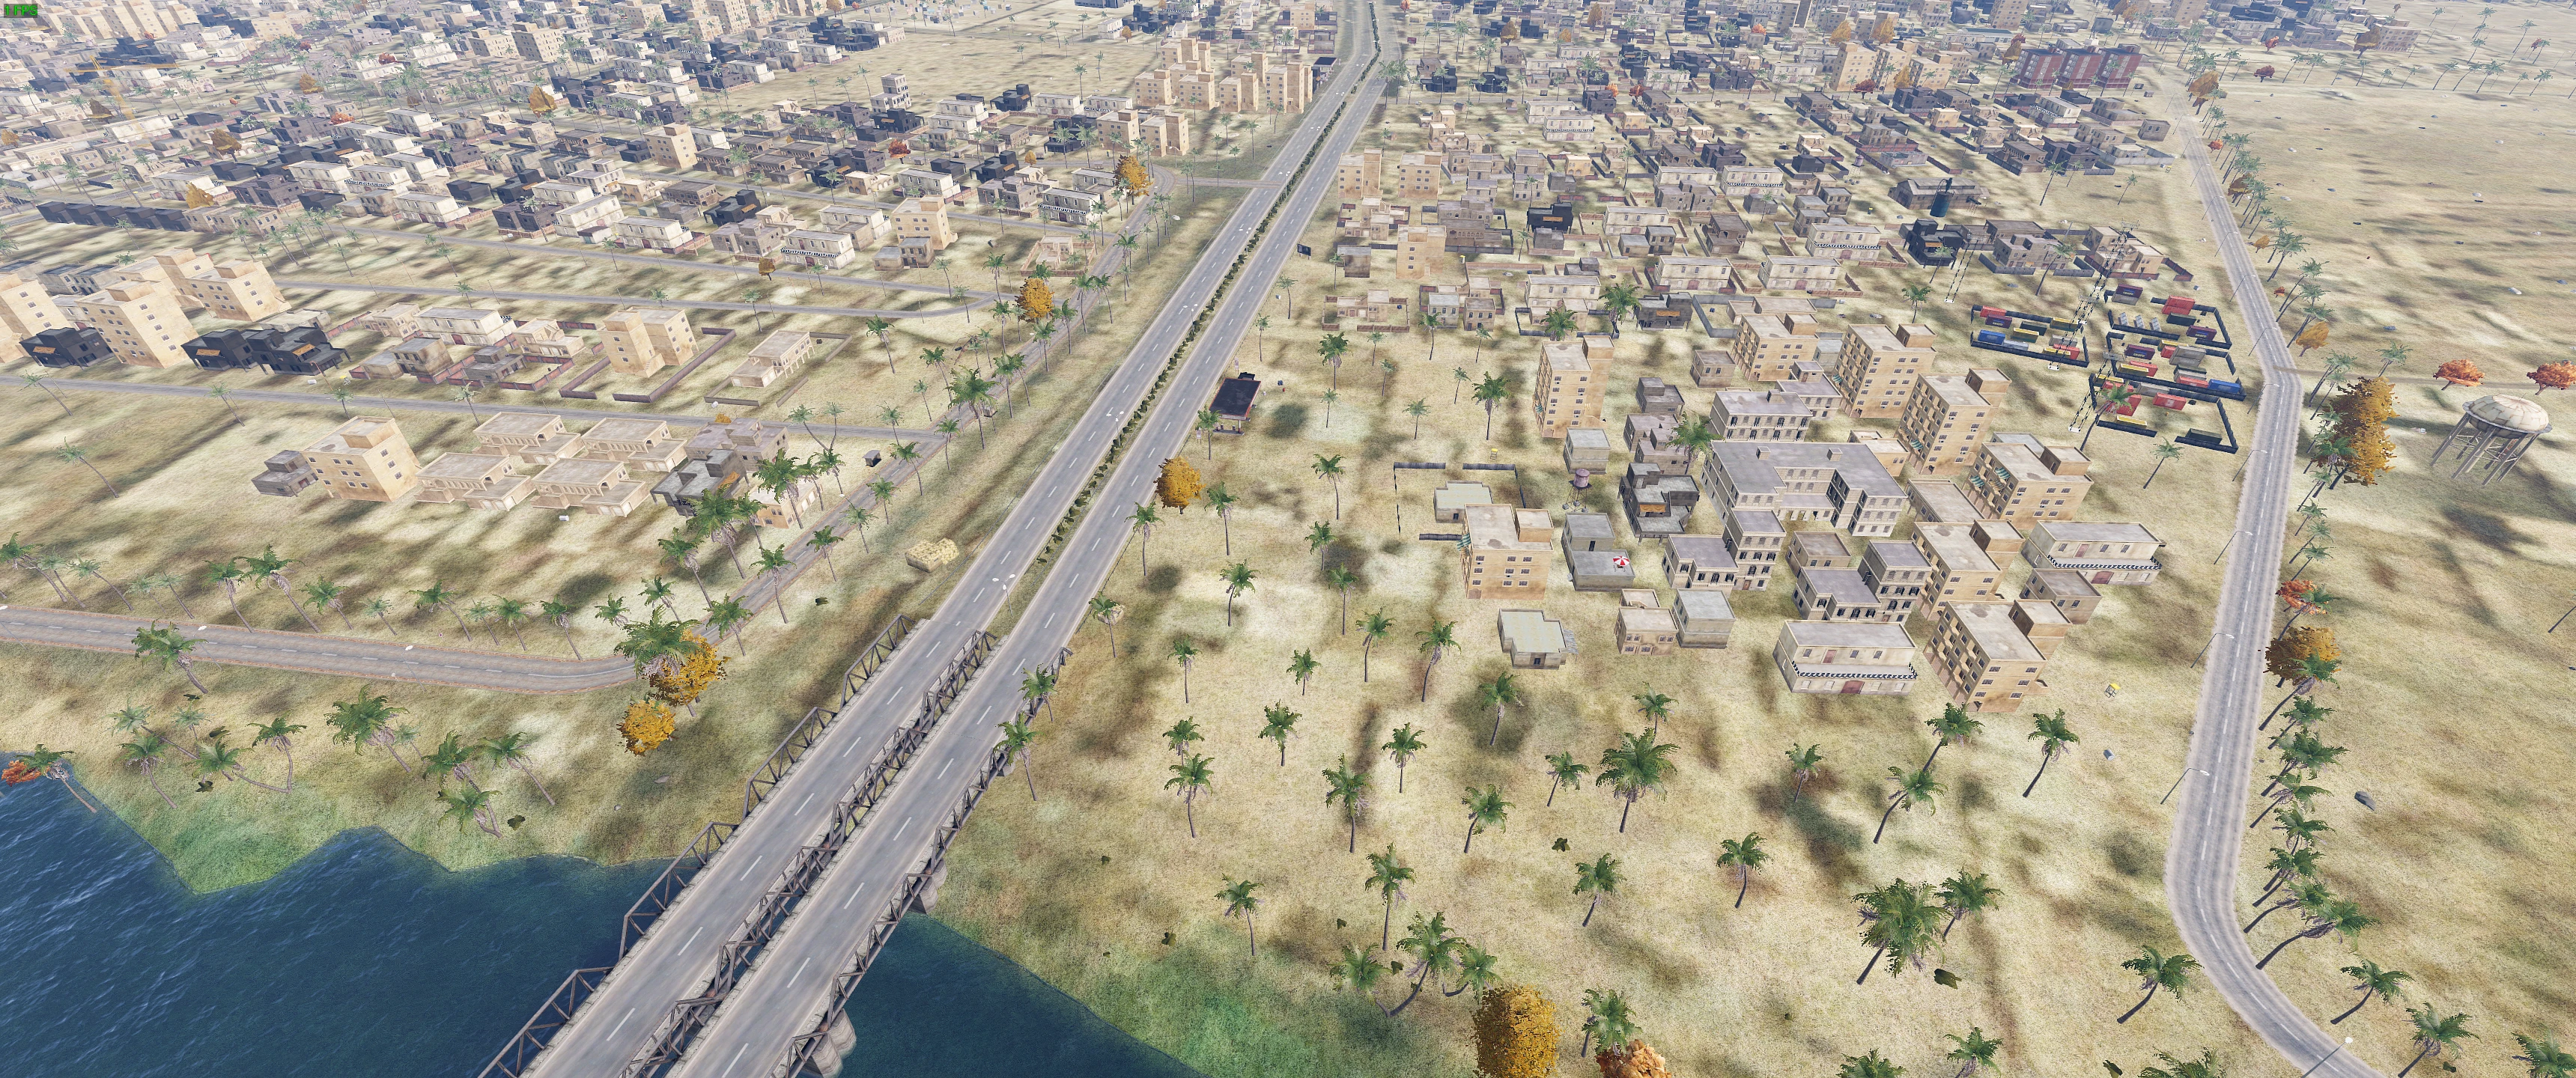
OBJ PEPSI seen within the area of OBJ BRIDGEBREAKER from the West. Expect fortifications on both sides
-
- Capture the bridge intact and flush out the enemy from their emplacements
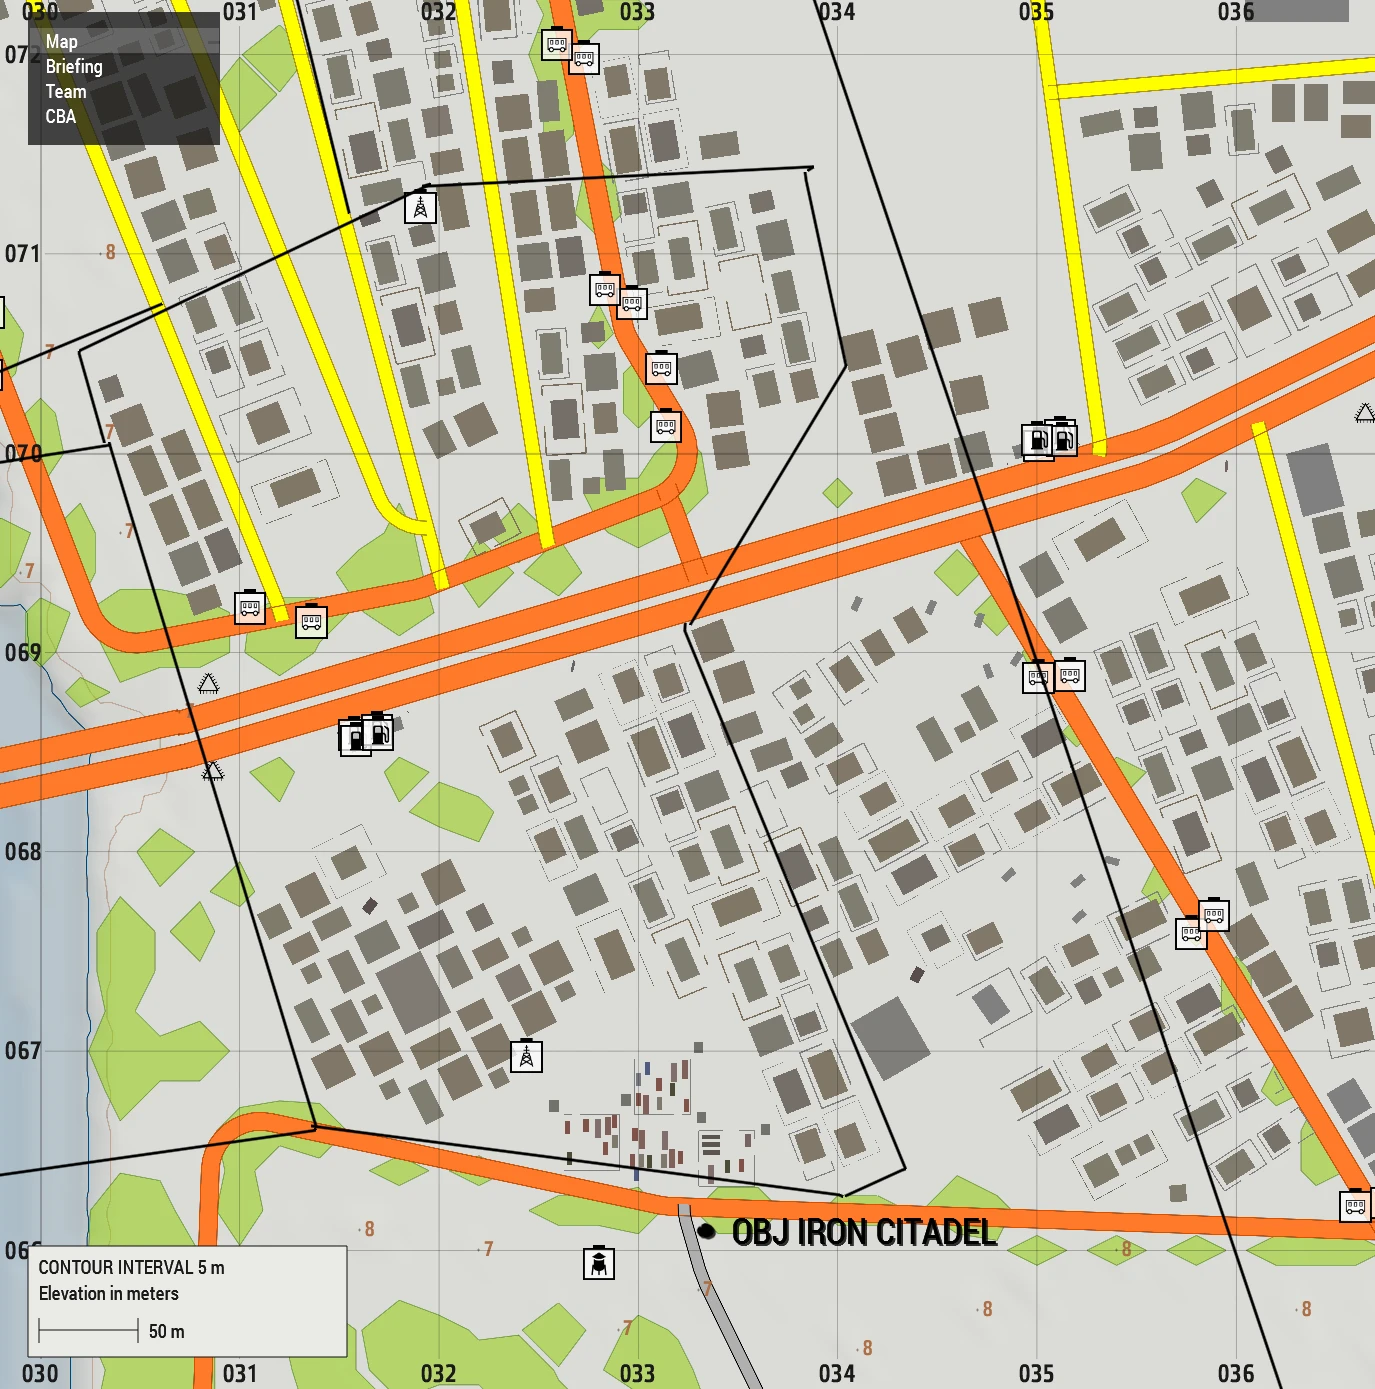
- OBJ IRON CITADEL
The immediate area on the East Bank is to be secured to allow armor to cross
-
- Establish a bubble of secure territory around the bridgehead
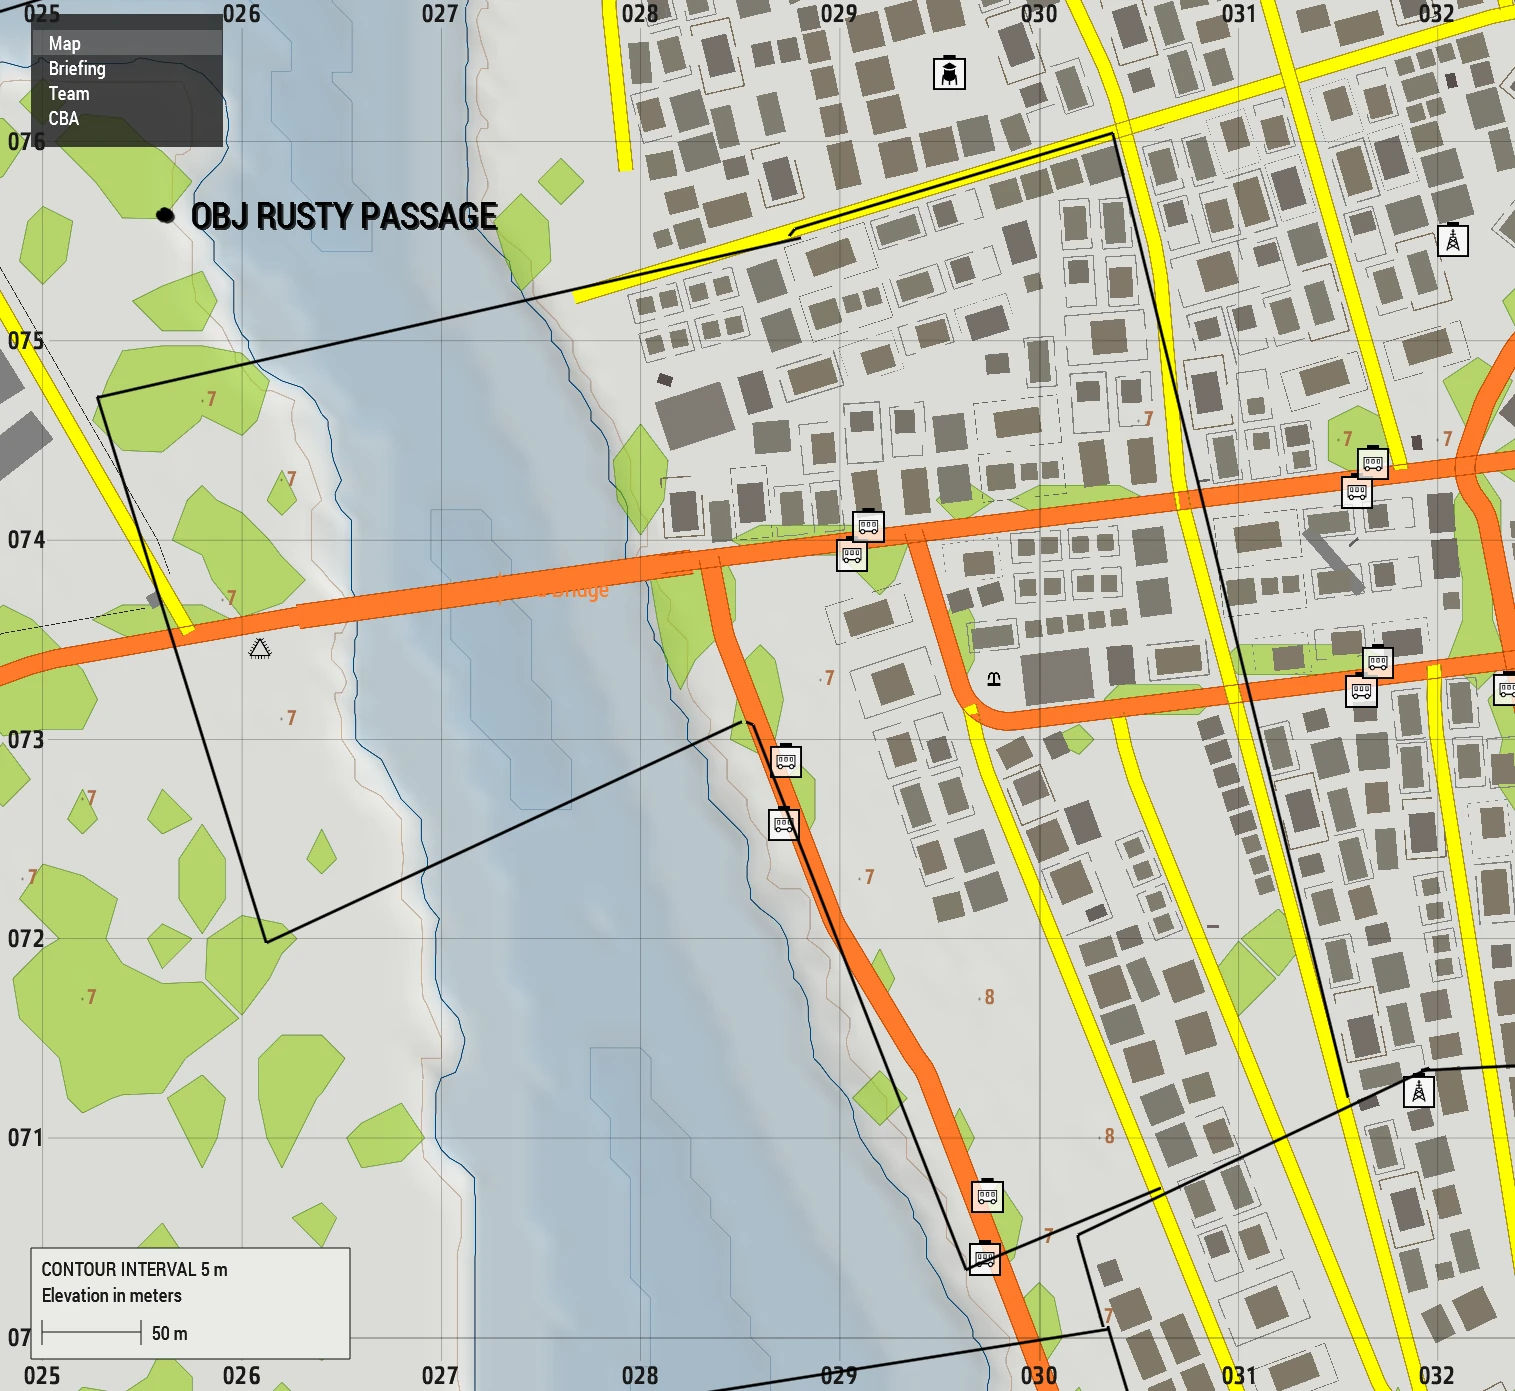
- OBJ RUSTED PASSAGE
A corridor to expand the bridgehead shall be established if evaluation in op allows us to do so
Securing an additional bridge and expanding the foothold is our goal
-
- Expand the bridgehead and secure the old bridge if possible
- Insert via Osprey para-jump
- Keep echo SBF assets safe from enemy infantry
- CQB and MOUT clear a bubble that friendly armor can use to enter the city
- EOD clear any IEDs, mines, or charges on the bridges and our approaches
- LAPES assets into the AO
- SBF assets destroy hard targets and enemy mechanized or armored forces
- CAS support via drone
CONOP:
-
Phase 0: PreOp 1730 CST
- COs/XOs finalize remaining details if any
- NCO meeting to disseminate plan
- Slotting
-
Phase I: Brief 1900 CST
- BCO will give final overview and expectations
- COs will brief vehicle commanders and squad leaders of final tweaks and expectations/needs
OBJ MAP
-
Phase II: Prep 1905 CST
- Alpha kits and organizes then prepares for Para-jump
- Echo load all vehicles for first LAPES run
LAPES and DZ Zone

COs will determine best Zone at mission start
-
- Osprey Insertion Order in 2 drops
- Stick 1
- 1 Alpha Squad
- Abrams Crew
- Support truck crew
- Drone pilot + Alpha CO/XO if room
- Stick 2
- 1 Alpha Squad
- Bradley Crew
- All others where seats available
- Stick 3
- All remaining personnel
- Stick 1
- C-17 LAPES Order
- 1st LAPES deployment
- Abrams
- Namor
- 2nd LAPES deployment
- Bradley
- M113
- 1st LAPES deployment
- Osprey Insertion Order in 2 drops
-
Phase III: Insert and OBJ BRIDGEBREAKER 1915 CST
- Upon insert Alpha will establish a security perimeter
- Begin moving to clear any obstacles along the road to Fallujah and start scouting for the enemy when fully constituted
- Echo will send vehicles as they become available to maintain support for the approach
- Utilizing ISR COs will identify the best approach and arrange plans to clear out the Western emplacements
- The 17th will then occupy the enemy emplacements and begin systematic destruction of enemies across the river before crossing and occupying a bridgehead
- EOD will need to ensure there are no mines or charges on the bridge
-
Phase IV: OBJ IRON CITADEL
- Alpha CO will establish sectors and coordinate the systematic clearing of an expanded bridgehead with Echo in support to maintain the MSR and ASRs along with any calls for emplacements or dangerous areas with heavy ordinance
- Alpha will establish a spotter/sniper team in the OBJ to provide overwatch
-
Phase V: OBJ RUSTY PASSAGE
- Once the original bridgehead is established it shall be expanded to the North to include the Old Bridge
- To be evaluated if there is time and we have the initiative
-
Phase VI: RP/AAR
-
All units prepare for debrief.
-
Imagery:
Timeline (in CST)
Command and Signal
Long Range Frequencies:
- Command 45
- RTO 45, 35
- Alpha Lead 40
- Flight Lead 45, 30
- Pilots 30, 35
- Echo Lead 45,80
- RRC 69
- Convoy 50
Nonverbal Coordination:
- Green: This is used to mark friendly positions on the field.
- Blue: Marking suitable locations for Landing Zones.
- Red: This is used for marking enemy positions for all units to reference.
- Yellow: This is used to inform friendly forces that Immediate medical support is needed.
- Purple: This color represents a friendly position with enemy units danger close, Anyone outside of 100 meters away from the smoke should be assumed hostile.
- Orange: This tells anyone in the air that a friendly unit is in desperate need of resupply.
Call signs for Supports:
Airframes
MH-6M Transport = "Apollo"
AH-6M Attack = "Artemis"
OH-6M Scout = "Icarus"
CH-47F Chinook = "Achilles"
MH-60M (DAP) = "Hades"
UH-60M Transport = "Griffin"
UH-60M Medical = “Dustoff"
Blackfish/V-22 Osprey (support) = "Pegasus"
Blackfish/AC=130 Spectre (attack) = "Spartan"
AH-64D Apache = "Orion"
A-10 Warthog = "Ares"
A-29 Super Tucano = “Odyssey"
C-17 Globemaster III = "Atlas"
C-130J Super Hercules = "Hercules"
F/A - 181 = “Xerxes”
AH-1Z Viper = "Athena"
UH-1Y Venom = “Homer"
CH-53E Super Stallion = "Atlas"
Ground
M1165A1 Humvee = "Dagger"
M1117 ASV = "Tanto"
M1132 Stryker = "Katana"
Badger IFV = "Rapier"
M2A3 Bradley = "Sabre"
M1A2 Abrams = "Claymore"
Rooikat 120 = "Gladius"
M142 HIMARS = "Halberd"
M109 Paladin = "Glaive"
Mk6 Mortar Team = "Hammer"
105mm Howitzer = “Mailman”
MK.V SOC = "Poseidon"
Speedboat Minigun = "Neptune"
RHIB = "Trident"
Available Assets:
- M1A2 Abrams
- M2A2 Bradley
- M1059
- Support vehicles
- N/A
- MQ-9 Reaper
- V-22 Osprey
- C-17 Globemaster
- MH-6M
- AH-6M
- UH-60
- CH-47