
Opord
Situation
The invasion has largely been a success. After retaking territory formerly held by Loyalists, our attention turns to capturing Airbase Blagoy and supporting garrisons to its South. The airbase has been devastated by anti-runway bombs. The airfield must be seized before engineers can repair the runway.
Area of Operation (AO):
AO: Yulakia
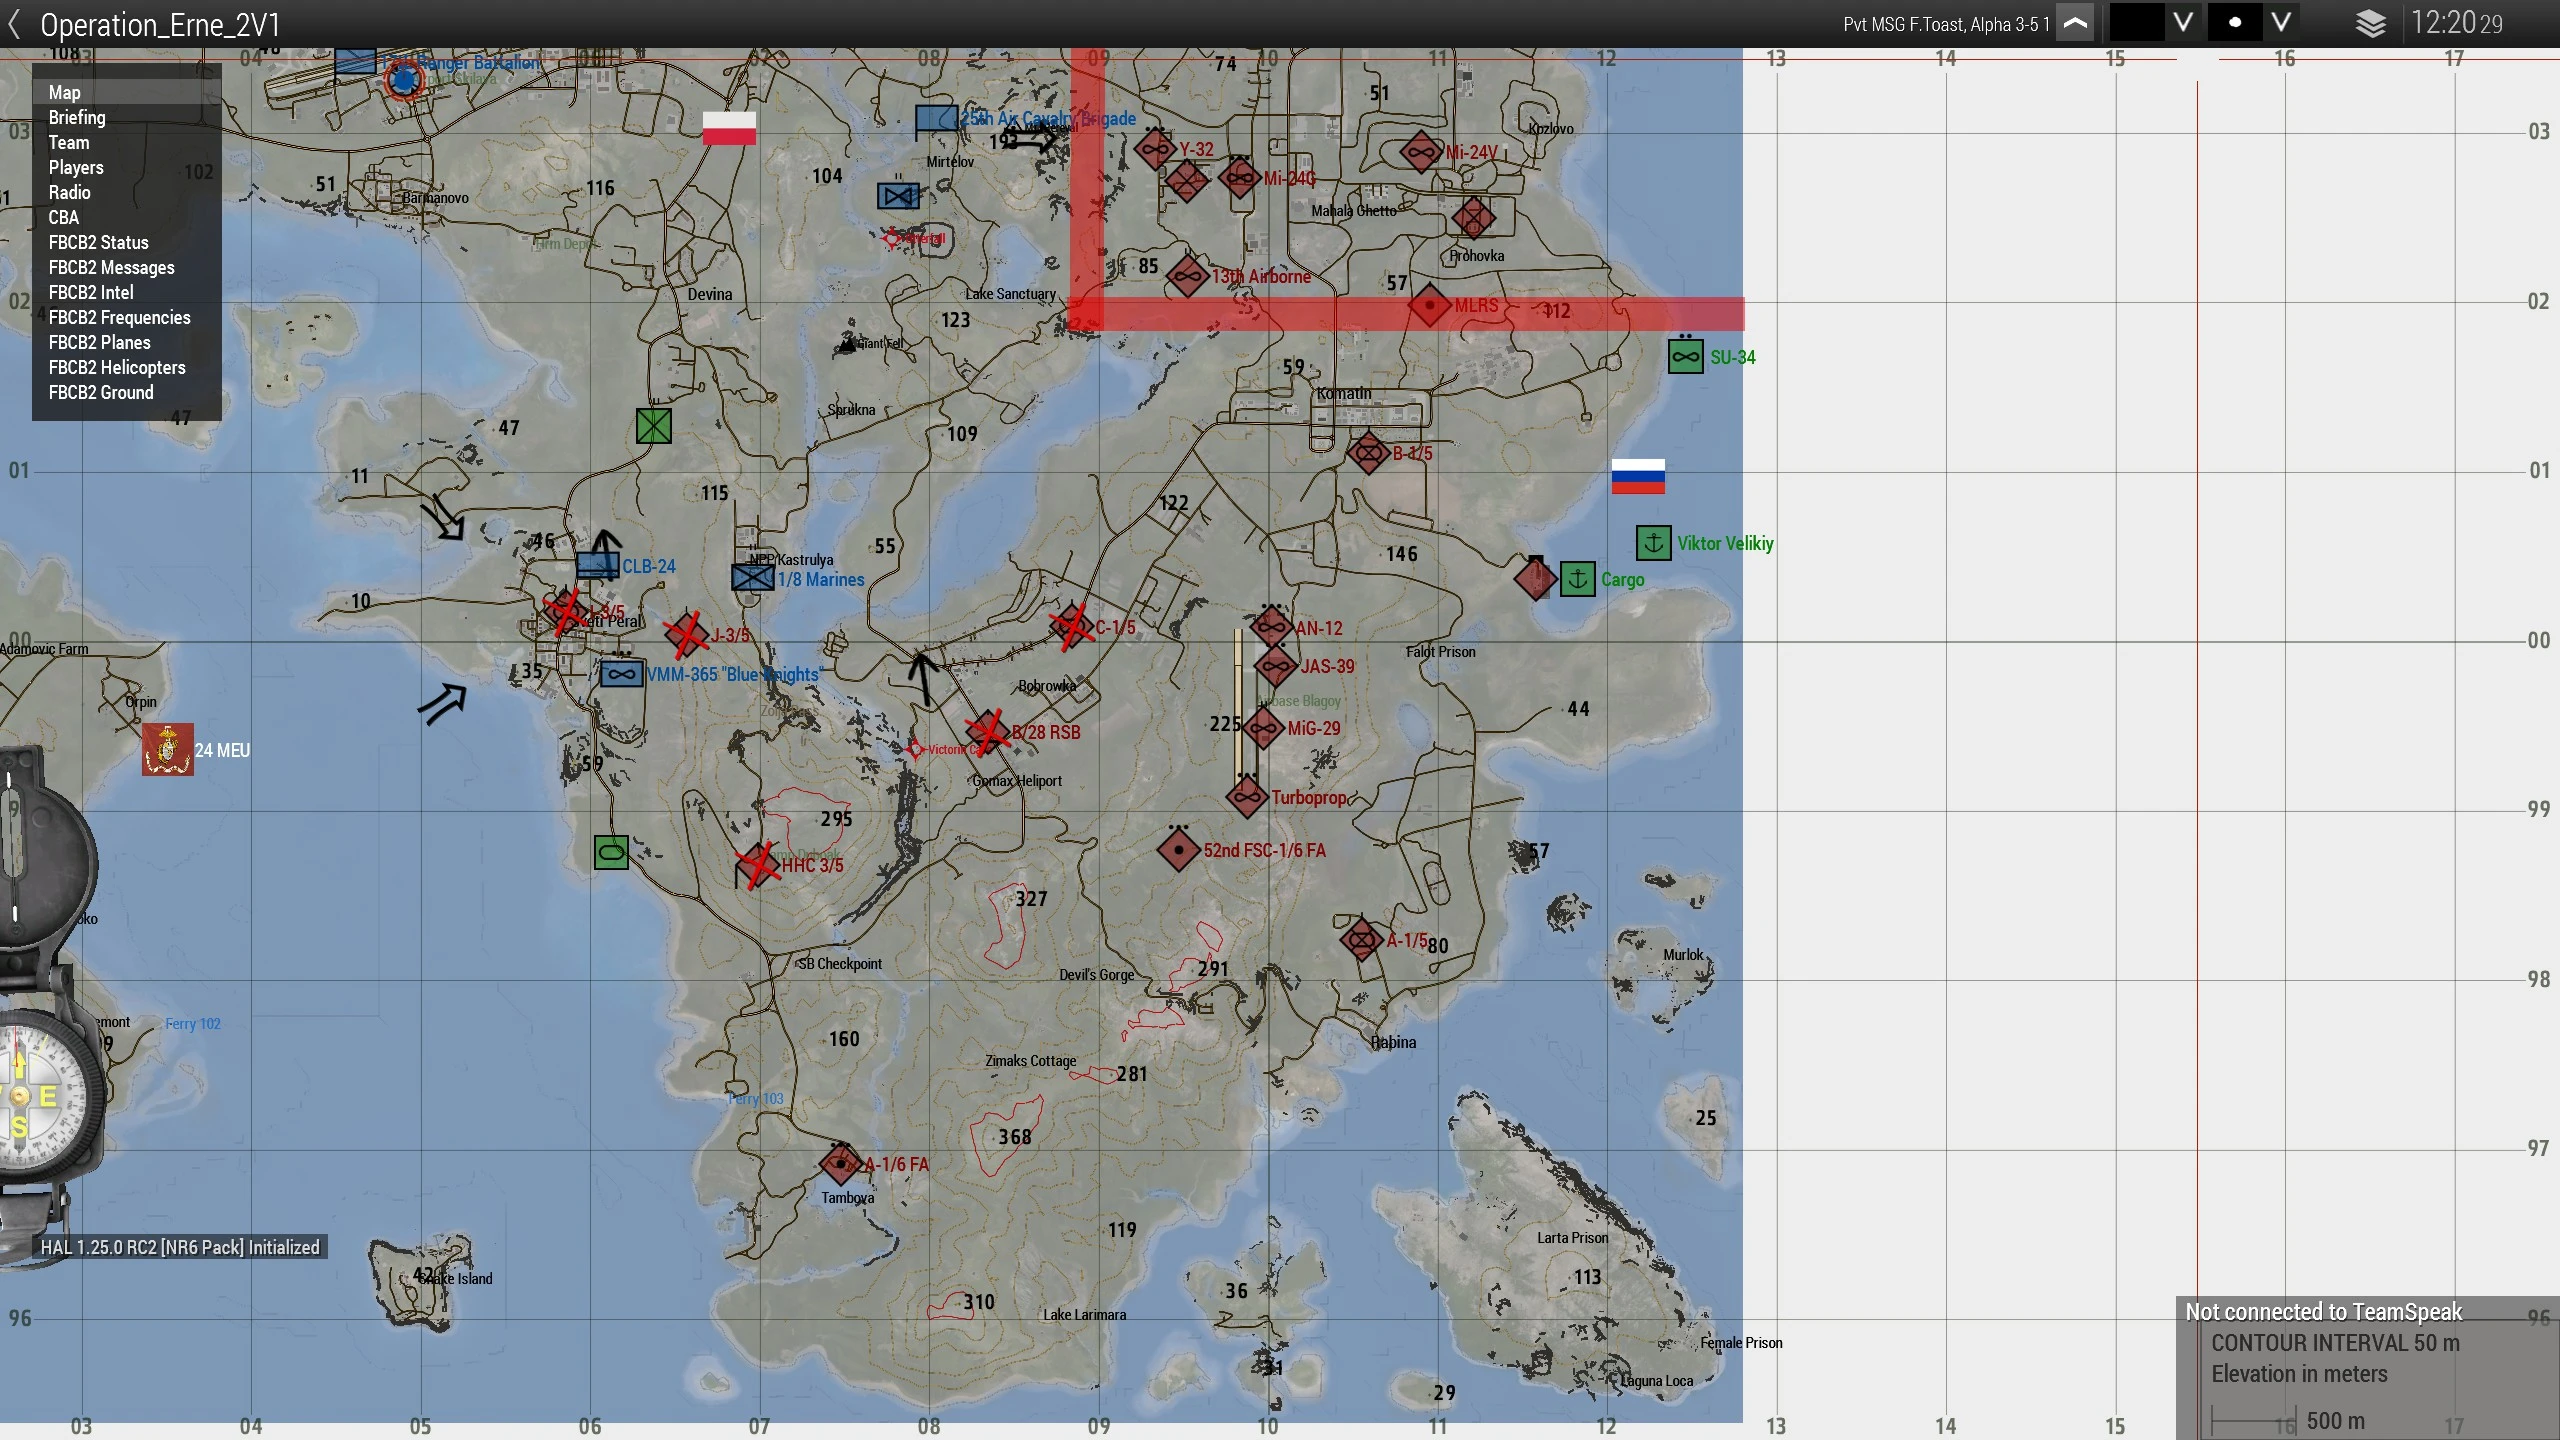
Map of the AO
Red lines mark no-fly zone
Forces in Play:
Opfor:
- Yulakian Nationalists
- 1st Battalion
- 3rd Battalion
- Kilo Company (Mechanized)
- Lima Company (Rifle)
- 2nd Platoon
- 3rd Platoon
- 92nd Fire Support Company
- 5th Combined Arms Regiment
- 13th Airborne Battalion (Mi-17)
- 6th Artillery Regiment (2S1)
- Alpha Battery
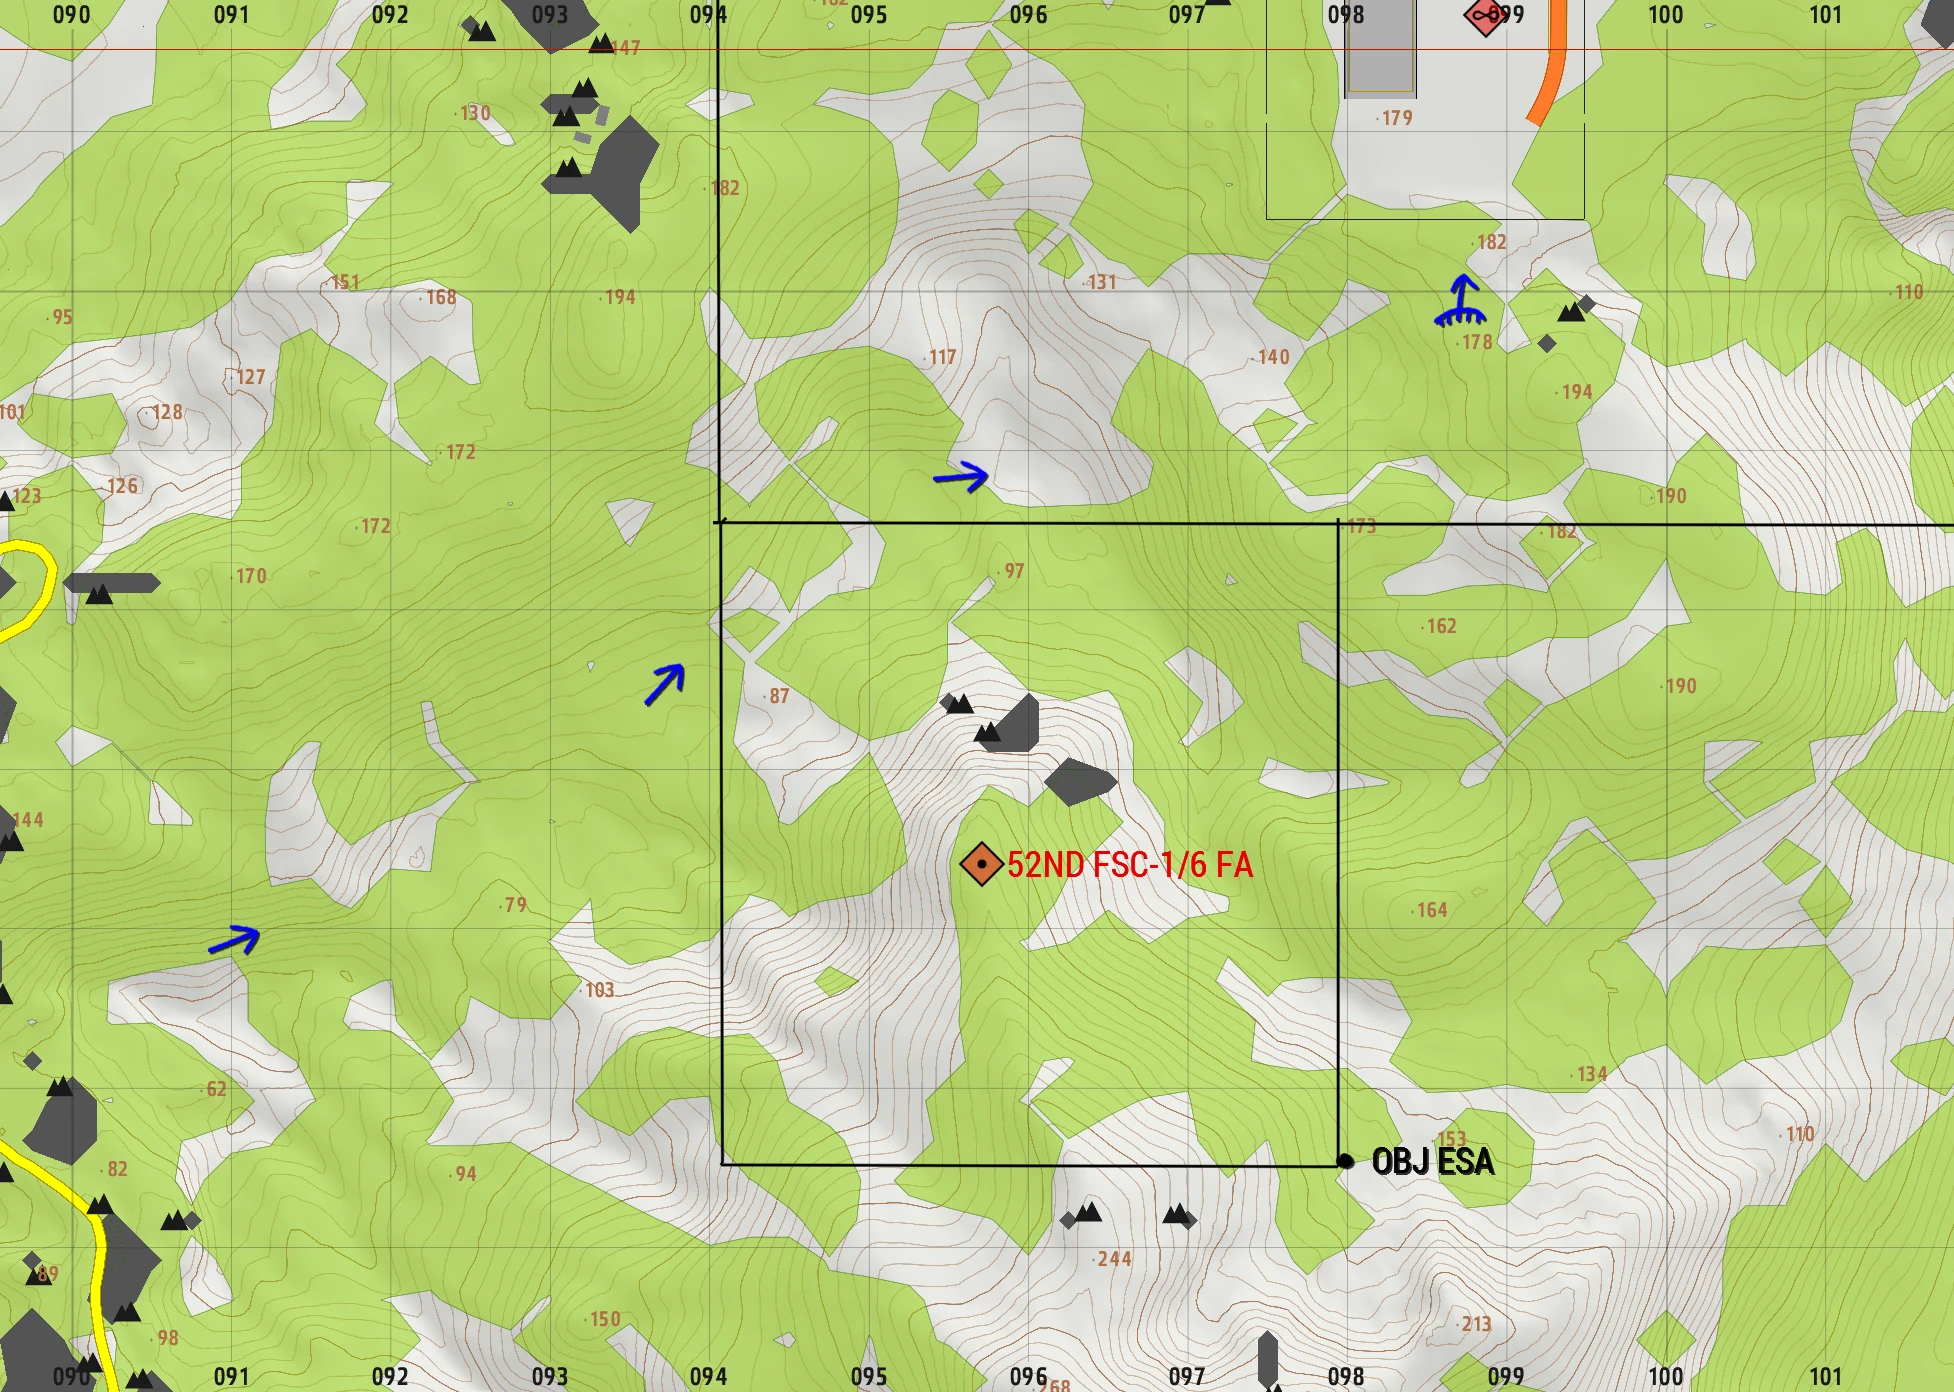
- 52nd Forward Support Company
- 20th Artillery Regiment (BM-21)
- 18th Tactical Air Support Squadron (Mi-24V)
- 23rd Tactical Air Support Squadron (Mi-24G)
- 3rd Tactical Strike Squadron (Y-32)
Most Likely Course of Action:
Aerial or mechanized QRF response to any reported attacks on installations.
Most Deadly Course of Action:
Envelopment and destruction of all forces found.
Civilian Considerations:
Civilians have been evacuated from the AO. Care should be taken to preserve civilian infrastructure such as power plants, refineries, economic targets. Civilian infrastructure occupied by OPFOR may be engaged.
Blufor:
- 17th Ranger Battalion, U.S. Army
- 24th Marine Expeditionary Unit, U.S. Marines
- Flottille 12F, French Naval Aviation
- 10th Aviation Squadron, Polish Air Force
- 9th Detached Armor Company, Yulakia National Army
- 15th MP Battalion, Yulakia National Army
Greenfor:
N/A
Engagement Criteria:
Engage only where necessary and at objectives.
Mission:
Execution:
The 17th will be deploying into the AO via Strykers and other ground vehicles to eliminate enemy artillery to the South, then assaulting and holding the Airfield in the East in the middle of the night. We will be starting from the Headquarters taken last week with pre-staged assets and support from Echo air and HIMARS staged from the Airfield we started from last week as well. Note: Alpha, JIPs, and Echo Ground will spawn at the HQ throughout the night while Echo air will use a TP pole to go to the Airfield.
Objectives:
- OBJ JAXA
- Eliminate all artillery support equipment
- OBJ NASA
- Take and hold Blagoy Airfield
- OBJ ESA
- Eliminate 52nd Support and prevent them from calling support on the Blagoy Airfield
- Conduct operations to eliminate enemy infantry
- Destroy enemy support infrastructure and assets
- Silencers approved this OP
- Utilize Humvees for transport if Echo doesn't have enough seats
- Utilize Strykers to transport and support Alpha
- Via air provide logistics, CAS, and Air Defense
- All fire standard missions shall be passed through JTAC to Alpha CO for approval while pilots must advise on free fire runs they undertake per these ROE for situational awareness
- Free fire on MBTs within 600 m of Alpha
- Free Fire on BMPs, BTRs within 400 m of Alpha with precise munitions
- Free Fire ROE
- Via HIMARS support main force by suppressing and decimating enemy formations or assets
CONOP:
-
Phase 0: PreOp 1730 CST
- COs/XOs finalize remaining details if any
- NCO meeting to disseminate plan
- Slotting
-
Phase I: Brief 1900 CST
- BCO will give final overview and expectations
- COs will brief vehicle commanders and squad leaders of final tweaks and expectations/needs
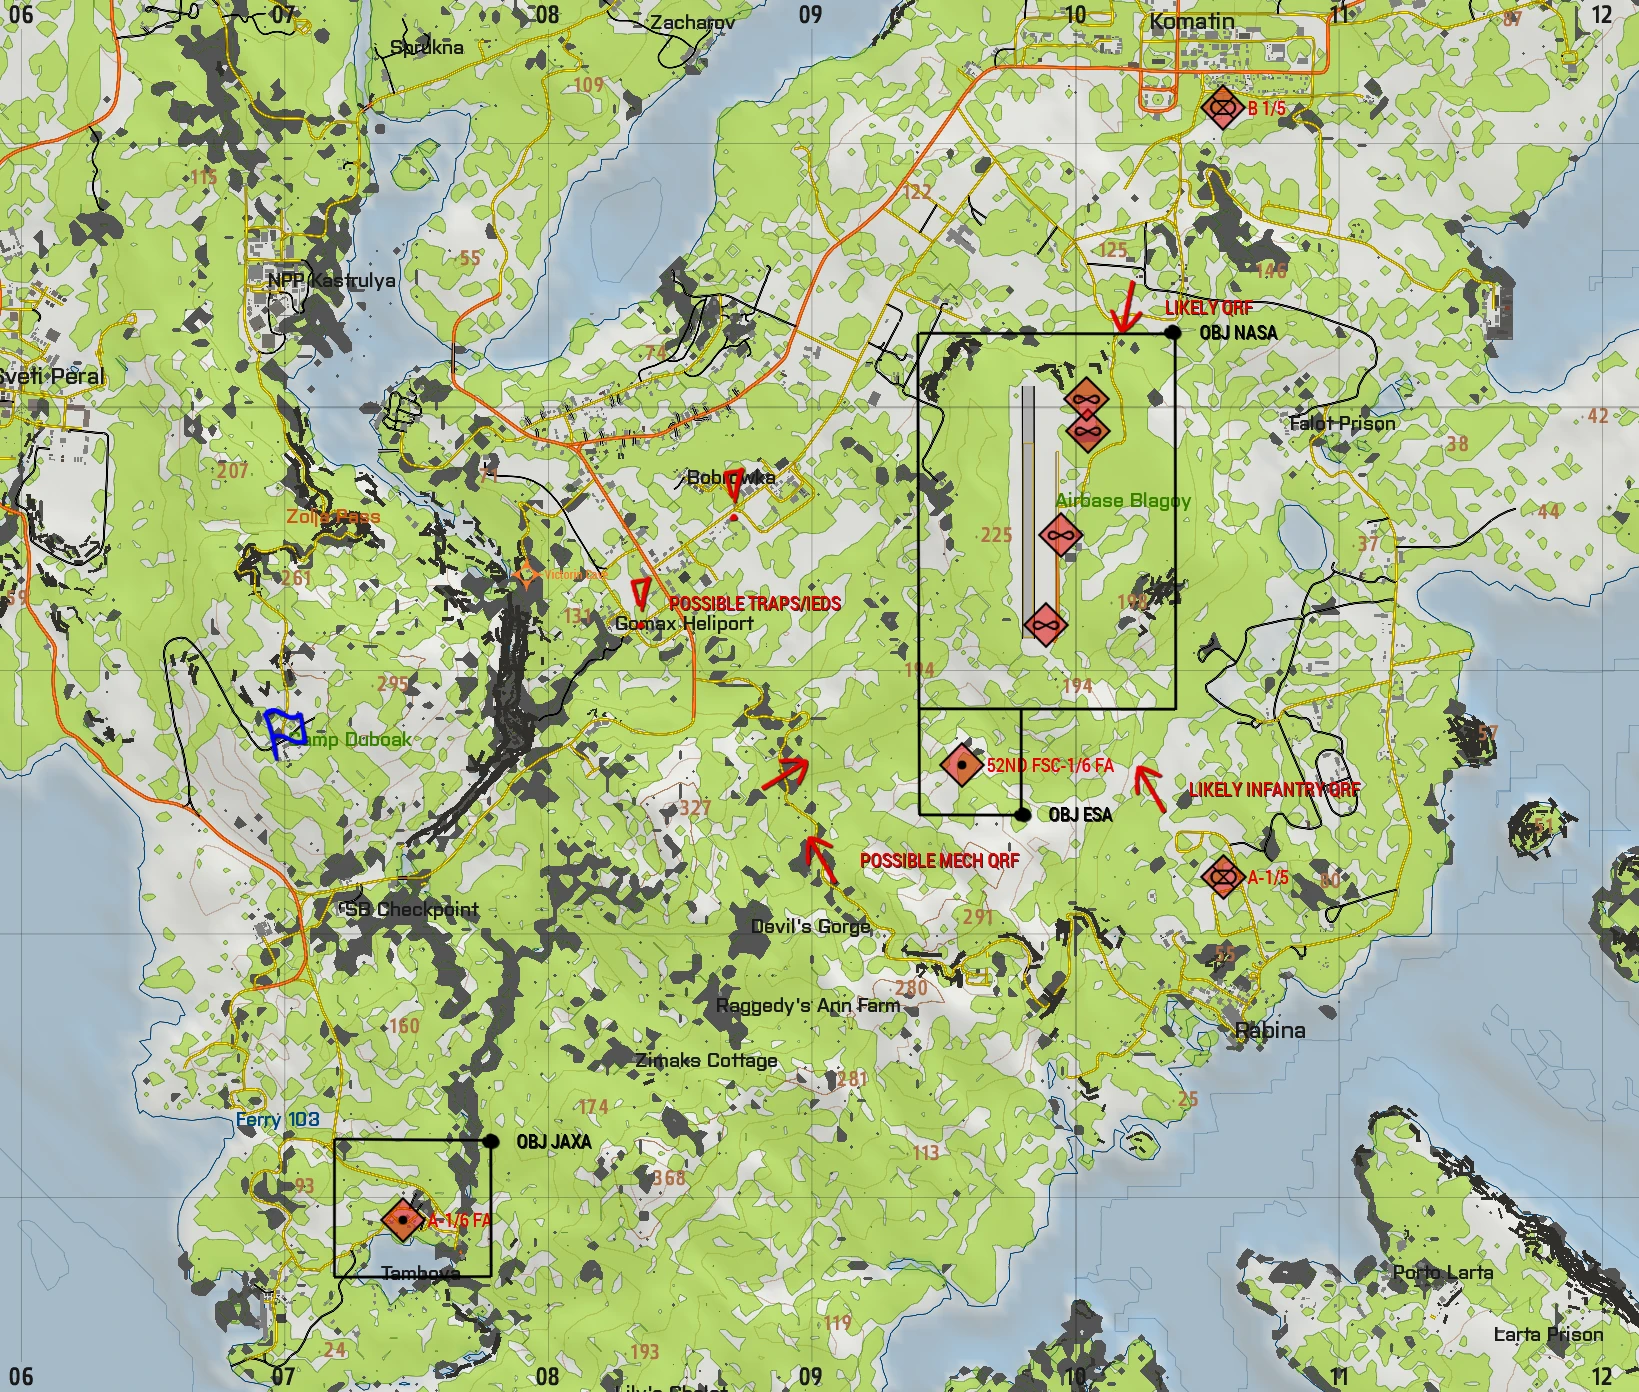
Overall AO
-
Phase II: Prep 1905 CST
- Birds armed with needed munitions
- JTAC and pilots establish combat points, flight paths, etc unless specified by CO
- Route plan established and briefed to drivers
- Loadouts and roles finalized
- Vehicle assignment for step off
- Birds armed with needed munitions
-
Phase III: OBJ JAXA 1915 CST
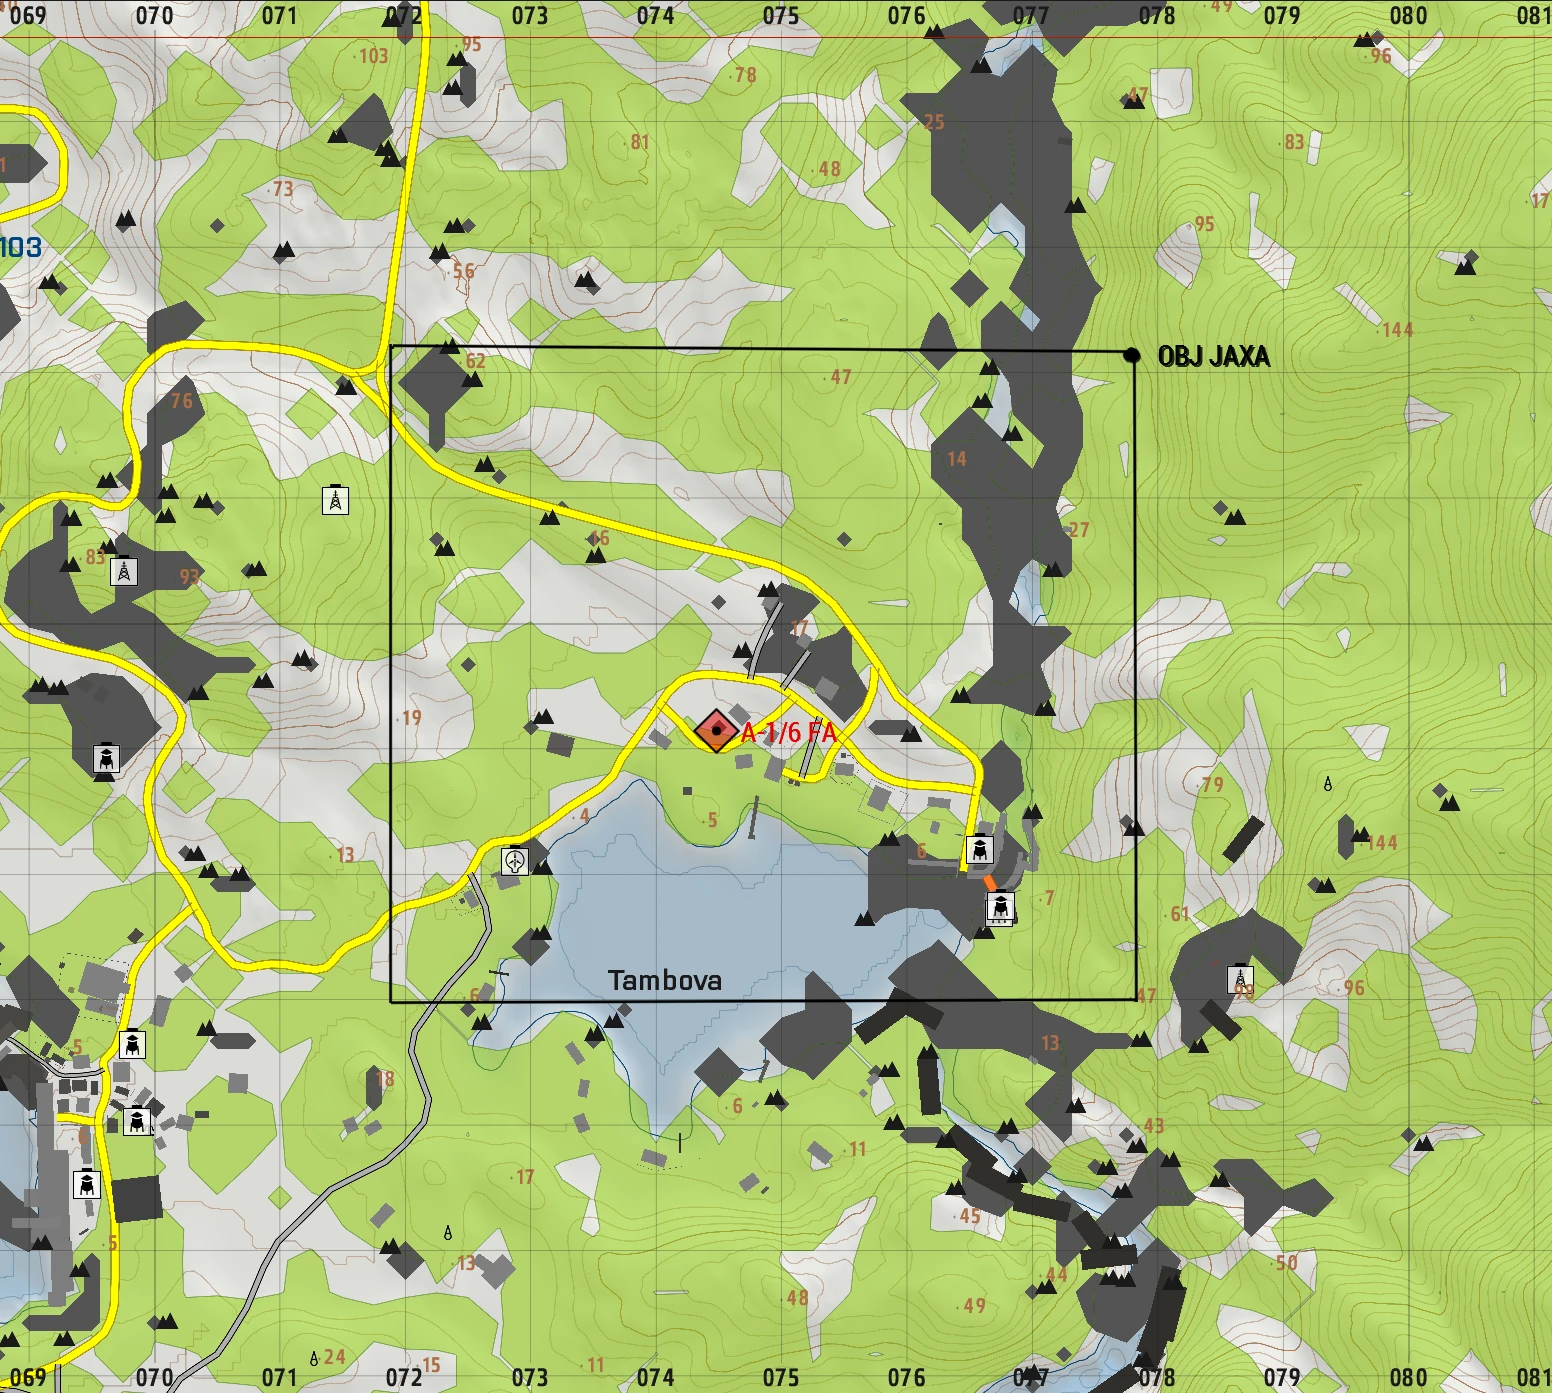
OBJ MAP

JAXA viewed from the East. Note the elevation advantage from the North
-
- Echo
- Deploy Alpha into AO
- Support assault and decimation
- Retrieve Alpha when OBJ complete.
- Provide CAS and ISR
- Interdict QRF per ROE
- Alpha
- Eliminate all infantry
- Ensure destruction of artillery and munitions
- Echo
-
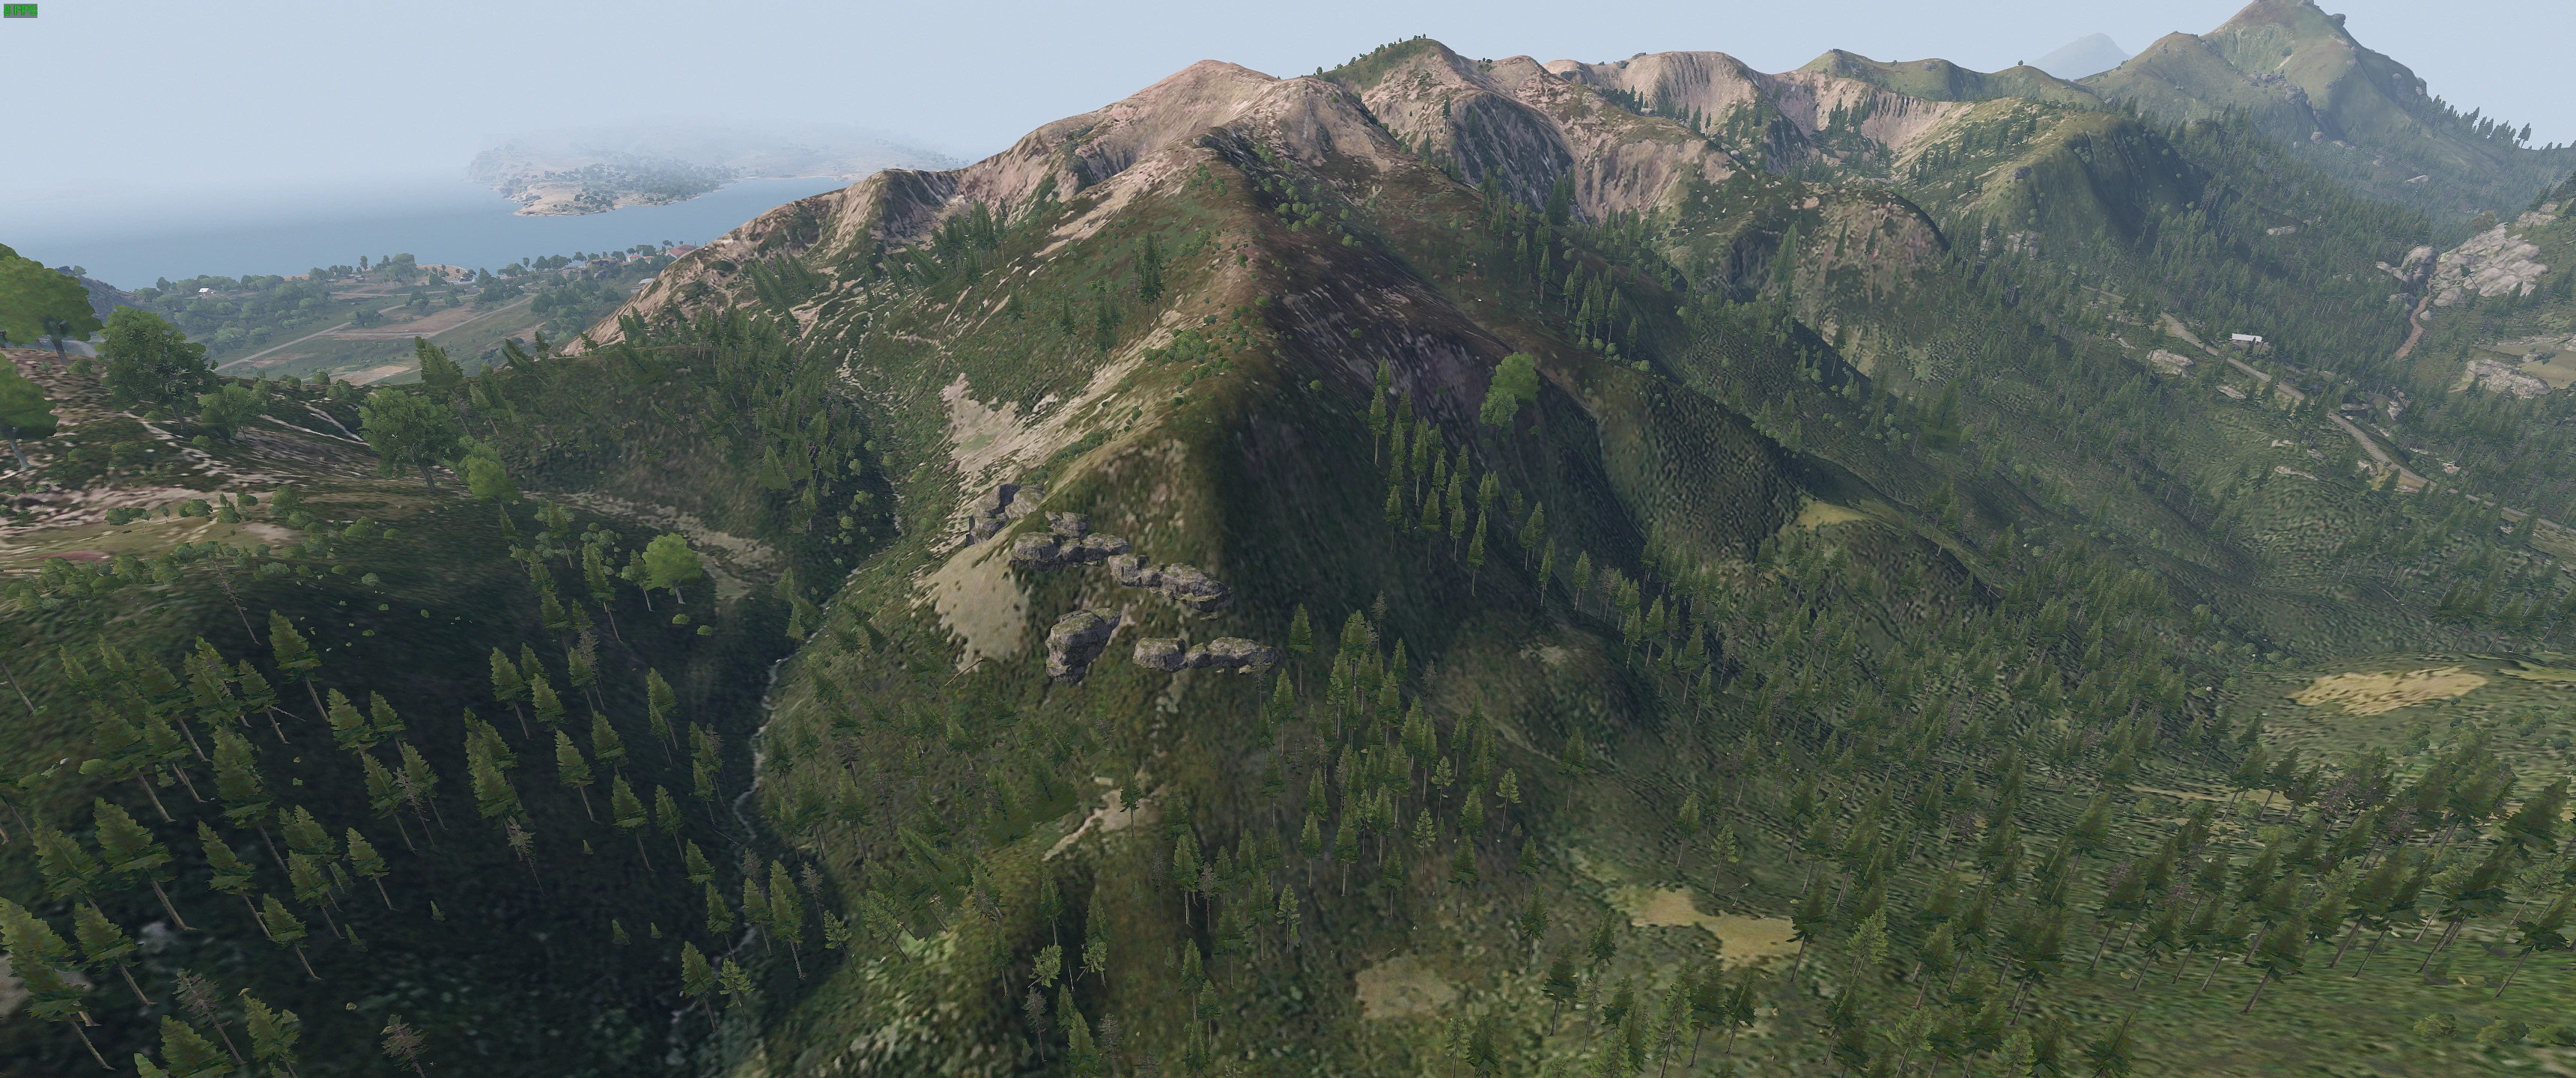
Phase IV: OBJ NASA
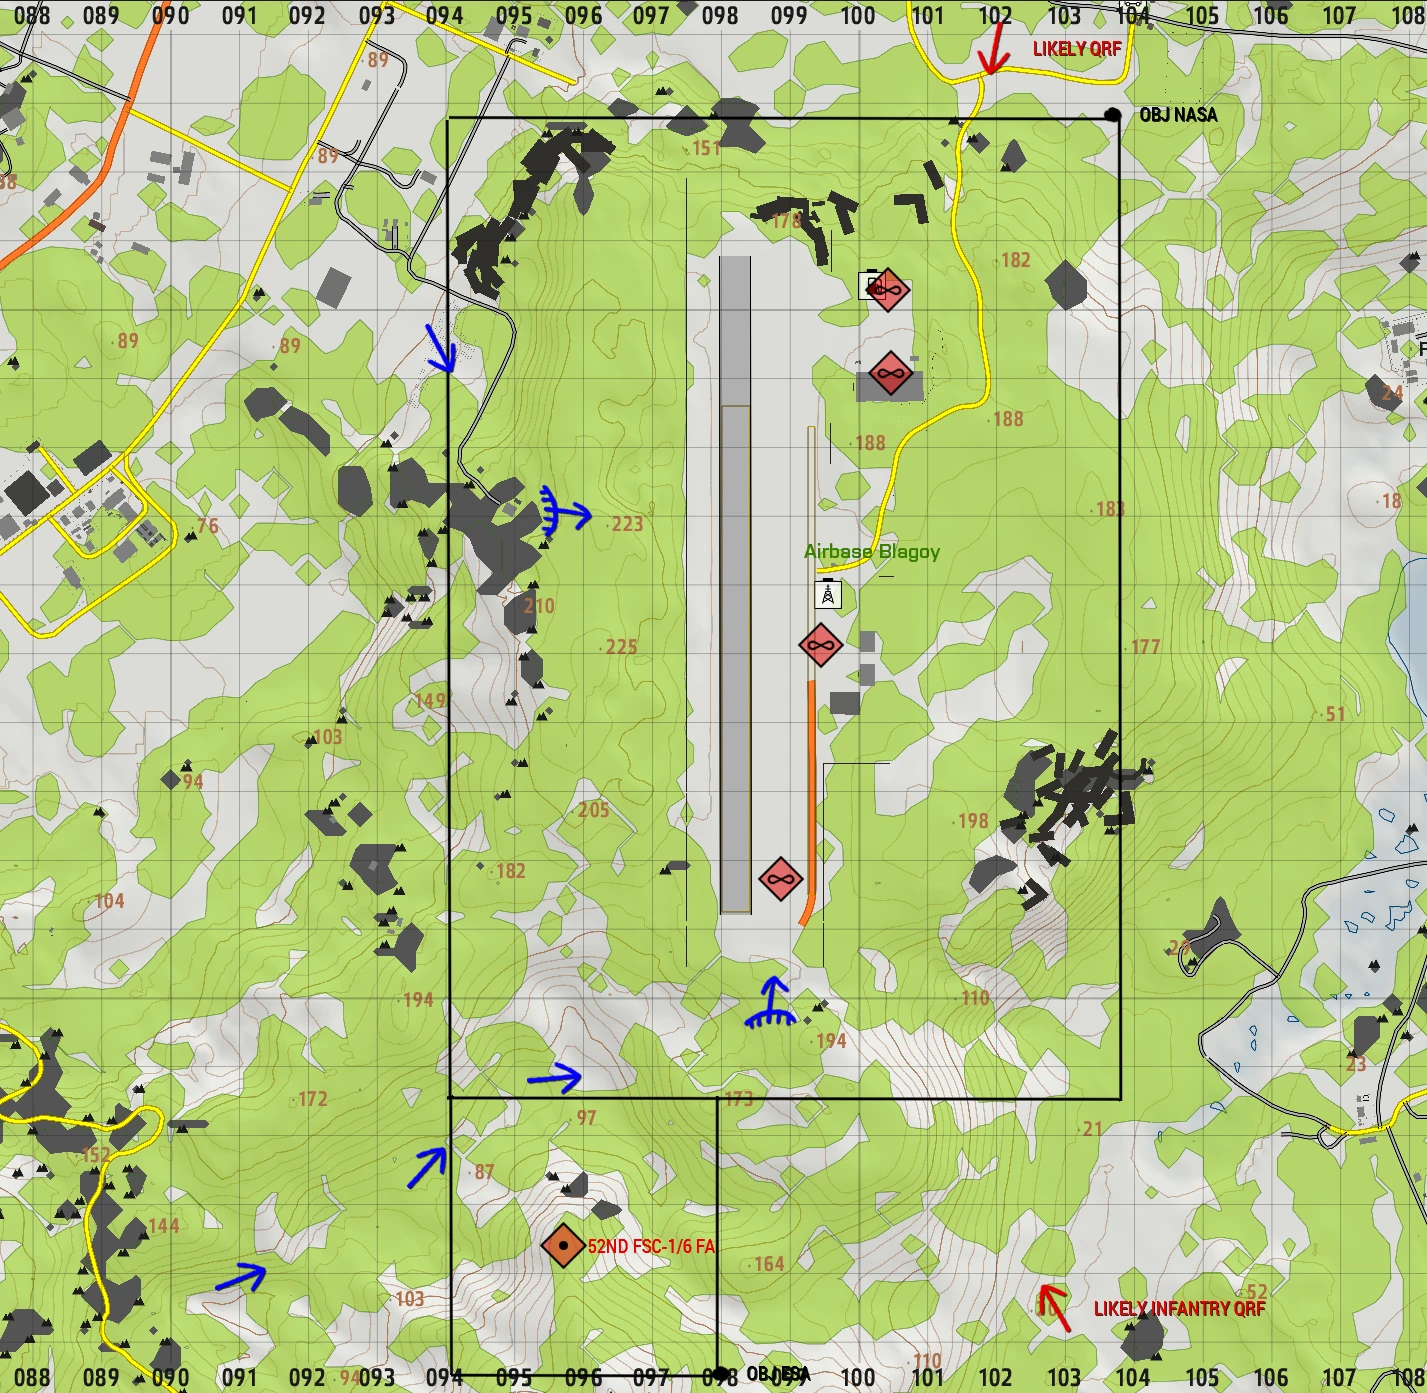
OBJ MAP

NASA viewed from the West. The house bottom center will be primary dismount from Western approach force.

NASA viewed from the South. Note the elevated rise of tress near the shelter at the end of the runway.
NASA Southern force valley approach
-
- Resupply and repair prior if necessary
- Echo
- Deploy Alpha to Western and Southern dismount points
- Support infantry advance
- Use mine plows to cross runway in case of UXO from strikes last week
- Provide CAS and ISR
- Interdict QRF per ROE
- Deploy Alpha to Western and Southern dismount points
- Alpha
- Assault and hold enemy airfield
- Embedded EOD needed to safely traverse amongst possible UXO
- Prepare for defense until relieved
- Command will determine if withdrawal is needed upon completion
-
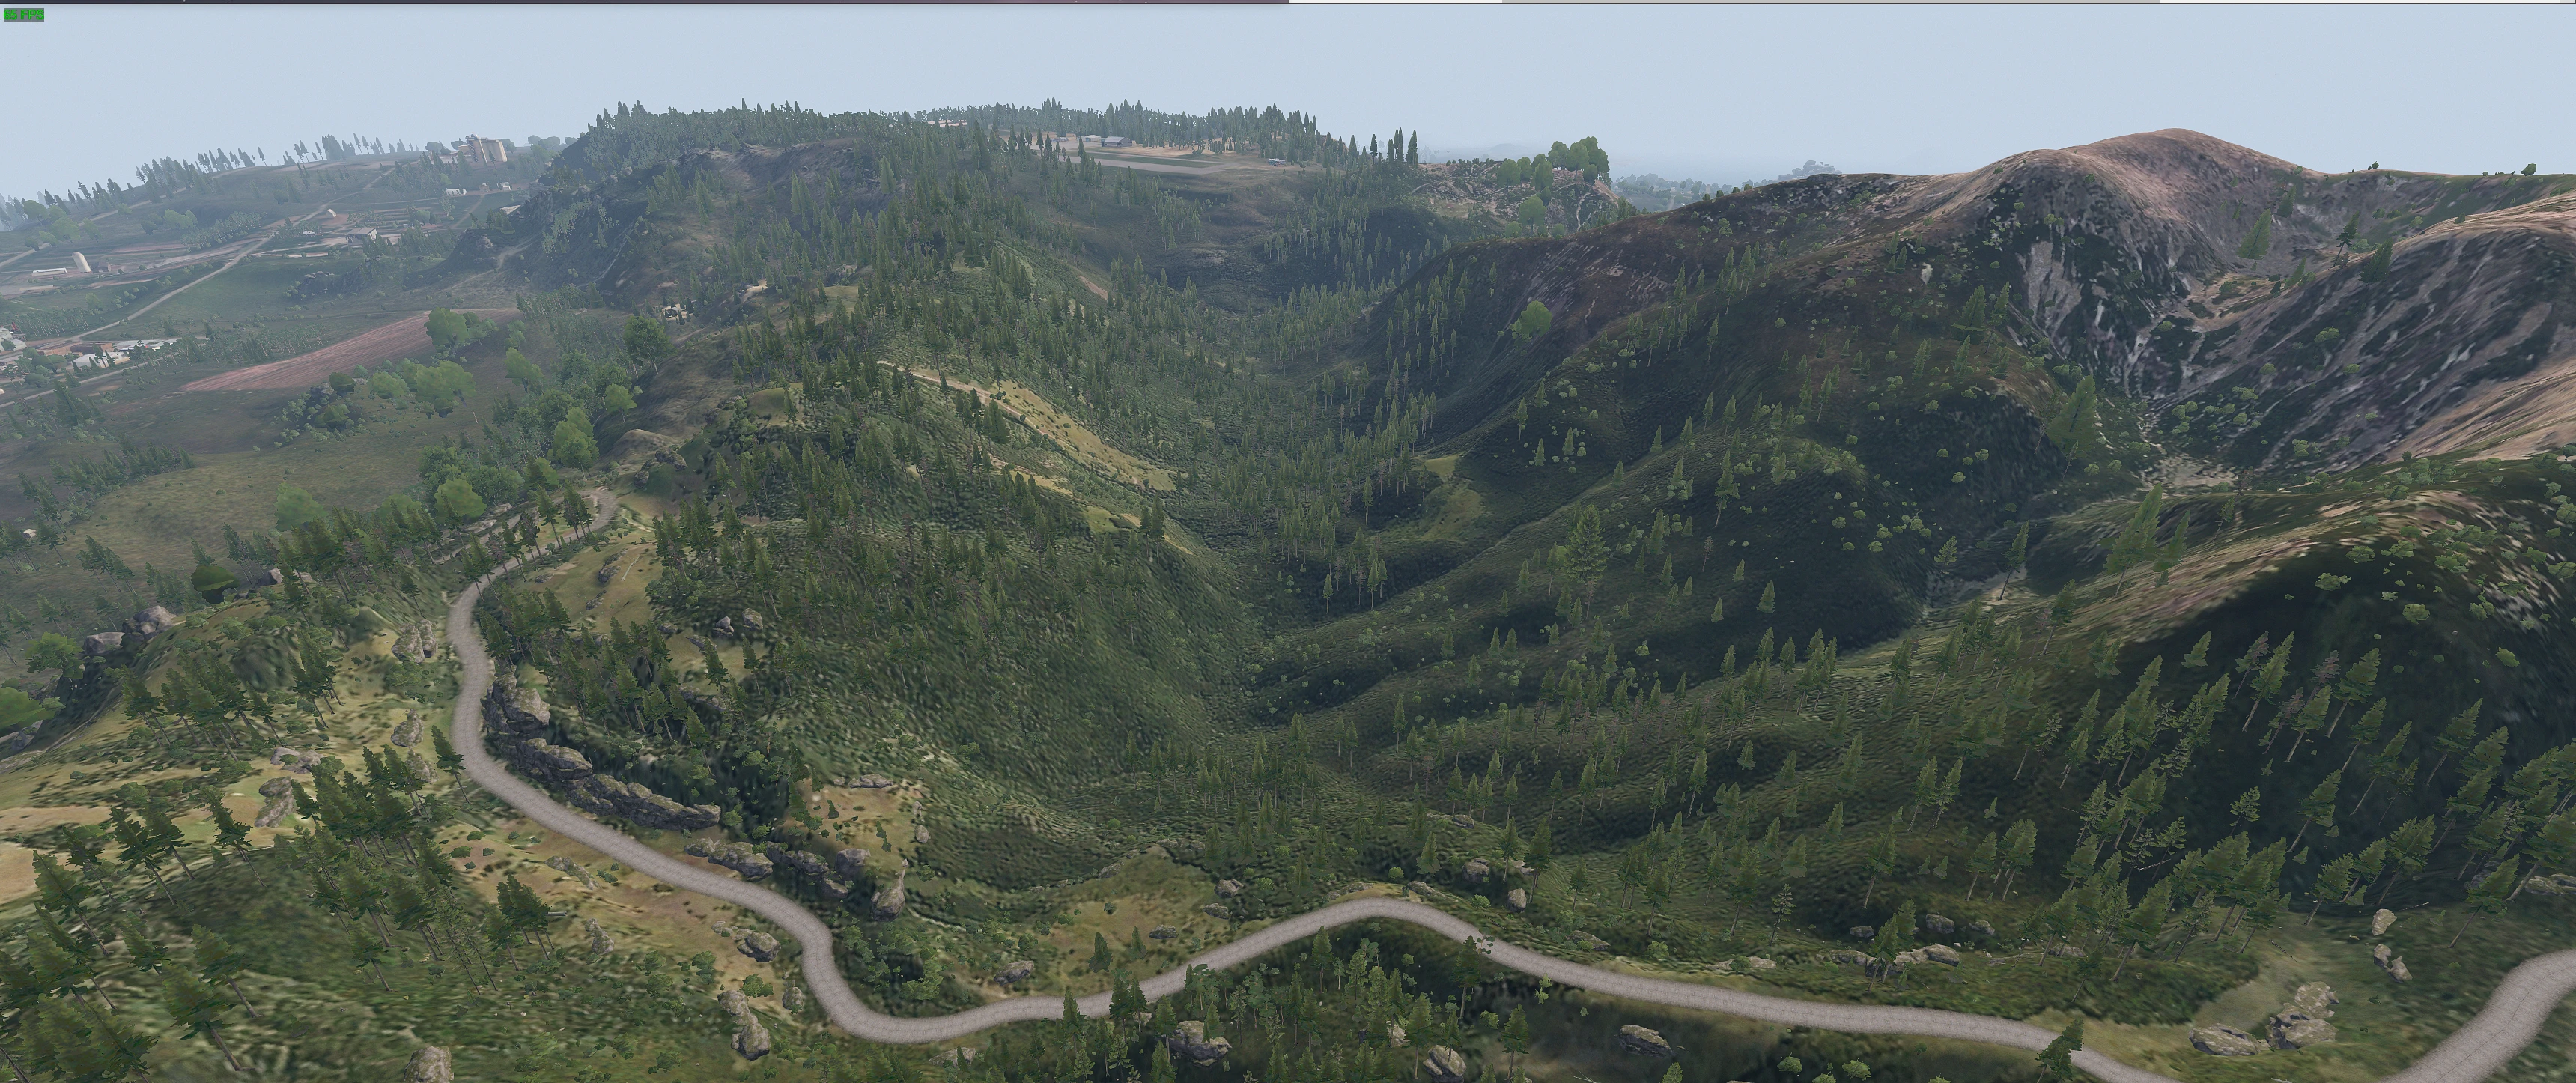
Phase V: OBJ ESA
OBJ MAP
OBJ viewed from the North. Approach to OBJ NASA runs from right/bottom right to bottom left/left under the expected enemy LP.
-
- Approach depends on ISR and command decision in field. Prepare for 2 scenarios
- Echo
- Support assault on enemy position OR
- Flatten enemy with saturated fire
- Alpha
- Assault and eliminate enemy preventing their call for support in response to airfield assault OR
- Have Echo strike prior to approach OR sneak past and ignore using Echo strike as go signal for airfield assault
-
Phase VI: RP/AAR
-
All units prepare for debrief.
-
Imagery:
Timeline (in CST)
Command and Signal
Long Range Frequencies:
- Command 45
- RTO 45, 35
- Alpha Lead 40
- Flight Lead 45, 30
- Pilots 30, 35
- Echo Lead 45,80
- RRC 69
- Convoy 50
Nonverbal Coordination:
- Green: This is used to mark friendly positions on the field.
- Blue: Marking suitable locations for Landing Zones.
- Red: This is used for marking enemy positions for all units to reference.
- Yellow: This is used to inform friendly forces that Immediate medical support is needed.
- Purple: This color represents a friendly position with enemy units danger close, Anyone outside of 100 meters away from the smoke should be assumed hostile.
- Orange: This tells anyone in the air that a friendly unit is in desperate need of resupply.
Call signs for Supports:
- MH-6M Transport = "Apollo"
- AH-6M Attack = "Artemis"
- OH-6M Scout = "Icarus"
- CH-47F Chinook = "Achilles"
- MH-60M (DAP) = "Hades"
- UH-60M Transport = "Griffin"
- UH-60M Medical = “Dustoff"
- Blackfish (support) = "Pegasus"
- Blackfish (attack) = "Spartan"
- AH-64D Apache = "Orion"
- A-10 Warthog = "Ares"
- A-29 Super Tucano = “Odyssey"
- C-17 Globemaster III = "Atlas"
- C-130J Super Hercules = "Hercules"
- F/A - 181 = “Xerxes”
- AH-1Z Viper = "Athena"
- UH-1Y Venom = “Homer"
- CH-53E Super Stallion = "Atlas"
Ground
- M1165A1 Humvee = "Dagger"
- M1117 ASV = "Tanto"
- M1132 Stryker = "Katana"
- Badger IFV = "Rapier"
- M2A3 Bradley = "Sabre"
- M1A2 Abrams = "Claymore"
- Rooikat 120 = "Gladius"
- M142 HIMARS = "Halberd"
- M109 Paladin = "Glaive"
- Mk6 Mortar Team = "Hammer"
- 105mm Howitzer = “Mailman”
- MK.V SOC = "Poseidon"
- Speedboat Minigun = "Neptune"
- RHIB = "Trident"
Available Assets:
- Strykers
- 2x outfitted with plow for UXO or IEDs
- HIMARS
- AH-6
- MH-6
- MH-47 Chinook