
Opord
Situation
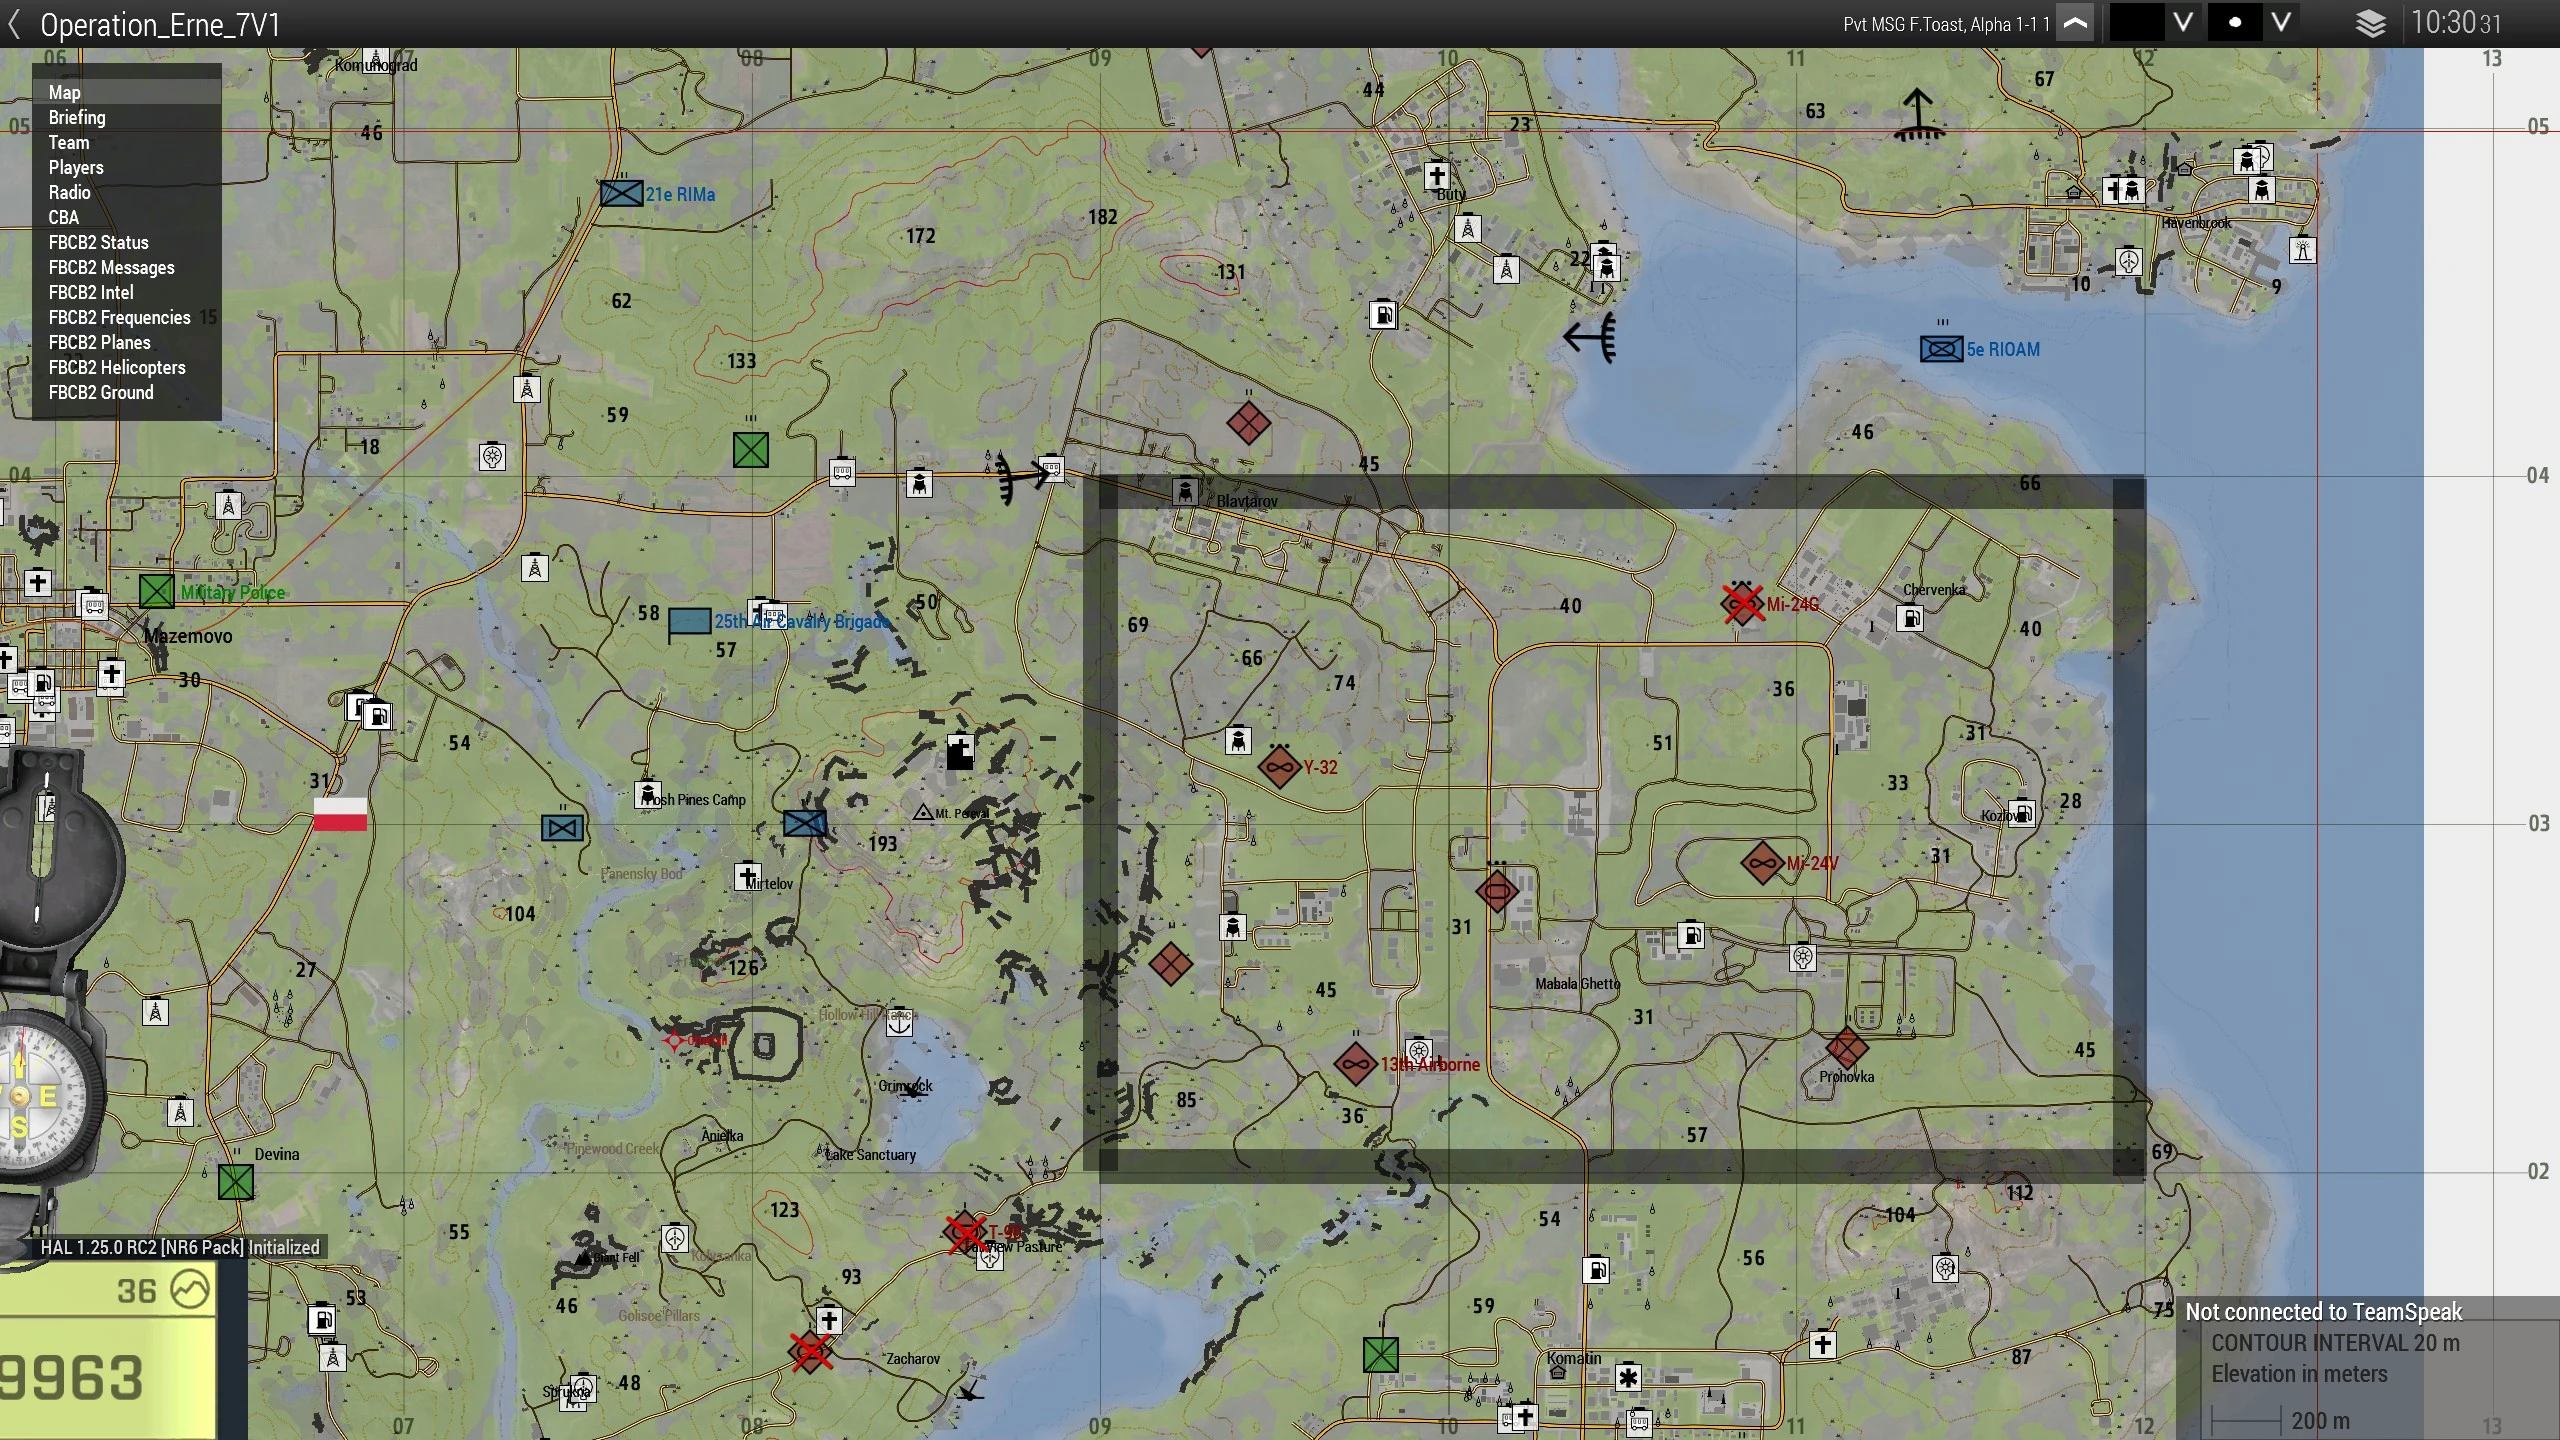
The Ultranationalists made a gambit with their armored assault, and failed. The enemy has a critical lack of armor that we must exploit before they are reinforced. The 17th has been tasked with seizing the Chervenka region, where the 5th Combined Arms Regiment has been staging most of their operations. This region has offered the greatest resistance due to its armored presence and entrenched defenses. An S-400 platoon has further complicated operations in the region.
To assist with seizing the region, a French Combined Arms Marine Regiment will be landing North of the AO, cutting off reinforcements and allowing Polish troops to break through the Blavtarov defensive line. This series of breakthroughs should decimate Ultranationalist forces in the region and set the stage for the siege of the Ultranationalist capital.
Area of Operation (AO):
Forces in Play:
Opfor:
- Yulakian Nationalists
- Remnants of 5th Combined Arms Regiment
- Consolidated Company
- Consolidated Company
- 2nd Battalion
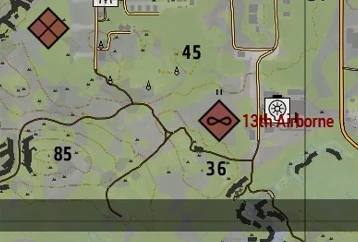
- 13th Airborne Battalion
- Consolidated Airborne Squadron
- 116th Airborne Squadron
- Remnants of 6th Armored Battalion
- Consolidated Company (T-72)
- 3rd Tactical Strike Squadron (Y-32)
- 18th Tactical Air Support Squadron (Mi-24V)
- 20th Artillery Regiment (BM-21)
- Bravo Battery
- 92nd Forward Support Company
- Remnants of 5th Combined Arms Regiment
Most Likely Course of Action:
Defense in place and hold what they have.
Most Deadly Course of Action:
Massed counterattack to attempt breakout with all remaining air support.
Civilian Considerations:
Civilians are not present in the AO. Fire on any armed, un-uniformed personnel.
Blufor:
- 17th Ranger Battalion, U.S. Army
- 24th Marine Expeditionary Unit, U.S. Marines
- 5th Overseas Interarmes Regiment, French Marines
- 3rd Aviation Squadron, Polish Air Force
- Flottile 17F, French Naval Aviation
Greenfor:
- n/a
Engagement Criteria:
Engage any armed individual.
Mission:
Execution:
The 17th is being tasked with clearing out all enemies in the pocket created by the landing of Coalition forces in the North of the AO. The enemy in the pocket is in essence a combined arms formation dug in and supported by mutually supporting elements in close proximity to each other. Air, artillery, armor, and infantry with an AA bubble protecting them. Our first goal will be to get close to the AO and get a firmer bearing on where the S400 AA system and rocket battery is for destruction and how the enemy is arrayed so that we can best engage them on our terms. Once the indirect support is gone we eliminate all hostiles.
Objectives:
- OBJ CHIP HAZARD
- Locate somewhere in AO and Capture primary, Kill if necessary, Lt. Col Vladimir Drljaca
- OBJ LINK STATIC
-
- Top priority across entire AO
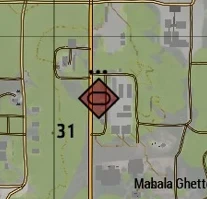
- Seek and destroy S400 battery
- Must be accomplished for mission completion and to allow for friendly air support in relation to OBJ BRICK BAZOOKA if necessary
-
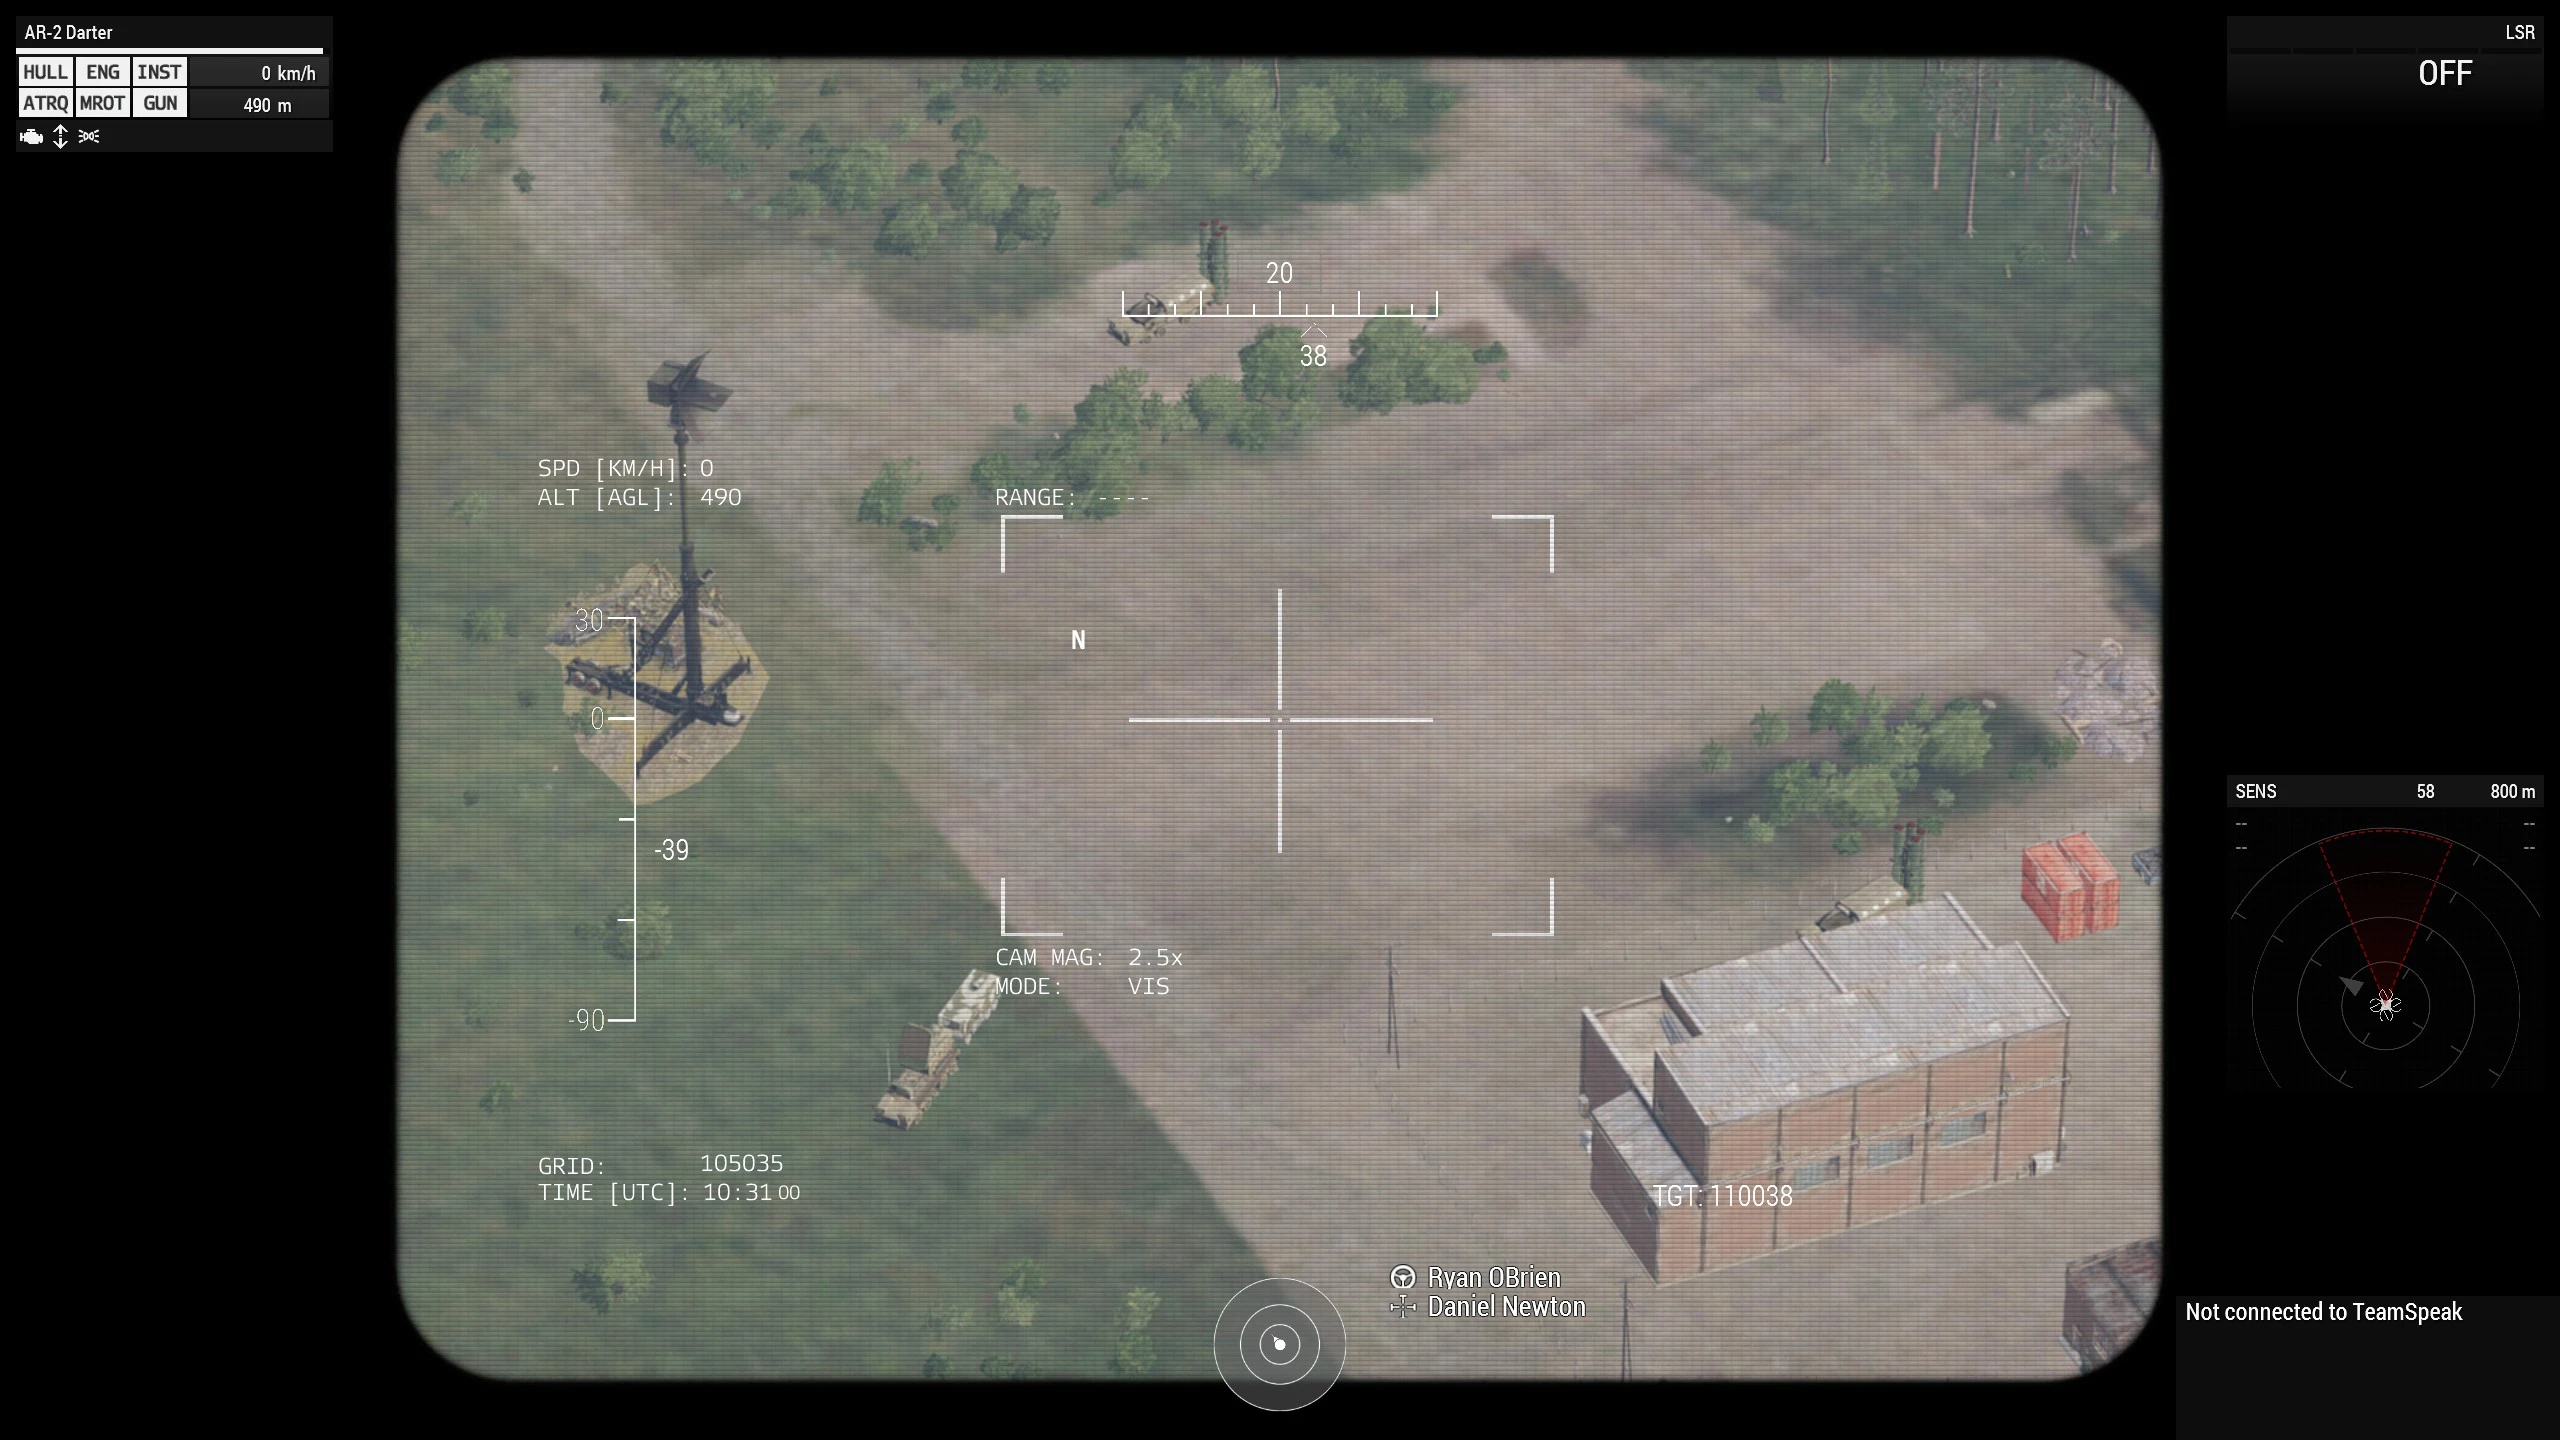
ISR from OCT 2 and not indicative of location or arrangement of vehicles
- OBJ NICK NITRO
-
- Locate and Identify the Airborne and Infantry formations and engage
- OBJ BUTCH MEATHOOK

-
- Locate and destroy enemy infantry around the prison
- OBJ BRICK BAZOOKA
-
- Identify location of armor and engage with Echo air or ground support
- OBJ KIP KILLIGAN
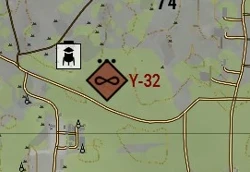
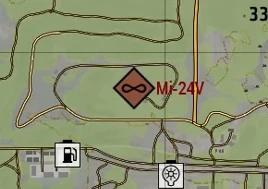
-
- Down or destroy on the ground the enemy Y-32s and Mi-24s
- Have AA ready
- Insert via boat
- Utilize Echo artillery support in augmenting firepower
- Utilize UGVs to provide SBF and carry AA
- Identify enemy concentrations to better inform OBJ order of battle
- Provide artillery support
- Provide aerial logistics
- Provide direct fire support and assist in anti-armor activities as a Rooikat QRF where necessary
- In emergency and AFTER OBJ LINK STATIC is confirmed destroyed provide CAS if called
CONOP:
-
Phase 0: PreOp 1730 CST
- COs/XOs finalize remaining details if any
- NCO meeting to disseminate plan
- Slotting
-
Phase I: Brief 1900 CST
- BCO will give final overview and expectations
- COs will brief vehicle commanders and squad leaders of final tweaks and expectations/needs
-
Phase II: Prep 1905 CST
- Alpha kits and organizes then use teleport pole to the Port for landing in the East of the AO
- Echo begins moving the artillery pieces to their fire base
- Rooikat prepped to move out
-
Phase III: OBJ LINK STATIC 1915 CST
- Somewhere in the AO is the S400. This must be found and destroyed first. Deployment of Darters to help this. Battalion CO/XO will focus on location while Alpha moves inland.
- Alpha will use RHIBs to approach the East Coast of the AO from the Port captured in Op 3
- Landing location and Maneuver inland at ACO discretion based on what is seen on approach
- Once located maneuver to and through any enemies or OBJs to eliminate
- OBJ BRICK BAZOOKA should be avoided until the S400 destruction
-
Phase IV: OBJ BRICK BAZOOKA
- Provided OBJ LINK STATIC is complete this armored formation should be eliminated next
- Recon is necessary first to determine if additional support is necessary
- Preemptory bombardment should be conducted if sufficiently massed
- Echo must be prepared to engage with QRF
- If Phase 3 is not complete reorient to Phase 5 and return to Phase 4 as necessary
-
Phase V: Remaining Objectives
- OBJ NICK NITRO
- OBJ KIP KILLIGAN
- OBJ BUTCH MEATHOOK
- The order and approach will be informed by in theater recon and engagement
-
Phase VI: RP/AAR
-
All units prepare for debrief.
-
Imagery:
Timeline (in CST)
Command and Signal
Long Range Frequencies:
- Command 45
- RTO 45, 35
- Alpha Lead 40
- Flight Lead 45, 30
- Pilots 30, 35
- Echo Lead 45,80
- RRC 69
- Convoy 50
Nonverbal Coordination:
- Green: This is used to mark friendly positions on the field.
- Blue: Marking suitable locations for Landing Zones.
- Red: This is used for marking enemy positions for all units to reference.
- Yellow: This is used to inform friendly forces that Immediate medical support is needed.
- Purple: This color represents a friendly position with enemy units danger close, Anyone outside of 100 meters away from the smoke should be assumed hostile.
- Orange: This tells anyone in the air that a friendly unit is in desperate need of resupply.
Call signs for Supports:
- MH-6M Transport = "Apollo"
- AH-6M Attack = "Artemis"
- OH-6M Scout = "Icarus"
- CH-47F Chinook = "Achilles"
- MH-60M (DAP) = "Hades"
- UH-60M Transport = "Griffin"
- UH-60M Medical = “Dustoff"
- Blackfish (support) = "Pegasus"
- Blackfish (attack) = "Spartan"
- AH-64D Apache = "Orion"
- A-10 Warthog = "Ares"
- A-29 Super Tucano = “Odyssey"
- C-17 Globemaster III = "Atlas"
- C-130J Super Hercules = "Hercules"
- F/A - 181 = “Xerxes”
- AH-1Z Viper = "Athena"
- UH-1Y Venom = “Homer"
- CH-53E Super Stallion = "Atlas"
Ground
- M1165A1 Humvee = "Dagger"
- M1117 ASV = "Tanto"
- M1132 Stryker = "Katana"
- Badger IFV = "Rapier"
- M2A3 Bradley = "Sabre"
- M1A2 Abrams = "Claymore"
- Rooikat 120 = "Gladius"
- M142 HIMARS = "Halberd"
- M109 Paladin = "Glaive"
- Mk6 Mortar Team = "Hammer"
- 105mm Howitzer = “Mailman”
- MK.V SOC = "Poseidon"
- Speedboat Minigun = "Neptune"
- RHIB = "Trident"
Available Assets:
- Rooikat 120
- UGV
- M2
- M134
- 105mm Howitzer
- RHIBs
- A-10 Warthog
- A-29 Super Tucano
- UH-60 Blackhawk
- MH-47 Chinook
- UH-47 Chinook