Opord
Situation
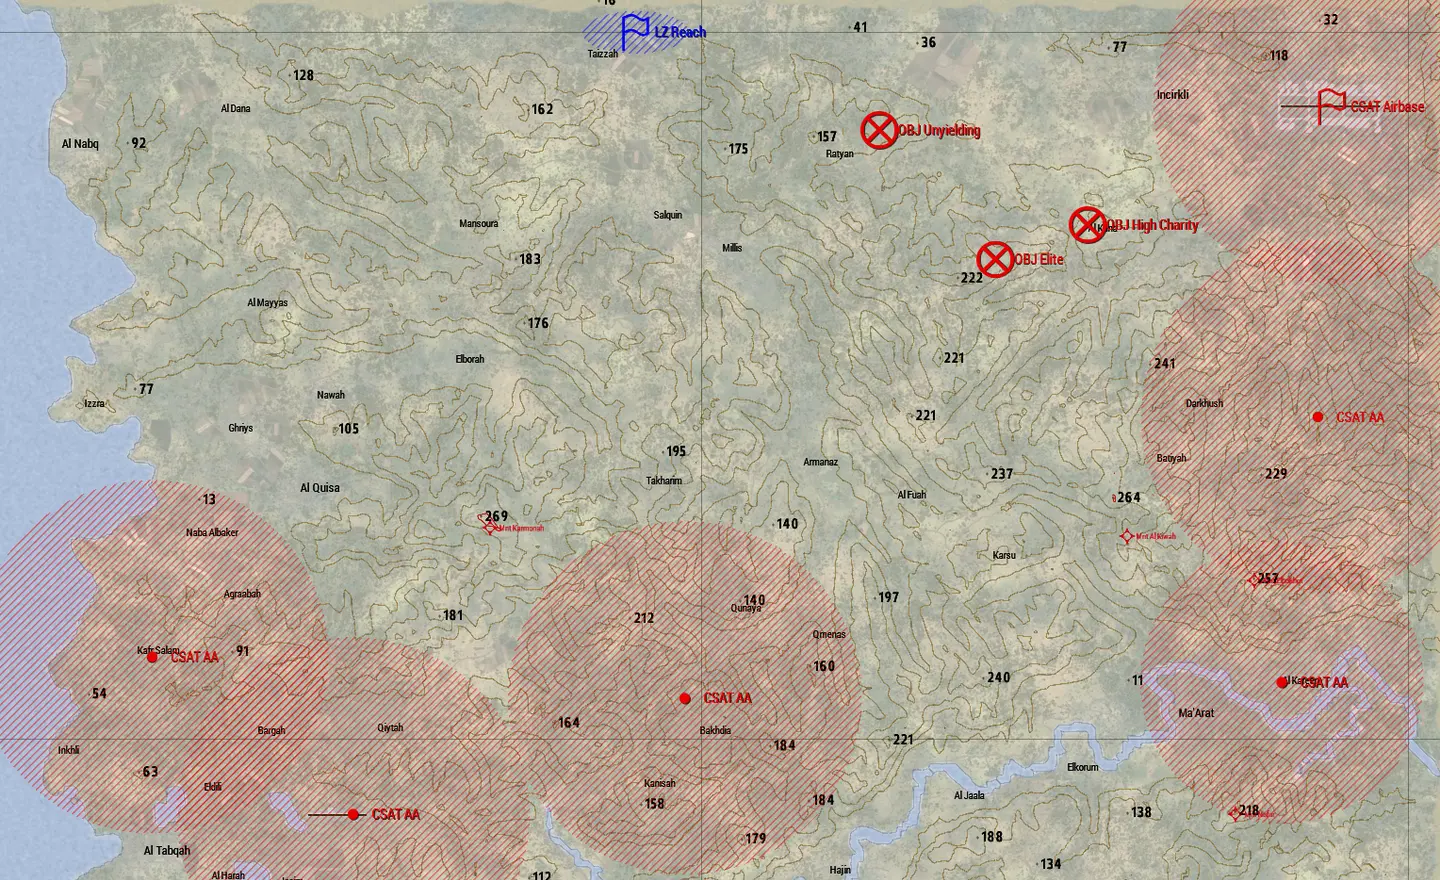
Welcome back Rangers. After successfully pushing CSAT forces back away from the southern coast, and capturing another one of their main airfields, CSAT has been forced back on the defensive. Additionally, we have intel stating that CSAT is currently relocating their long-range AA emplacements, leaving only some short-range AA instillations still active. This has caused a hole to form in CSAT's air defense network, one which we're going to be using to assault some key positions to cut off CSAT's last main airfield from the front lines. If we can pull this off, CSAT will lose almost all control they have over the front lines, allowing our Marine friends to start pushing more inland.
Area of Operation (AO):
Al Rayak
Forces in Play:
OPFOR:
- CSAT 82nd Mixed Brigade
BLUFOR:
- 17th Ranger Battalion
- US Marine Corp 11th MEU
Civilian Consideration:
- Civilians may be present within the AO.
Engagement Criteria:
N/A
Mission:
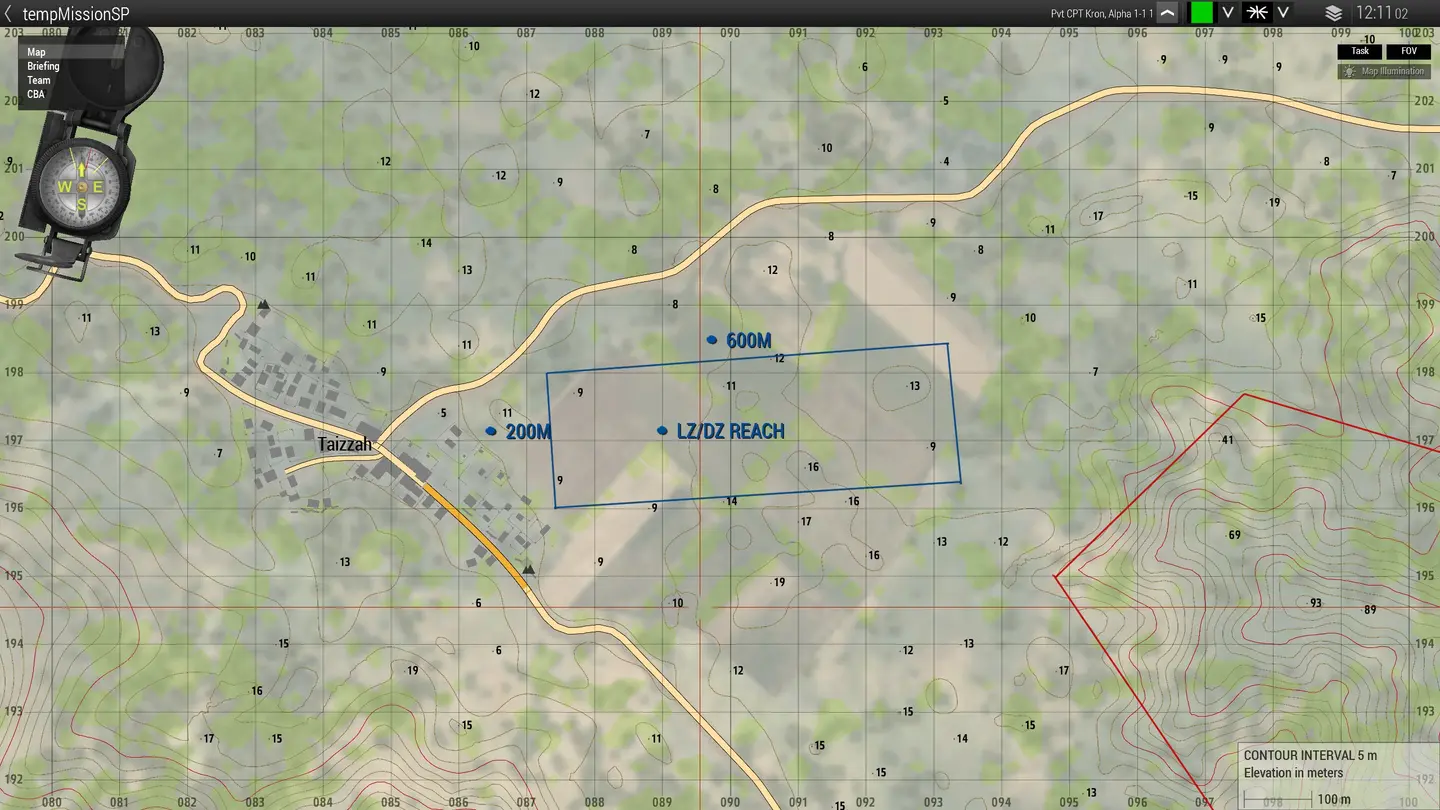
Deploy via paradrop into the AO and secure the 3 OBJs.
Execution:
N/A
Objectives:
-
Alpha
- Paradrop into the AO and assault/secure the 3 OBJs.
Echo- Paradrop Alpha into the AO via the use of Echo air assets
- Provide any additional logistics/combat support for Alpha.
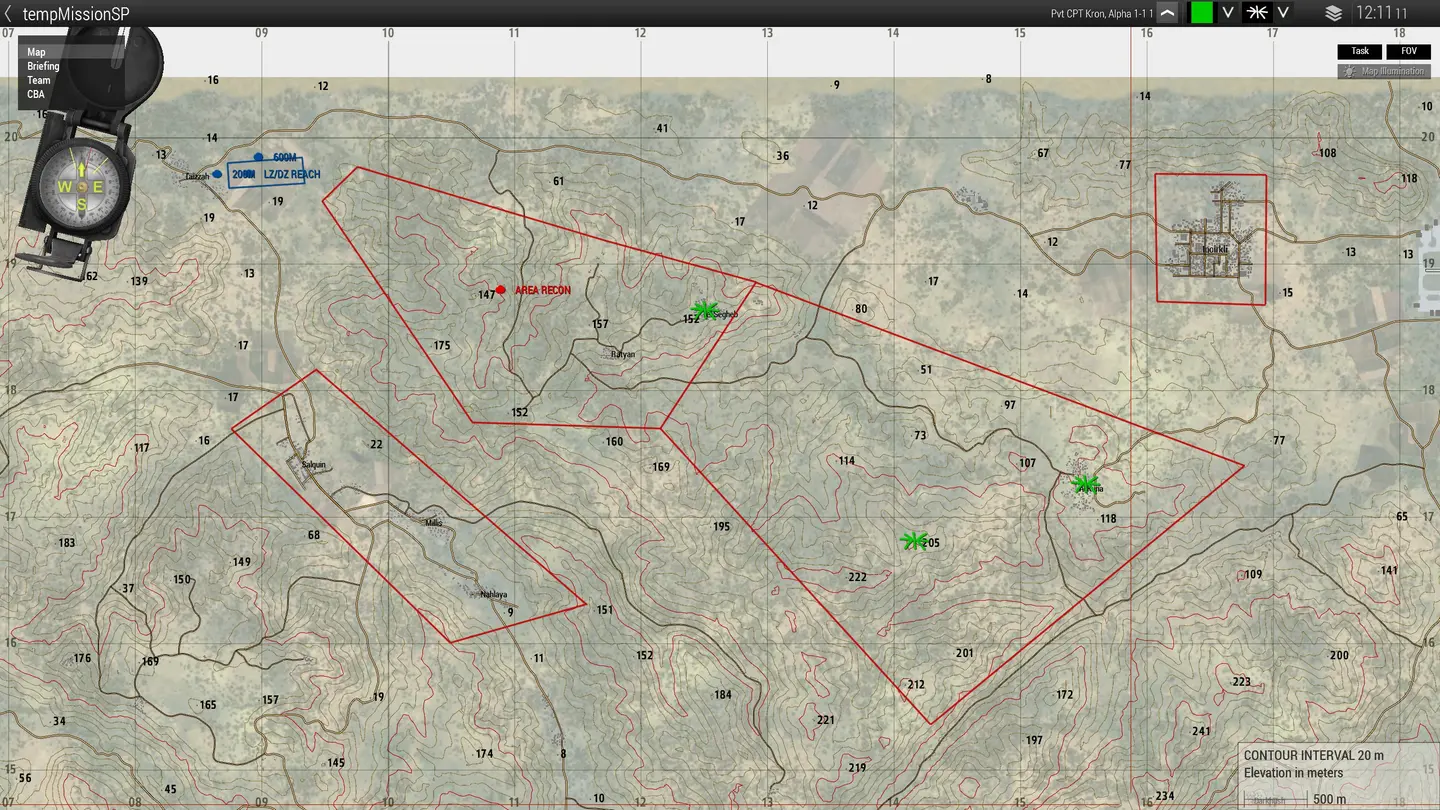
RRC- Provide reconnaissance of the LZ and 3 OBJs before the arrival of the battalion.
- Provide any additional reconnaissance/assistance for Alpha.
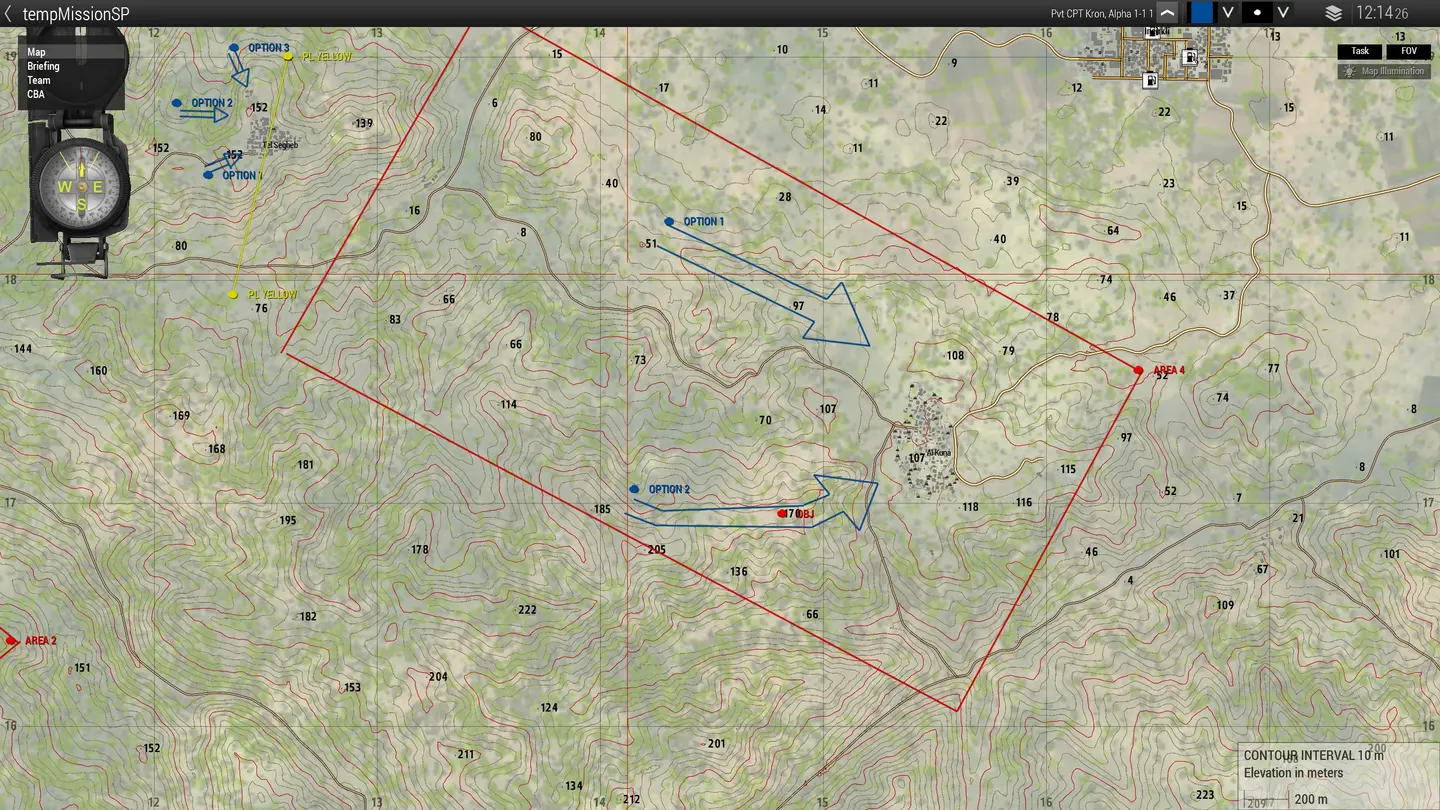
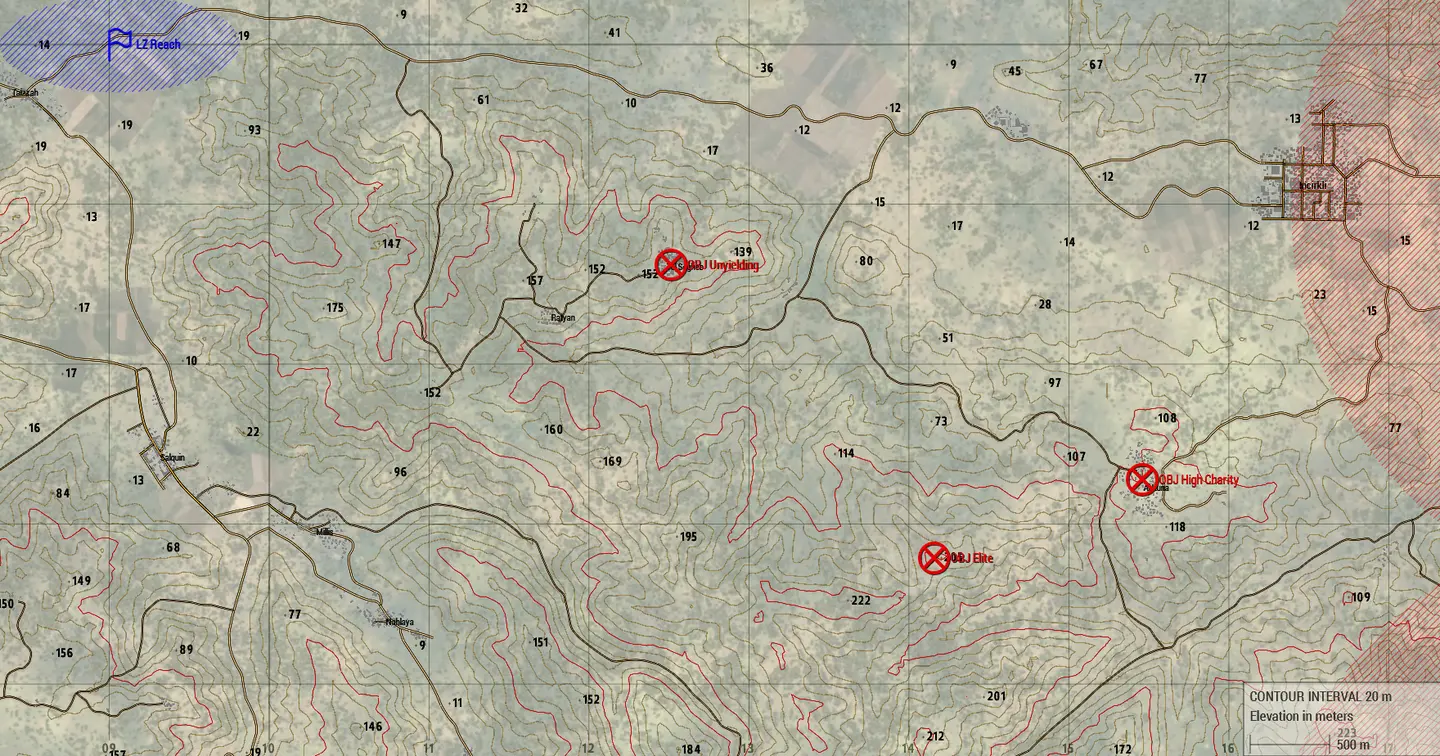
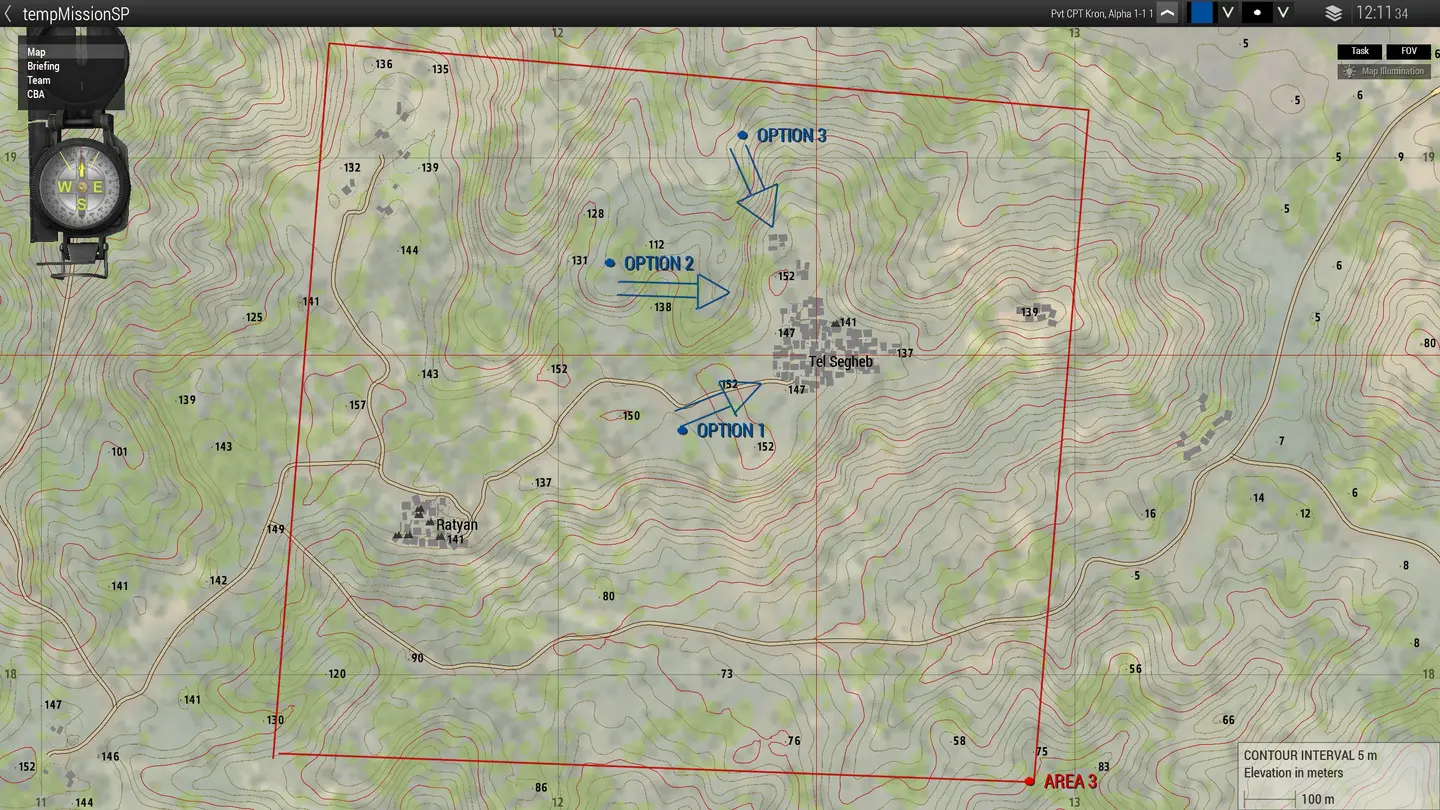
- OBJ Unyielding - A small town occupied by enemy security forces; potentially QRF for the region
- OBJ Elite - A CSAT Radar station that governs AA in the area
- OBJ High Charity - A supply depot for CSAT Armor and Mechanized troops
CONOP:
-
Phase 0:
-
Phase I: Brief
-
Phase II: Prep
-
Phase III:
-
Phase IV:
-
Phase V:
-
Phase VI: RP/AAR
-
All units prepare for debrief.
-
Imagery:
Timeline (in CST)
Command and Signal
Long Range Frequencies:
- Command 45
- RTO 45, 35
- Alpha Lead 40
- Flight Lead 45, 30
- Pilots 30, 35
- Echo Lead 45,80
- RRC 69
- Convoy 50
Nonverbal Coordination:
- Green: This is used to mark friendly positions on the field.
- Blue: Marking suitable locations for Landing Zones.
- Red: This is used for marking enemy positions for all units to reference.
- Yellow: This is used to inform friendly forces that Immediate medical support is needed.
- Purple: This color represents a friendly position with enemy units danger close, Anyone outside of 100 meters away from the smoke should be assumed hostile.
- Orange: This tells anyone in the air that a friendly unit is in desperate need of resupply.
Call signs for Supports:
- MH-6M Transport = "Apollo"
- AH-6M Attack = "Artemis"
- OH-6M Scout = "Icarus"
- CH-47F Chinook = "Achilles"
- MH-60M (DAP) = "Hades"
- UH-60M Transport = "Griffin"
- UH-60M Medical = “Dustoff"
- Blackfish (support) = "Pegasus"
- Blackfish (attack) = "Chimera"
- AH-64D Apache = "Orion"
- A-10 Warthog = "Ares"
- A-29 Super Tucano = “Odyssey"
- C-17 Globemaster III = "Titan"
- C-130J Super Hercules = "Hercules"
- F/A - 181 = “Xerxes”
- AH-1Z Viper = "Athena"
- UH-1Y Venom = “Homer"
- CH-53E Super Stallion = "Atlas"
Ground
- M1165A1 Humvee = "Dagger"
- M1117 ASV = "Tanto"
- M1132 Stryker = "Katana"
- Badger IFV = "Rapier"
- M2A3 Bradley = "Sabre"
- M1A2 Abrams = "Claymore"
- Rooikat 120 = "Gladius"
- M142 HIMARS = "Halberd"
- M109 Paladin = "Glaive"
- Mk6 Mortar Team = "Hammer"
- 105mm Howitzer = “Mailman”
- MK.V SOC = "Poseidon"
- Speedboat Minigun = "Neptune"
- RHIB = "Trident
Available Assets:
N/A
RRC COA
Phase 1: Tiger will insert into DZ Marlins, Tiger 1 will insert into DZ Astros.
Tiger- Recon and mark DZ Breach. Create final readings for Echo Air and provide the update NLT 3km from the DZ
Tiger 1- Begin recon of Area 1 with focus on a SE approach to the OBJ and the ridge lines. Enemy Groups 4 or less can be ambushed to provide Alpha freedom of maneuver.
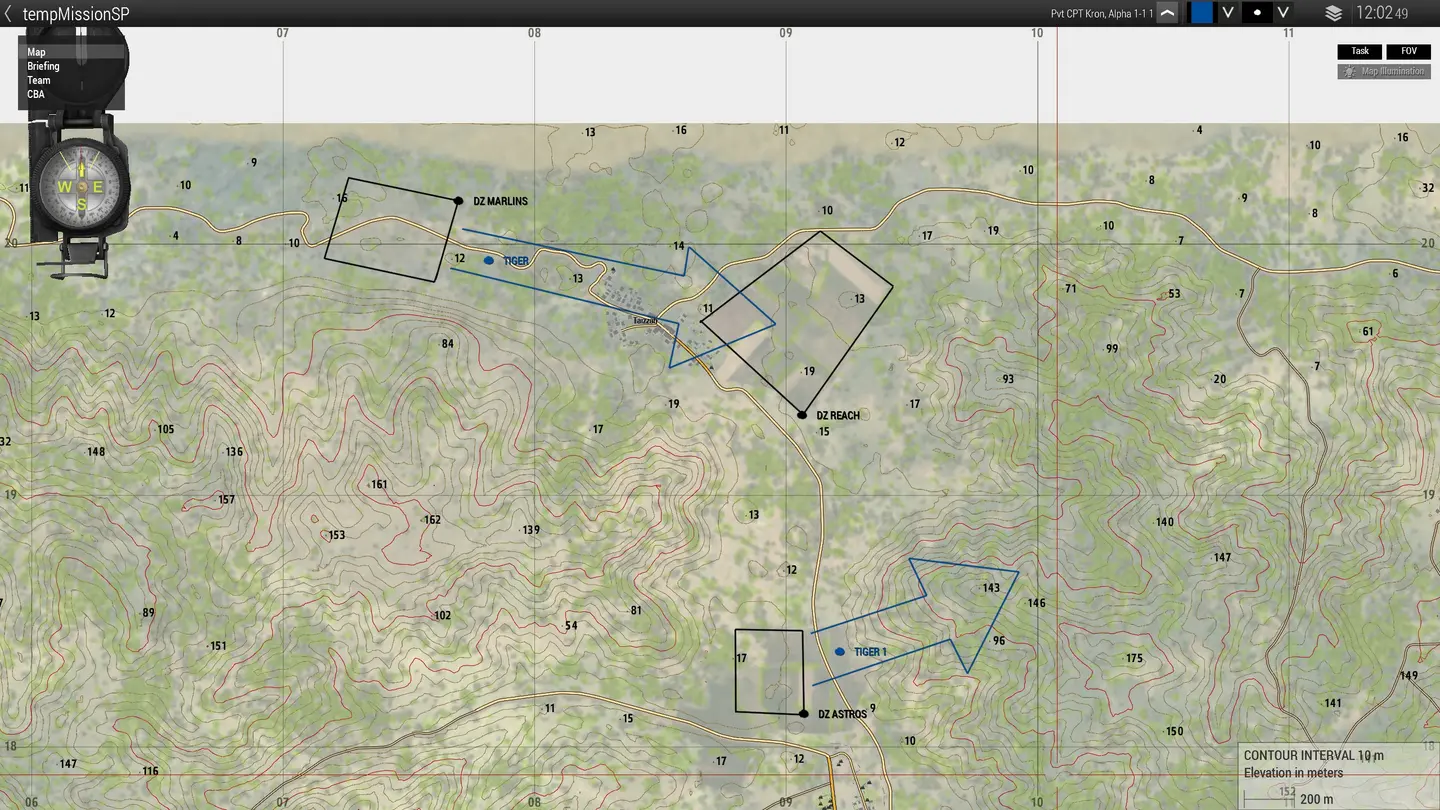
Tiger- After Alpha begins movement Tiger will establish a DZ for resupply near the objective.
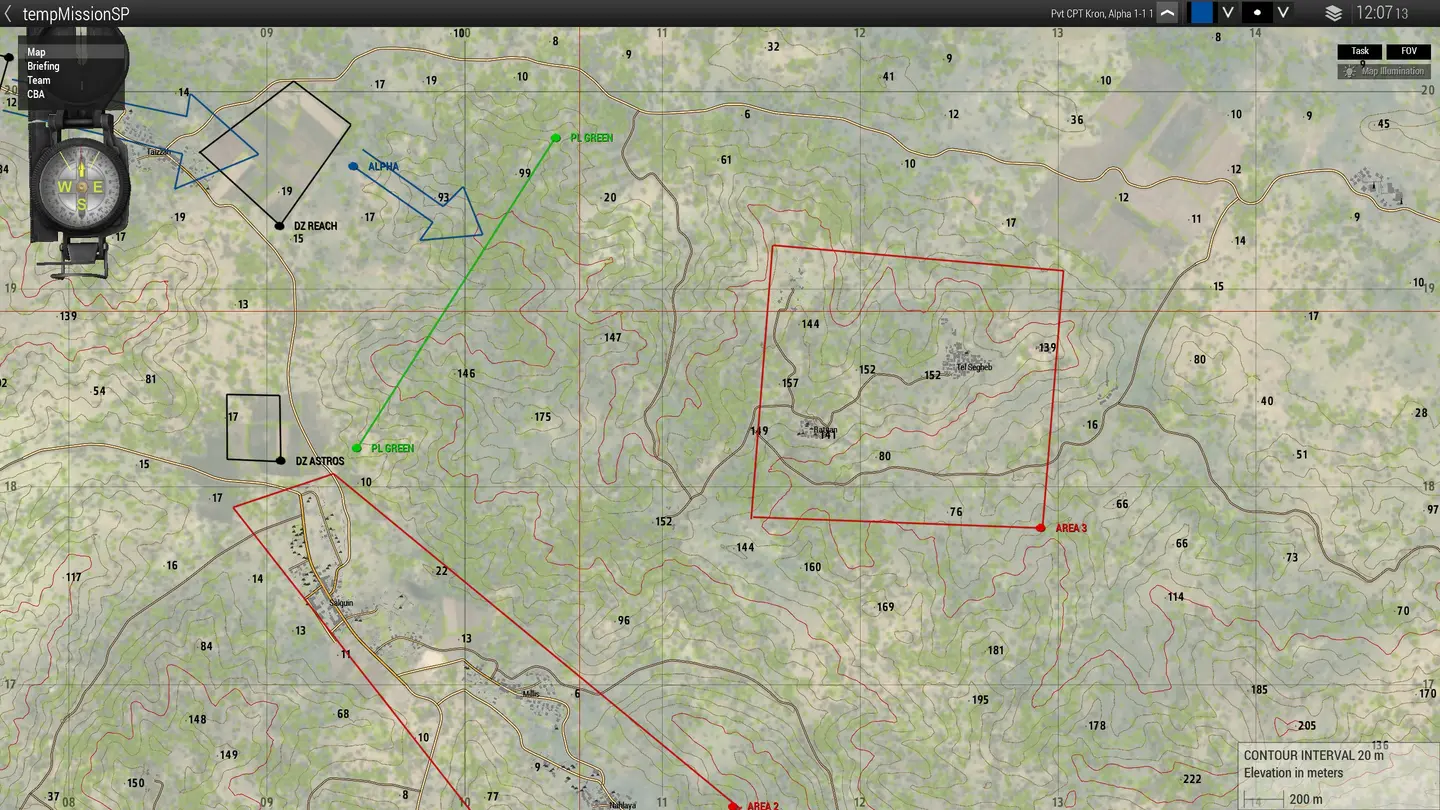
Tiger- Follow and provide options for JIP and Resupply to free up RTO's