
Opord
Situation
Date : 3 FEB 2024
ToD : 1800
Weather : Clear
Area of Operation (AO):
North-Eastern Gulfcoast Region; “Corel Island”
Forces in Play:
Opfor:
- Mariterran Liberation Front (MLF)
Most Likely Course of Action : MLF is cornered and has no choice but to play out a defensive battle, unable to retreat.
Most Deadly Course of Action : MLF is luring friendly forces into a trap of some kind, and will trigger it once friendly forces are all in position.
Blufor:
- 17th Ranger Battalion
- U.S. 3rd Brigade Combat Team, 25th Infantry Division*
- Carrier Strike Group 6
- Mariterran Union (MU)
Greenfor:
- n/a
Engagement Criteria:
- Civilians are still present in major urban areas
- Preserve as much civilian infrastructure as possible
Mission:
Execution:
Hammer and Anvil, gentlemen. We’ve backed a large portion of the MLF into a corner on Corel Island, now it’s time to bring the hammer down. 3rd BCT and The Kaiyo Maru are sponsoring one hell of a fireworks show for our big entrance. After that we’ll launch a two-phase assault on the island, details below. MLF military and political leaders are confirmed to be present in the area as well, capturing them alive is a top priority. We also have good intel that the MLF will be deploying another radio jammer, so communication interruptions are expected. As always, keep an eye out for any intel in the field.
Objectives:
- OBJ Aragon : Seize the airstrip at Corel Airbase
- OBJ Seymour : Control Corel Port
- OBJ Cleves : Secure the southern gate to the Corel Airbase
- OBJ Boleyn : Seize the island’s castle and clear out the caverns
- OBJ Howard : Neutralize the jammer
- OBJ Parr : Seize city hall and capture the MLF leader, Colonel Arin Wakuu, alive
- Destroy all MLF jammers
- Secure Corel Port/Airfield/Southern Gate
- Assault Corel Castle and Industrial Zone - Destroying any remaining jammers
- Assault Corel Springs and capture Colonel Arin Wakuu - ALIVE
- Insert Rangers via MK V SOC boats
- Provide resupply and JIP service
- Provide ground assistance via Badger plus CAS once air corridor is open
- Insert prior to operation via SDV to neutralize jammers within OBJ Howard
- Seek and destroy remaining jammers
- Provide forward reconnaissance for Battalion maneuvers
CONOP:
-
Phase 0: Connect to Operations Server
- Server will be going live earlier than normal to allow RRC to step off early and for Echo to organize vehicles. Everyone else will load in 15 minutes prior UNLESS told otherwise
-
Phase I: Brief
- Mission Maker/BCO will open up with a general briefing, followed by Alpha, Echo, and RRC with their overall movements
-
Phase II: Prep
- Conduct final preparation and last second planning. Make adjustments to the primary assault plan based on info from RRC. Rangers will then board their vehicles of the convoy and move towards the contested North Eastern region
-
Phase III: OBJ Seymour/Aragon/Cleves
- The Port, Airbase, and Southern Gate all need to be taken to establish a foothold on the island. All three of these objectives can be able to be hit within one movement from North to South - Communications will most likely be down
-
Phase IV: OBJ Boleyn/OBJ Howard
- Both objectives are too small to fit the entire battalion so this phase will be split in half. Hoping to have both objectives hit simultaneously, communications should be back online once these two are cleared
-
Phase V: OBJ Parr
- The large city of Corel Springs contains Colonel Arin Wakuu whom we need to capture ALIVE - Most of this city needs to be cleared out to prepare for a safe extraction, which will be held on the North end of the city
-
Phase VI: RP/AAR
-
All units prepare for debrief.
-
- Radio Jammer confirmed present in the AO. Exact area of effect unknown.
- Extreme resistance is to be expected.
- We have no distinct information about enemy troop composition, but this will be everything that remains of their forces in the North-East region, so armor/mechanized is expected.
Imagery:
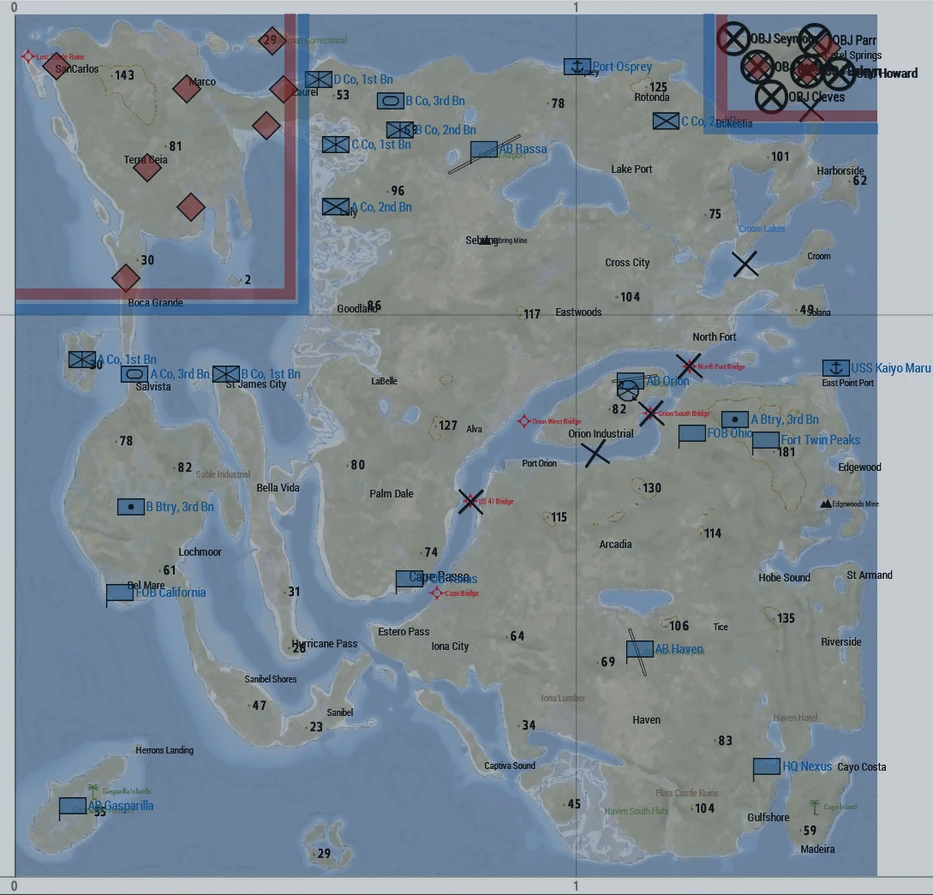
Mariterran Conflict AO
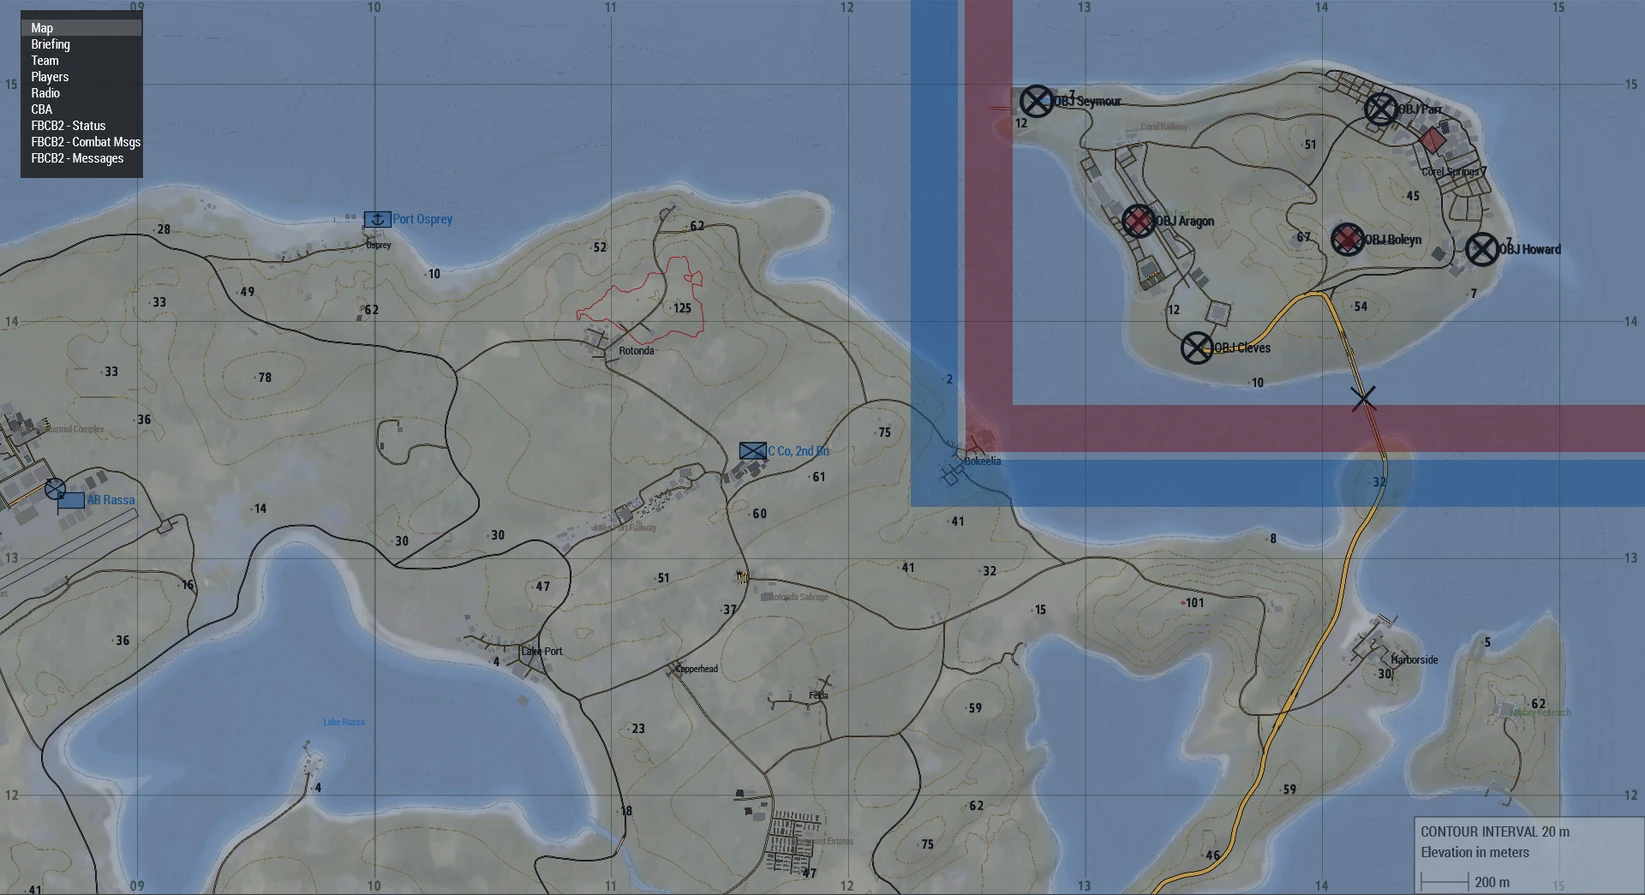
Main AO with Osprey and Rassa as main bases

Objective locations
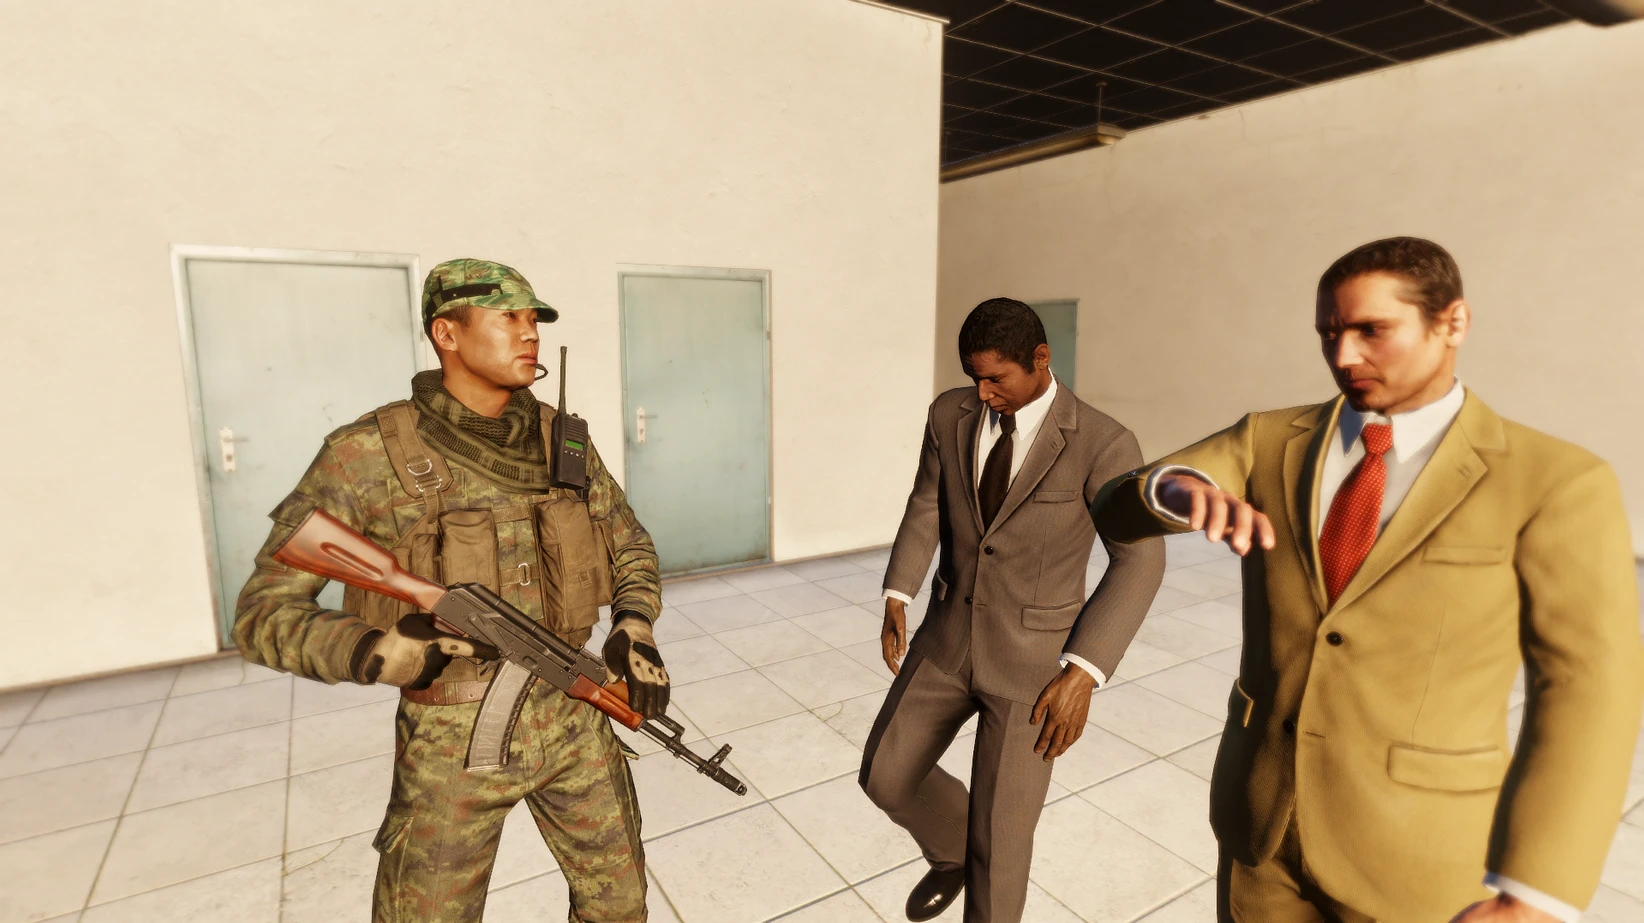
Older photograph of Colonel Arin Wakuu on the left with government officials
Timeline (in CST)
Command and Signal
Long Range Frequencies:
- Command 45
- RTO 45, 35
- Alpha Lead 40
- Flight Lead 45, 30
- Pilots 30, 35
- Echo Lead 45,80
- RRC 69
- Convoy 50
Nonverbal Coordination:
- Green: This is used to mark friendly positions on the field.
- Blue: Marking suitable locations for Landing Zones.
- Red: This is used for marking enemy positions for all units to reference.
- Yellow: This is used to inform friendly forces that Immediate medical support is needed.
- Purple: This color represents a friendly position with enemy units danger close, Anyone outside of 100 meters away from the smoke should be assumed hostile.
- Orange: This tells anyone in the air that a friendly unit is in desperate need of resupply.
Call signs for Supports:
- MH-6M Transport = "Apollo"
- AH-6M Attack = "Artemis"
- OH-6M Scout = "Icarus"
- CH-47F Chinook = "Achilles"
- MH-60M (DAP) = "Hades"
- UH-60M Transport = "Griffin"
- UH-60M Medical = “Dustoff"
- Blackfish (support) = "Pegasus"
- Blackfish (attack) = "Chimera"
- AH-64D Apache = "Orion"
- A-10 Warthog = "Ares"
- A-29 Super Tucano = “Odyssey"
- C-17 Globemaster III = "Titan"
- C-130J Super Hercules = "Hercules"
- F/A - 181 = “Xerxes”
- AH-1Z Viper = "Athena"
- UH-1Y Venom = “Homer"
- CH-53E Super Stallion = "Atlas"
- M1165A1 Humvee = "Dagger"
- M1117 ASV = "Tanto"
- M1132 Stryker = "Katana"
- Badger IFV = "Rapier"
- M2A3 Bradley = "Sabre"
- M1A2 Abrams = "Claymore"
- Rooikat 120 = "Gladius"
- M142 HIMARS = "Halberd"
- M109 Paladin = "Glaive"
- Mk6 Mortar Team = "Hammer"
- 105mm Howitzer = “Mailman”
- MK.V SOC = "Poseidon"
- Speedboat Minigun = "Neptune"
- RHIB = "Trident"
Available Assets:
- 4x Badger IFVs
- 6x SOCOM M1165A1 GMV Humvees
- 4x MRZR 4
- Destroyer USS Kaiyo Maru and 2x submarine escort
- 6x Speedboat Miniguns
- 2x Mk.V SOC
- 6x MH-6 Little Birds
- 5x UH-60 Blackhawks
- 4x CH-47F Chinook
- 2x MH-60M Dap
- 2x AH-6 Little Birds
- 2x MQ-9 Reapers